Contents
Содержание:
- Prerequisites
- Step 3 – Using Webmin
- Step 2 — Installing Virtualmin
- Угроза вирусов
- Schritt 3 – Verwenden von Webmin
- Install Webmin on Ubuntu 18.04 & Ubuntu 16.04 From Webmin Repository
- Step 3 – Using Webmin
- Access Webmin Interface
- Решение наиболее часто возникающих проблем
- Страницы сайта отображаются в неверной кодировке
- Файл, загружаемый через форму, некорректно принимается (только для apache 1.3)
- При попытке выполнения файлов скриптов (*.php, *.pl, …) на сервере, выдается ошибка 500
- Использование PHP версии 4/5 по-умолчанию для обработки php-файлов
- Файл есть на диске, но ссылка на него выдает, что «Файл не найден»
- Step 2 — Adding a Valid Certificate with Let’s Encrypt
Prerequisites
To complete this tutorial, you will need:
- One new Ubuntu 16.04 server with at least 1GB of RAM set up by following the Ubuntu 16.04 initial server setup guide, including a sudo non-root user and a firewall.
- A Fully-Qualified Domain Name configured to point to your server. You can learn how to point domain names to DigitalOcean Droplets by following the How To Set Up a Host Name with DigitalOcean tutorial.
- Two registered custom nameservers for Virtualmin by following the How To Create Vanity or Branded Nameservers with DigitalOcean Cloud Servers tutorial. Register and , where is your domain name.
Step 3 – Using Webmin
Webmin has modules that can control everything from the BIND DNS Server to something as simple as adding users to the system. Let’s look at how to create a new user, and then explore how to update software packages using Webmin.
In order to log in to Webmin, navigate to and sign in with either the root user or a user with sudo privileges.
Managing Users and Groups
Let’s manage the users and groups on the server.
First, click the System tab, and then click the Users and Groups button. From here you can either add a user, manage a user, or add or manage a group.
Let’s create a new user called deploy which could be used for hosting web applications. To add a user, click Create a new user, which is located at the top of the users table. This displays the Create User screen, where you can supply the username, password, groups and other options. Follow these instructions to create the user:
- Fill in Username with .
- Select Automatic for User ID.
- Fill in Real Name with a descriptive name like .
- For Home Directory, select Automatic.
- For Shell, select /bin/bash from the dropdown list.
- For Password, select Normal Password and type in a password of your choice.
- For Primary Group, select New group with same name as user.
- For Secondary Group, select sudo from the All groups list, and press the -> button to add the group to the in groups list.
- Press Create to create this new user.
When creating a user, you can set options for password expiry, the user’s shell, or whether they are allowed a home directory.
Next, let’s look at how to install updates to our system.
Updating Packages
Webmin lets you update all of your packages through its user interface. To update all of your packages,, click the Dashboard link, and then locate the Package updates field. If there are updates available, you’ll see a link that states the number of available updates, as shown in the following figure:

Click this link, and then press Update selected packages to start the update. You may be asked to reboot the server, which you can also do through the Webmin interface.
Step 2 — Installing Virtualmin
To install Virtualmin, download and run the official Virtualmin installation script, which will install Virtualmin, and Webmin, along with a LAMP stack, BIND, and Postfix.
Use to download the script:
While this script comes from the official Virtualmin website, you may want to open the script in your editor and review the contents before running it.
Once you’re comfortable with the contents of the script, use it to install Virtualmin and its prerequisites:
The script will display a warning message about existing data and compatible operating systems. Press to confirm that you want to continue the installation.
The script will take some time to complete all the steps as it installs various software packages and components.
Once the script completes, you can configure the root password.
Угроза вирусов
В последнее время значительно усугубилась ситуация с активностью вирусов, заражающих сайты. Мы настоятельно рекомендуем прочитать информацию в этом разделе и учесть её при работе с Вашим сайтом.
Как определить, что сайт заражен вирусом
Сайт скорее всего заражен вирусом, если:
- при просмотре страниц сайта на компьютере с установленным антивирусным програмным обеспечением выдаются предупреждения о наличии вируса на страницах сайта
- при открытии вашего сайта открываются страницы, не принадлежащие вашему сайту, например посторонняя реклама
- работоспособность вашего сайта нарушилась без видимых причин
- в журнале ftp-сервера присутствуют подключения с неизвестных вам IP-адресов
Каким образом сайт может оказаться инфицированым
Заражение вирусом как правило происходит по следующей схеме: первоначально вирус попадает на компьютер, с которого производится подключение к Вашему сайту по протоколу FTP, например при посещении уже зараженного сайта (если на этом компьютере отсутствовало антивирусное ПО), затем при следующем подключении к вашему сайту по FTP вирус перехватывает ваши реквизиты доступа к сайту и отправляет их в автоматизированную систему управления бот-сетью злоумышленников. Используя ваши реквизиты доступа, компьютеры, находящиеся под управлением злоумышленников автоматически подключаются к вашему сайту и вносят изменения в код вашего сайта таким образом, как это требуется злоумышленникам, например размещают ссылки на вредоносный код или перенаправление на другой ресурс. После этого посетители вашего сайта могут заразиться этим вирусом при последующем посещении, таким образом происходит распространение вируса.
Что делать, если сайт заражен вирусом
Прежде всего необходимо поменять пароль для доступа к сайту. Сделать это можно через страницу персональной статистики (см. раздел Персональная статистика, Реквизиты доступа).
После этого, во избежание повторения подобной ситуации, необходимо ограничить список сетей, с которых возможен доступ к сайту по протоколу FTP , либо отказаться от использования протокола FTP в пользу .
Затем необходимо восстановить содержимое вашего сайта либо самостоятельно, если у вас есть резервная копия, либо обратившись к нам в отдел хостинга. Мы храним еженедельные резервные копии за последний месяц.
Также мы настоятельно рекомендуем проверить на вирусы все компьютеры, с которых производится подключение к вашему сайту по и установить на них антивирусное програмное обеспечение.
Schritt 3 – Verwenden von Webmin
Nun haben Sie eine gesicherte Arbeitsinstanz von Webmin eingerichtet. Nun sehen wir uns an, wie wir diese verwenden können.
Webmin verfügt über viele verschiedene Module, die alles vom BIND-DNS-Server bis zum Hinzufügen von Benutzern zum System kontrollieren können. Sehen wir uns an, wie man einen neuen Benutzer einrichtet, und erörtern wir anschließend, wie Sie die Pakete Ihres Systems mit Webmin aktualisieren.
Verwalten von Benutzern und Gruppen
Wir behandeln nun, wie Sie die Benutzer und Gruppen auf Ihrem Server verwalten.
Klicken Sie zunächst auf das Auswahlmenü von System in der linken Seitenleiste und anschließend auf den Link für Users and Groups. Hier können Sie Benutzer und Gruppen hinzufügen und verwalten.
Wir erstellen einen neuen Benutzer namens deploy, den Sie zum Hosten von Webanwendungen verwenden können. Wenn Sie einen Benutzer anlegen, können Sie Optionen für den Ablauf des Passworts und die Shell des Benutzers festlegen sowie bestimmen, ob ein Stammverzeichnis für ihn zugelassen wird.
Um einen Benutzer hinzuzufügen, klicken Sie auf Create a new user im oberen Bereich der Benutzertabelle. Dadurch wird der Bildschirm Create User angezeigt, auf dem Sie den Benutzernamen, das Passwort, Gruppen und andere Optionen festlegen können. Folgen Sie diesen Anweisungen zur Erstellung des Benutzers:
- Geben Sie bei Username als Benutzernamen ein.
- Wählen Sie Automatic für User ID.
- Geben Sie bei Real Name einen beschreibenden Namen wie ein.
- Für Home Directory wählen Sie Automatic.
- Für Shell wählen Sie /bin/bash aus der Auswahlliste.
- Für Password wählen Sie Normal Password und geben ein Passwort Ihrer Wahl ein.
- Gehen Sie weiter nach unten zu Primary Group und wählen Sie New group with same name as user aus.
- Für Secondary Group wählen Sie sudo aus der Liste All groups. Das sollte automatisch der Liste In groups hinzugefügt werden. Falls nicht, klicken Sie zum Hinzufügen auf die Schaltfläche ->.
Nachdem die Auswahl vorgenommen wurde, klicken Sie auf Create. Dadurch wird der Benutzer deploy in kurzer Zeit erstellt.
Als Nächstes sehen wir uns an, wie wir Aktualisierungen auf dem System installieren.
Aktualisieren von Paketen
Mit Webmin können Sie alle Pakete über die Benutzeroberfläche aktualisieren. Um alle Pakete zu aktualisieren, klicken Sie zunächst auf die Schaltfläche Dashboard über der linken Seitenleiste und suchen dann das Feld Package updates. Wenn Aktualisierungen verfügbar sind, sehen Sie einen Link, der die Anzahl der verfügbaren Aktualisierungen angibt.
Klicken Sie auf diesen Link und anschließend auf Update selected packages um die Aktualisierung zu starten. Möglicherweise werden Sie aufgefordert, den Server neu zu starten. Auch das können Sie über die Benutzeroberfläche von Webmin erledigen.
Install Webmin on Ubuntu 18.04 & Ubuntu 16.04 From Webmin Repository
Webmin has been around since 1997. At the time of this writing, the latest stable version available is 1.941, which was released on January 16, 2020. Webmin isn’t in Ubuntu software repository. It’s recommended to install Webmin from its official repository so that you can always get the latest version.
To add Webmin repository, create a source list file with a command-line text editor such as nano.
sudo nano /etc/apt/sources.list.d/webmin.list
Add the following line in the file.
deb http://download.webmin.com/download/repository sarge contrib

Save and close the file. To save the file in nano text editor, press , then press to confirm. To close the file, press . Next, we need to run the following command to download and import Webmin PGP signing key to APT keyring so that the APT package manager can verify the integrity of packages downloaded from Webmin repository.
wget http://www.webmin.com/jcameron-key.asc
Then import it with:
sudo apt-key add jcameron-key.asc
Now we can update local package index and install Webmin.
sudo apt update

sudo apt install webmin
Once installed, the Wemin built-in web server will automatically start as can be seen by running the systemctl command below:
systemctl status webmin
Output:
● webmin.service - LSB: web-based administration interface for Unix systems
   Loaded: loaded (/etc/init.d/webmin; generated)
   Active: active (running) since Sun 2020-02-23 16:34:02 HKT; 37s ago
     Docs: man:systemd-sysv-generator(8)
    Tasks: 1 (limit: 4915)
   CGroup: /system.slice/webmin.service
           └─25792 /usr/bin/perl /usr/share/webmin/miniserv.pl /etc/webmin/miniserv.conf
Webmin server listens on port 10000. Now you can access the web-based control panel via
https://your-server-ip:10000
Because it’s running in HTTPS mode and using a self-signed TLS certificate, so you will be told by the browser that the connection is not secure.

But you know this is your own server, so simply click the tab in Firefox and add exception. If you are using Google Chrome, you can click -> .
And now you will be presented with Webmin login screen. You can use root or any other user accounts in the sudo group on your Ubuntu 18.04 & Ubuntu 16.04 system to login.

If you don’t like the default brown color on the navigation menu, you can change it to a different color by clicking the cog icon on the bottom of the navigation menu, then select navigation menu options and set the color palette. For example, I selected Midnight blue.

Save the change.
Step 3 – Using Webmin
You’ve now set up a secured working instance of Webmin. Let’s look at how to use it.
Webmin has many different modules that can control everything from the BIND DNS Server to something as simple as adding users to the system. Let’s look at how to create a new user, and then explore how to update the operating system using Webmin.
Managing Users and Groups
Let’s explore how to manage the users and groups on your server.
First, click the System tab, and then click the Users and Groups button. Then, from here, you can either add a user, manage a user, or add or manage a group.
Let’s create a new user called deploy which can be used for hosting web applications. To add a user, click Create a new user, which is located at the top of the users table. This displays the Create User screen, where you can supply the username, password, groups and other options. Follow these instructions to create the user:
- Fill in Username with .
- Select Automatic for User ID.
- Fill in Real Name with a descriptive name like .
- For Home Directory, select Automatic.
- For Shell, select /bin/bash from the dropdown list.
- For Password, select Normal Password and type in a password of your choice.
- For Primary Group, select New group with same name as user.
- For Secondary Group, select sudo from the All groups list, and press the -> button to add the group to the in groups list.
- Press Create to create this new user.
When creating a user, you can set options for password expiry, the user’s shell, and whether or not they are allowed a home directory.
Next, let’s look at how to install updates to our system.
Updating Packages
Webmin lets you update all of your packages through its user interface. To update all of your packages, first, go to the Dashboard link, and then locate the Package updates field. If there are updates available, you’ll see a link that states the number of available updates, as shown in the following figure:

Click this link, and then press Update selected packages to start the update. You may be asked to reboot the server, which you can also do through the Webmin interface.
Access Webmin Interface
Now open up a browser and visit
https://your-ip-addr-ess:10000
Webmin uses a self-signed certificate for secure communication between you and the system, so, you need to add an SSL exception in your browser to access the Webmin.
Use root or any user who has sudo privileges to run commands as root when the Webmin prompts you for username and password.
Install Webmin on Debian 9 – Webmin Login Page
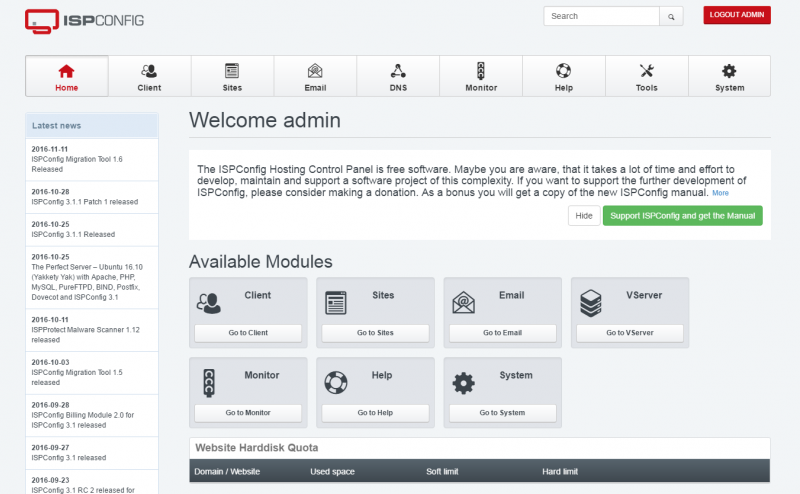
Once you logged in, Webmin may redirect you to its dashboard where you can get basic information about your system.
Install Webmin on Debian 9 – Webmin Dashboard
To manage or configure any service or application, choose the desired one from the left pane.
Install Webmin on Debian 9 – Webmin Left Pane
One important feature of Webmin is web-based ssh terminal. You can initiate the terminal by clicking the below icon or use “Alt+k”
Install Webmin on Debian 9 – Webmin Web SSH Terminal Icon
Web-based SSH terminal:
Install Webmin on Debian 9 – Webmin Web SSH Terminal
That’s All.
Решение наиболее часто возникающих проблем
Страницы сайта отображаются в неверной кодировке
Неверные настройки кодировки сайта. По умолчанию, apache 1.3 отдает документы в кодировке koi8-r.
Изменить это можно либо в настройках сервера, либо в файле (), добавив туда следующую строку:
CharsetSourceEnc windows-1251
При использовании apache 1.3 (к apache 2.2 это неприменимо!) также можно отключить перекодировку передоваемых документов, добавив в файл в томже или вышестоящем пути следующую строку:
CharsetDisable on
Apache 2.2 по-умолчанию просто не указывает используемую кодировку, предоставляя ее определение пользователю или браузеру посетителя.
Файл, загружаемый через форму, некорректно принимается (только для apache 1.3)
Проблема выражается в том, что принятый файл оказывается нечитаемым, и возникает из-за того, что web-сервер автоматически перекодирует данные формы.
Здесь можно предложить два решения:
Отключение модуля mod_charset
Выключить модуль перекодировки полностью, добавив следующую строку в файл :
CharsetDisable On
Также включить кодировку по умолчанию при помощи директивы AddDefaultCharset, например для кодировки Windows-1251:
AddDefaultCharset windows-1251
Если страница отдается скриптом, то дополнительно можно выдавать в заголовках ответа нужную кодировку, например:
Content-type: text/html; charset=utf-8
Отключение перекодировки в формах
Модуль перекодировки при этом можно оставить работающим.
Отключить перекодировку multipart-форм (картинки грузятся именно через этот вид формы) директивой CharsetRecodeMultipartForms в :
CharsetRecodeMultipartForms Off
Если через форму загружается не только бинарный файл (картинка), а еще, к примеру, текстовые данные с кириллицей, то необходимо позаботиться о правильной перекодировке данных, потому что модуль перекодировки для multipart-форм работать не будет.
При попытке выполнения файлов скриптов (*.php, *.pl, …) на сервере, выдается ошибка 500
Наиболее вероятно, что на данных файлах не установлен на выполнение.
На нашем хостинге требуется установка атрибута на выполнение для файлов-скриптов, предназначенных к выполнению. Сделать это можно как через ftp-клиент, установив файлам атрибуты 755, так и командой из командной строки, после подключения к серверу с использованием терминального доступа.
Автоматически это можно также осуществить через административный интерфейс Вашего сайта, в разделе «Проверка совместимости скриптов».
Также не следует забывать, что первая строка скрипта, написанного на интерпретируемом языке (кроме скриптов с расширениями php или php3) должна быть следующего вида:
#!/путь/к/интерпретатору
Например »#!/usr/bin/perl», для использования интерпретатора .
Информация об ошибке доступна в .
Использование PHP версии 4/5 по-умолчанию для обработки php-файлов
Для того, чтобы файлы обрабатывались нужной версии (по умолчанию это php5), можно поменять соответствующую настройку в панели управления сайтом в разделе «Настройки сервера».
Также это можно сделать, создав (если не создан) файл в папке и добавить в него следующие строки:
Для apache 1.3 + php4:
AddHandler application/x-httpd-php .php
Для apache 2.2 + php4:
AddHandler fcgid-script .php
FCGIWrapper /web/php .php
См. также .
Файл есть на диске, но ссылка на него выдает, что «Файл не найден»
Убедитесь, что регистр символов в имени файла и ссылке совпадает — в unix-подобных системах файлы с именами «A.html» и «a.html» будут считаться разными, и могут находится в одной директории, поэтому ссылка »/File.html» не вернет «file.html» и выдаст ошибку. Как временное решение такой проблемы, можно включить автоматическое исправление ошибок в именах файлов в разделе «Настройки сервера» панели управления сайтом, но лучше на него не полагаться, и исправить либо имена файлов, либо ссылки на них.
Также убедитесь что во всех вложеных директориях, начиная с до той, в которой расположен запрашиваемый файл, нет файлов , ограничивающих доступ или содержащих директивы mod_rewrite.
Если есть необходимость использовать данные параметры из PHP-кода, это можно сделать, добавив следующую строку в файл (расположеный в одном пути со скриптом, или выше по иерархии):
RewriteEngine on
RewriteRule . -
И следующий код в начало скрипта (после выполнения которого данные параметры и будут доступны):
if (!empty($_SERVER)) {
  $userpass = explode(":", base64_decode(substr($_SERVER, 6)));
  if (count($userpass) == 2) {
    $_SERVER = $userpass;
    $_SERVER = $userpass;
  }
}
Step 2 — Adding a Valid Certificate with Let’s Encrypt
Webmin is already configured to use HTTPS, but it uses a self-signed, untrusted certificate. Let’s replace it with a valid certificate from Let’s Encrypt.
Navigate to in your web browser, replacing with the domain name you pointed at your server.
Note: When logging in for the first time, you will see an “Invalid SSL” error. This is because the server has generated a self-signed certificate. Allow the exception to continue so you can replace the self-signed certificate with one from Let’s Encrypt.
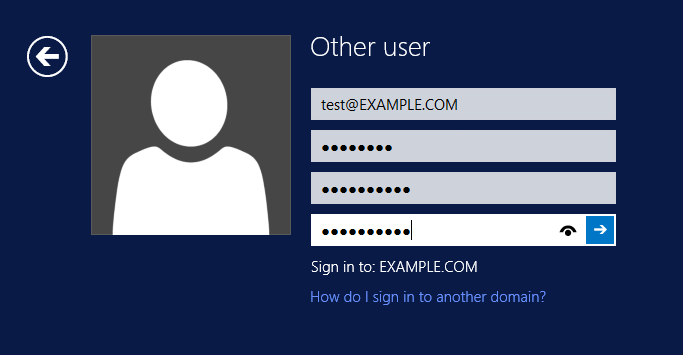
You’ll be presented with a login screen. Sign in with the non-root user you created while fulfilling the prerequisites for this tutorial.
Once you log in, the first screen you will see is the Webmin dashboard. Before you can apply a valid certificate, you have to set the server’s hostname. Look for the System hostname field and lick on the link to the right, as shown in the following figure:

This wil take you to the Hostname and DNS Client page. Locate the Hostname field, and enter your Fully-Qualified Domain Name into the field. Then press the Save button at the bottom of the page to apply the setting.
After you’ve set your hostname, click on Webmin on the left navigation bar, and then click on Webmin Configuration.
Then, select SSL Encryption from the list of icons, and then select the Let’s Encrypt tab. You’ll see a screen like the following figure:
Using this screen, you’ll tell Webmin how to obtain and renew your certificate. Let’s Encrypt certificates expire after 3 months, but we can instruct Webmin to automatically attempt to renew the Let’s Encrypt certificate every month. Let’s Encrypt looks for a verification file on our server, so we’ll configure Webmin to place the verification file inside the folder , which is the folder that the Apache web server you configured in the prerequisites uses. Follow these steps to set up your certificate:
- Fill in Hostnames for certificate with your FQDN.
- For Website root directory for validation file, select the Other Directory button and enter .
- For Months between automatic renewal section, deselect the Only renew manually option by typing into the input box, and selecting the radio button to the left of the input box.
- Click the Request Certificate button. After a few seconds, you will see a confirmation screen.
To use the new certificate, restart Webmin by clicking the back arrow in your browser, and clicking the Restart Webmin button. Wait around 30 seconds, and then reload the page and log in again. Your browser should now indicate that the certificate is valid.