Использование rdp-клиентов в linux
Содержание:
- Step 3: Configure and establish the Ubuntu remote desktop session to Windows
- Troubleshooting an Ubuntu Remote Desktop
- How to Share Your Ubuntu Desktop
- How to use rdesktop
- Удаленный рабочий стол RDP Linux Mint
- KRDC
- 3 Ways to Remote Control Ubuntu
- Remote Desktop to Ubuntu With Commercial Tools
- Зачем нужно подключение к Linux из Windows
- How to Install Remmina Remote Desktop Client
- Подключение к серверу
- Snap
- NoMachine
- Disclaimer
- 100% funded by people like you
- Exact hits
- Remote Access Using Remote Desktop Protocol
Step 3: Configure and establish the Ubuntu remote desktop session to Windows
Once you open the Remmina Remote Desktop Client, you should see something like this:
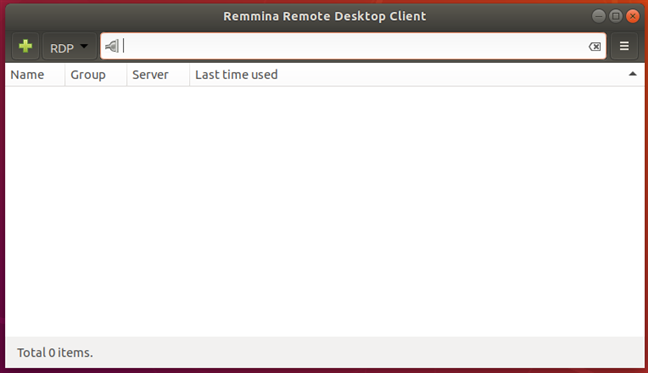
The Remmina Remote Desktop Client
Click the «Create a new connection profile» button.
Its icon is a green plus sign which is easy to spot in the top-left corner of the window.
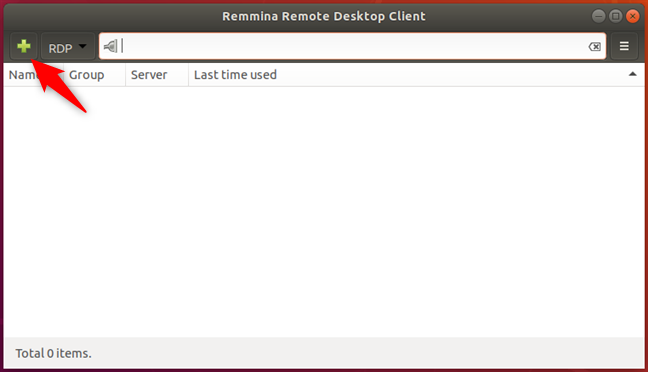
Create a new connection in Remmina Remote Desktop Client
The previous action opens a window called Remote Desktop Preference. Here you can configure the remote desktop Ubuntu to Windows connection that you are going to establish.

The Remote Desktop Preference window
In the Profile section, type the Name that you want to use for the connection. It can be anything you wish. Leave the other settings from the Profile section set to their defaults.
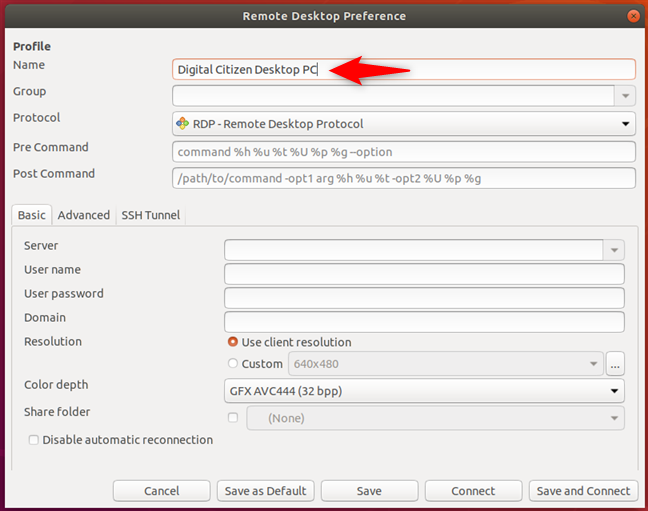
Choosing a name for the remote desktop profile
In the Server field from the Basic tab, type the IP address of the Windows PC to which you will connect. Enter the User name and User password for the user account that you want to use on the remote Windows PC. That user account needs to exist on the Windows PC.
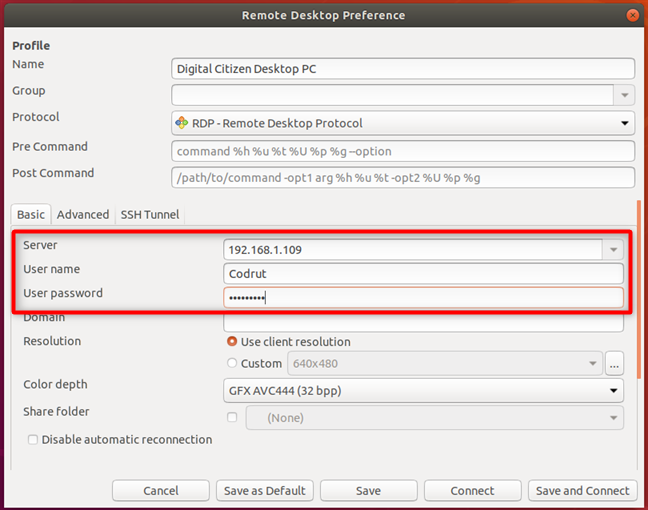
Entering the IP address and the username and password
Next, you can set the Resolution and the Color depth that you want to use for your remote desktop connection. By default, the remote desktop profile is set to use the «Use client resolution» which means that the connection uses the same resolution as the Windows computer to which you connect. The Color depth is also set at the highest quality possible. However, selecting a smaller desktop resolution and color depth can improve the performance of your Linux to Windows remote desktop session. If you experience lag when connected to the remote Windows desktop, try reducing the color depth or resolution.
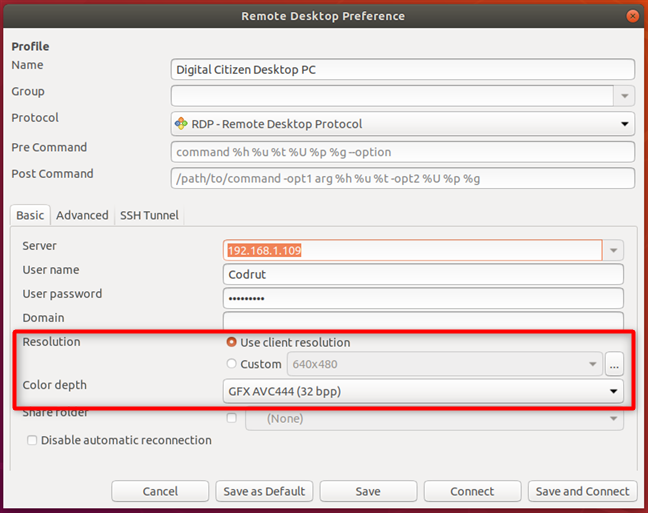
Configuring the resolution and color depth used by the remote desktop profile
If you want to share a folder from your Ubuntu computer with the Windows PC, check the Share folder box and select it.
Also, for more advanced settings, go to the Advanced tab. There you can turn the sound on or off, share printers, disable clipboard synchronization, and so on.
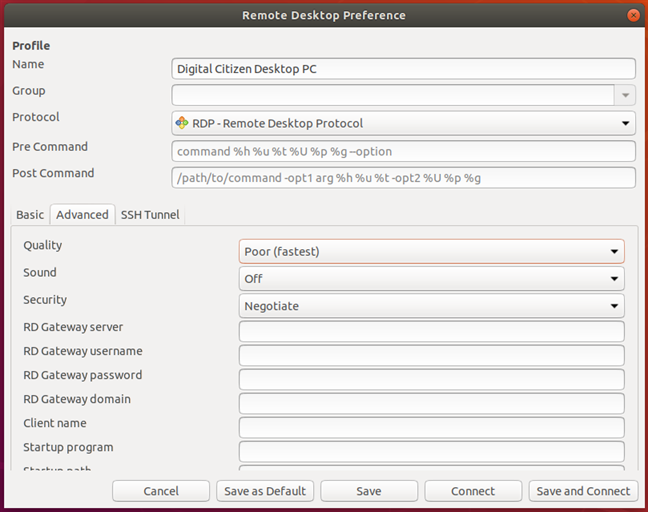
Configuring the advanced settings for the remote desktop connection
Once you finish configuring all the details, click Save and Connect. This saves your connection profile and then initiates an RDP connection to the Windows PC.
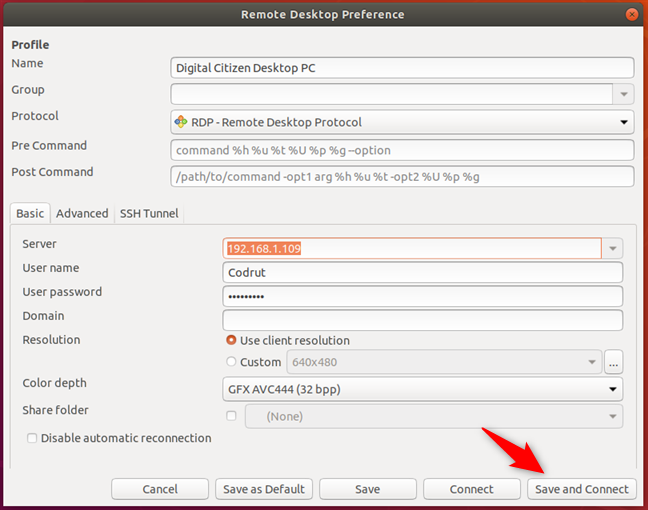
Saving the RDP profile and connecting to the Windows PC
In a matter of seconds, you should have a running remote desktop connection established to your Windows PC.
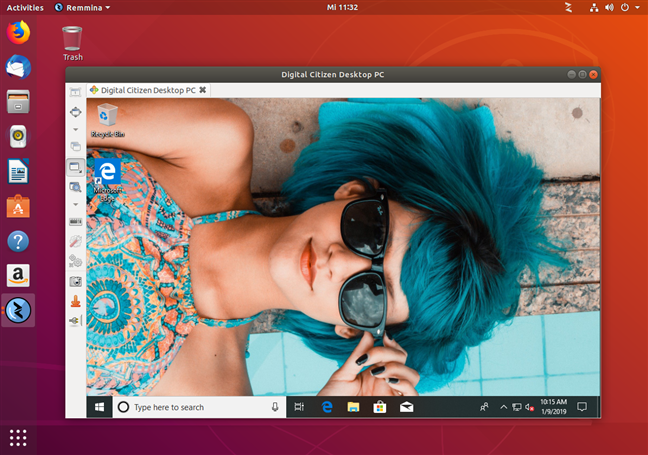
A remote desktop connection established from Ubuntu to Windows
You could also Connect to the remote Windows PC, without all the personalization steps shared earlier. However, that means that you have to reconfigure the remote desktop connection profile the next time you want to remote control your Windows PC.
Troubleshooting an Ubuntu Remote Desktop
You may receive an error stating that the connection cannot be made because the encryption level is too high on the Ubuntu computer.
The first thing to try is to increase the level of encryption the VNC Viewer is attempting to use.
Right-click the icon for your connection and click Properties. Try each encryption option in turn. If none of the options work, try these instructions:
Type the following command into a terminal on Ubuntu:
gsettings set org.gnome.vino require-encryption false
Try to connect to Ubuntu again using Windows.
Running this command will send password credentials «in the clear» (meaning anyone «sniffing» for unencrypted network traffic can intercept), which is a huge security threat.
Lifewire / Michela Buttignol
There are two ways to set up a remote desktop using Ubuntu. The method outlined below is the one that the Ubuntu developers included as part of the system.
The second way is to use a piece of software called xRDP. This software is a bit hit-or-miss when running on Ubuntu. While you may now be able to access the desktop, you will find the experience a little frustrating due to mouse and cursor glitches and general graphics-based problems.
The actual process of sharing the desktop is relatively straightforward. The tricky bit is trying to access it from somewhere that isn’t on your home networks such as your workplace, hotel, or internet cafe.
How to use rdesktop
To install rdesktop on Debian, Kali Linux, Linux Mint, Ubuntu and derivatives, run the command:
sudo apt install rdesktop
To install rdesktop on Arch Linux and derivatives, run the command:
sudo pacman -S rdesktop
How to connect to remote desktop with rdesktop
To connect to RDP with rdesktop, use a command of the form:
rdesktop -u USER -p PASSWORD HOST
For instance:
rdesktop -u Tester -p 1234 192.168.0.101
As usual, at the very beginning there will be a problem with the certificate:
Autoselecting keyboard map 'ru' from locale

ATTENTION! The server uses and invalid security certificate which can not be trusted for
the following identified reasons(s);

 1. Certificate issuer is not trusted by this system.

     Issuer: CN=HackWare-MiAl


Review the following certificate info before you trust it to be added as an exception.
If you do not trust the certificate the connection atempt will be aborted:

    Subject: CN=HackWare-MiAl
     Issuer: CN=HackWare-MiAl
 Valid From: Thu Apr  2 20:56:11 2020
         To: Fri Oct  2 20:56:11 2020

  Certificate fingerprints:

       sha1: 6a4cbe35235f46b5bd37155ef721ec59aac11c3e
     sha256: 35368cc1b2ae9e79927bcb8ededed228062de34978aeeeab74bb029ccbc255e9


Do you trust this certificate (yes/no)? yes

We type yes.
Then an error will occur:
Failed to initialize NLA, do you have correct Kerberos TGT initialized ?
Failed to connect, CredSSP required by server (check if server has disabled old TLS versions, if yes use -V option).
This is because network-level authentication (Kerberos TGT) is not configured. Setup instructions at: https://github.com/rdesktop/rdesktop/wiki/Network-Level-Authentication-(NLA)
Another option that allows you to connect to Windows via RDP using rdesktop without setting up Network Level Authentication (NLA) is to disable network-level authentication in Windows. It is clear that this will weaken the security of RDP, therefore it is not recommended. But as a “quick dirty fix” this can be done as follows: Start menu → Settings → System → Remote Desktop → Advanced settings → Uncheck “Require computers to use Network Level Authentication at the to connect (recommended)”:
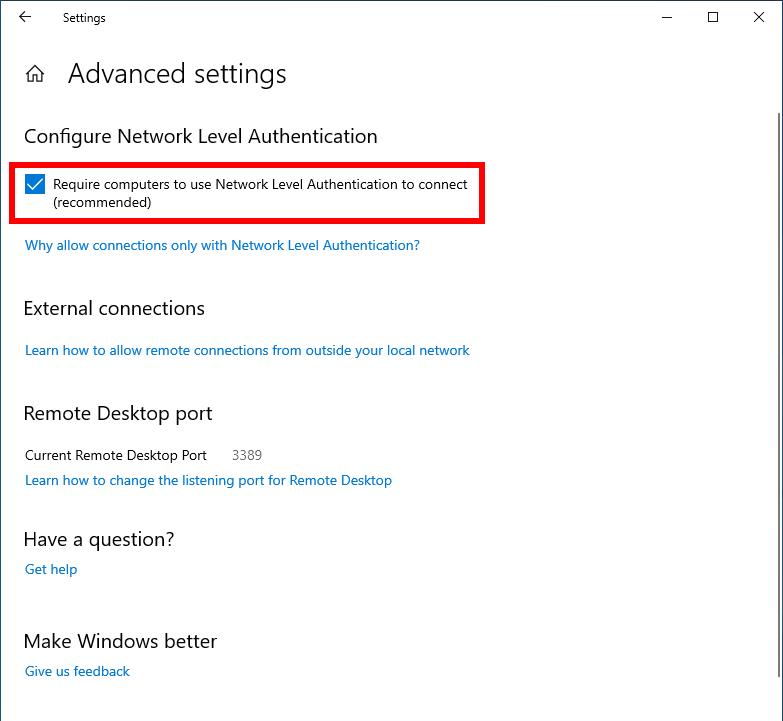
After that, rdesktop connection passes without errors:

In the Windows settings, you could see the link “Why allow connections with Network Level Authentication?”, It says the following:
Удаленный рабочий стол RDP Linux Mint
RDP (англ. Remote Desktop Protocol) — это протокол удаленного рабочего стола, разработанный компанией Microsoft. С его помощью можно подключиться к операционной системе другого компьютера через сетевое соединение.
Логотип Linux Mint
К сведению! RDP появился вместе с ОС Windows NT 4.0 в 1996 г., с тех пор выпускались новые версии протокола для новых ОС Windows. Последняя 10 версия выпущена в составе Windows 10 в 2015 г.
Для подключения по RDP к Linux нужен так называемый протокол, который позволяет производить соединение и обмен данными. В итоге один ПК становится управляемым операционной системой другого с возможностью взаимодействия мышью и клавиатурой, программами и Интернетом.
KRDC
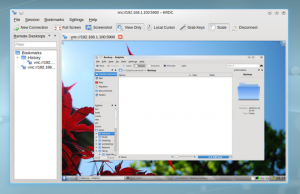
KRDC For Ubuntu
KRDC is a client application that allows you to view or even control the desktop session on another machine that is running a compatible server. VNC and RDP is supported.
There are plenty of settings for the client itself – you get the choice of high-, medium- or low-speed connections, and the software works out which features to use from there.
Using Krdc was trouble-free, and it also supports the RDP protocols used for Windows remote access. If someone adds an NX plugin, it could become even more useful. If you run KDE and need an occasional VNC client, there’s no compelling reason to change.
3 Ways to Remote Control Ubuntu
Generally speaking, you have three options to remote control an Ubuntu PC:
- SSH: Secure Shell
- VNC: Virtual Network Computing
- RDP: Remote Desktop Protocol
While many Linux users see SSH as their remote connection tool of choice, it lacks a graphical user interface (GUI).
How to Set Up SSH on Linux and Test Your Setup: A Beginner’s Guide
Need to access your Linux computer or server remotely? Here’s how to set up and configure SSH on Linux, Windows, and mobile.
Usually, these three options are separate. However, thanks to Ubuntu’s built-in remote desktop tool, you can use SSH, VNC and RDP in the same app. Linux, Mac, and Windows PCs can use remote desktop tools to control Ubuntu, as can Android and iOS.
Remote Desktop to Ubuntu With Commercial Tools
Everything you’ve learned so far is standard if you need to remotely access a Linux PC on your local network. If you need to go beyond that, then the steps to enable port forwarding will help.
But what if you have no intention of accessing your router? If this seems too complicated, then third-party commercial software designed to facilitate remote desktop, is required. Several are available, but not all support Linux.
We suggest you try out:
- NoMachine: initially released as a Linux remote desktop tool, this is now available across all major platforms. Install on the target computer, then on your local machine, and set up a remote connection.
- Chrome Remote Desktop: uses your Google account to manage remote access via the Chrome browser.
- TeamViewer: a well-known commercial remote desktop solution, this offers Linux software. Simply install client and host software beforehand. Also offers a host app for remotely accessing Raspberry Pi devices.
Note that these tools require setting up before use. If you have a colleague near the remote PC, they might be able to help. See our list of remote access tools for more suggestions.
Зачем нужно подключение к Linux из Windows
Удаленное управление Linux очень полезно во многих случаях. Например, если пользователю нужно с работы срочно подключиться к домашнему компьютеру или в офисе в другом кабинете нужно запустить обновление. Все это можно сделать из одного ПК.
Зачем еще это нужно:
- выполнение задач, которые нужно исполнить на разных компьютерах или серверах;
- помощь другому человеку в исправлении каких-либо ошибок;
- обучение специальным программам учащихся дистанционно.
Обратите внимание! Удаленным доступом чаще пользуются системные администраторы, чтобы устранять сбои в работе операционной системы из своего компьютера
How to Install Remmina Remote Desktop Client
In this short tutorial, I will show you all the possible way to install or upgrade Remmina remote desktop client in all the Ubuntu version and its derivatives.
1. Install Remmina via Snap
This is the easiest way to install any software in Ubuntu. Snap is a universal repository management system which you can use across the distros. You need to search Remmina Snap package in the Ubuntu software center and hit the install button. Remember there is two Remmina version – one is Snap version, and another is standard Ubuntu package which comes preinstalled.
 Install Remmina via Snap from Ubuntu software center
Otherwise, you can use the below Snap command to install:
snap install remmina
Moreover, don’t forget to run the following command one by one for some advanced features.
sudo snap connect remmina:avahi-observe :avahi-observe
sudo snap connect remmina:cups-control :cups-control
sudo snap connect remmina:mount-observe :mount-observe
sudo snap connect remmina:password-manager-service :password-manager-service
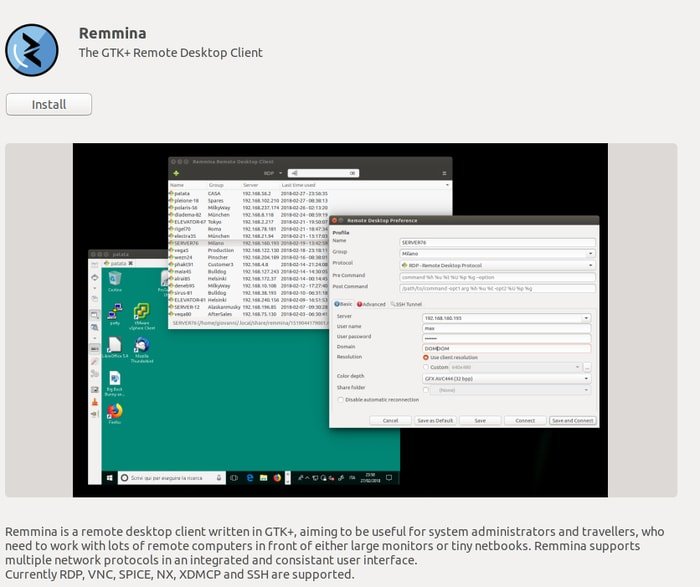
2. Install Remmina via Ubuntu PPA
In case you don’t prefer Ubuntu software center or Snap package, use official PPA for install or upgrade. Run the below command into the Terminal:
sudo add-apt-repository ppa:remmina-ppa-team/remmina-next
sudo apt-get update
sudo apt-get install remmina remmina-plugin-* libfreerdp-plugins-standard
How to downgrade Remmina if Installed via PPA
If you are not satisfied with the new version, there is always a way to downgrade the software. Run the below command:
sudo apt-get install ppa-purge
sudo ppa-purge ppa:remmina-ppa-team/remmina-next
3. Install Remmina via Flatpak
This is a relatively new way of installing software in Linux distros. Flatpak is also a universal package management system for Linux system. FlatHub is an app store where all the Linux software is available in the flatpak format. Check my tutorial if you don’t know how to use Flatpak in Ubuntu. So to install Remmina remote desktop client in Ubuntu, search it on FlatHub store and hit the install button.
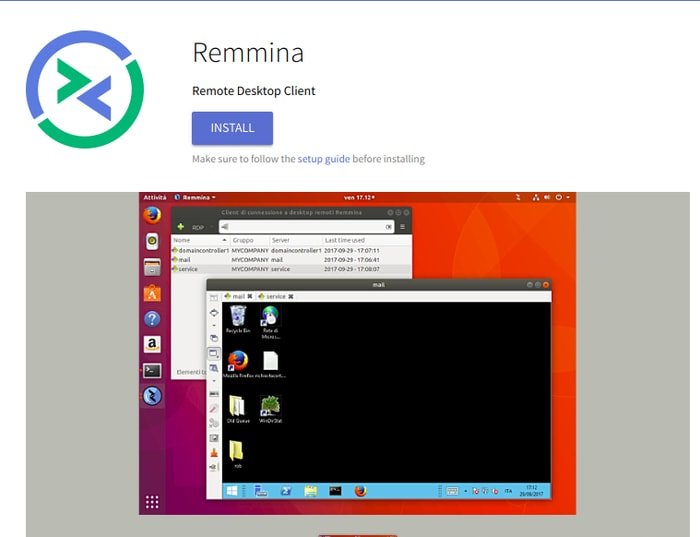 Install Remmina via Flatpak
Otherwise, you can use the below Flatpak command to install:
Install:
Make sure to follow the setup guide before installing
flatpak install flathub org.remmina.Remmina
Run:
flatpak run org.remmina.Remmina
Is this tutorial helpful? I hope it will help you to go through installing Remmina desktop client in Ubuntu system. Don’t forget to share your suggestion and experience in the comment below.
Подключение к серверу
rdesktop -z -P -g 1280×900 -u USERNAME -p PASSWORD SERVER_IP
Поясним:
- -z включает сжатие потока
- -P кэширование
- -g задает геометрию окна
- -u имя пользователя на сервере
- -p пароль.
Следует оговориться — задание пароля в явном виде в качестве опции для rdesktop не является безопасным, так как он может быть просмотрен другими пользователями с помощью команды ps. Поэтому, если компьютер может быть доступен другим пользователям (локальным или удаленным), эту опцию следует опускать — пароль можно будет ввести уже после установления сессии.
Опцию «-g» можно заменить опцией «-f». В этом случае окно rdesktop будет открыто на весь экран. Выход в этом случае можно будет инициировать нажатием клавиш Ctrl-Alt-Enter.
Snap
This also is a system agnostic package that works on many distributions, but mainly Ubuntu.
If you run into issues, try something else first, and then report the issues.
Our Snap package does not work on Ubuntu 17.10 if you use Wayland, see issue #1414._
First make sure you have installed. Then install the last release from the Ubuntu Software Center by looking for , or install it from a terminal with:
The Snap subsystem has limitations, so some features, for example password storage via keyring is missing and must be fixed manually:
Some features just don’t work on Snap, for example accessing your personal ~/.ssh directory is not possible.
You have to manually copy your ~/.ssh/* files to ~/snap/remmina/common/.ssh/
If you want to install the latest Git revision of Remmina as Snap, get it from the channel:
Or, update your Remmina Snap install with your channel of choice:
Snaps are updated with the system and include both latest Git and the latest release (for better security).
NoMachine
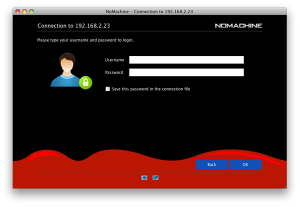
NoMachine for Ubuntu
NoMachine is a remote desktop tool. Just like VNC. So what is the difference between NoMachine with the other? The most important factor is speed. The NX protocol provides near local speed responsiveness over high latency and low bandwidth links. So it feels like you were directly in front of your computer.
NoMachine has many key features. When you connected to NoMachine-enabled computer, you can work with any content such as documents, music, videos, as if you were in front of your computer. You can also have the same desktop environment from where ever you are connected.
Remember to like our and our twitter @ubuntufree for a chance to win a free Ubuntu laptop every month!
Read our other articles: Free Backup Software for Ubuntu, Photoshop Alternative on Ubuntu, MS Office Alternatives on Ubuntu
Post Views:
21,831
Disclaimer
The Remmina project is not a nonprofit organization. Revenue streams go towards development as directly as possible.
This avoids the biggest libre software 501(c)(6) fiscal host dictating which revenue streams can be utilized and saves 5% from the net revenue.
The money you donate, goes to one of the Remmina maintainers (rotating yearly).
For amounts above 200$, get in contact with us.
Thank you so much for your support!
Exact amounts are not disclosed for privacy, except if requested.
Ask at any time how your donation is used. Remmina is fully transparent, and is helped by hiding nothing.
If you want to be removed, or you are not listed, or you want more details about you added, let us know.
100% funded by people like you
These are the recurring expences paid by Antenore and Giovanni.
| What | Description | Yearly cost | Paid | Renewal |
|---|---|---|---|---|
| remmina.com (OVH.COM) | domain | 9.99 EUR | 15/04/2020 | 15/04/2021 |
| remmina.org (OVH.COM) | domain | 12.99 EUR | 25/03/2020 | 25/03/2021 |
| remmina.org (OVH.COM) | — Hosting — Performance1 — 12 months.- 1000 pops, 1000 mailing lists.- CDN — 3 POPs | 119.88 EUR | 24/10/2019 | 23/10/2020 |
| remmina.org (OVH.COM) | zone DNS | 1.00 EUR | 25/03/2020 | 25/03/2021 |
| Computing environment (self-owned) | 2 Intel servers and 1 pi4 are used to build Remmina packages, test different OS configurations and other tasks. | 180.00 EUR | ||
| Total | 323.86 EUR |
Honest hard work goes into building Remmina packages, testing Remmina on different operating systems and against different
remote servers (Linux and Windows VMs), managing translations, elaborating opt-in statistics, debugging reported bugs, helping users, implementing new features, and preparing new releases.
We are so grateful for the increased donations, and any stability helps focus on what is most demanded.
Exact hits
Package remmina
-
xenial (16.04LTS) (gnome):
remote desktop client for GNOME desktop environment1.1.2-3ubuntu1: amd64 arm64 armhf i386 powerpc ppc64el s390x
-
bionic (18.04LTS) (gnome):
GTK+ Remote Desktop Client1.2.0-rcgit.29+dfsg-1ubuntu1.2 : amd64 i386
1.2.0-rcgit.29+dfsg-1ubuntu1 : arm64 armhf ppc64el s390x
-
bionic-updates (gnome):
GTK+ Remote Desktop Client1.2.0-rcgit.29+dfsg-1ubuntu1.2: amd64 arm64 armhf i386 ppc64el s390x
-
eoan (19.10) (gnome):
GTK+ Remote Desktop Client1.3.4+dfsg-3ubuntu1: amd64 arm64 armhf i386 ppc64el s390x
-
focal (20.04LTS) (gnome):
GTK+ Remote Desktop Client1.4.2+dfsg-1ubuntu1: amd64 arm64 armhf ppc64el s390x
-
groovy (gnome):
GTK+ Remote Desktop Client1.4.8+dfsg-1ubuntu1: amd64 arm64 armhf ppc64el s390x
Remote Access Using Remote Desktop Protocol
The easiest option is to use Remote Desktop Protocol or RDP. Built into Windows, this tool can establish a remote desktop connection across your home network. All you need is the IP address of the Ubuntu device.
While the necessary software is pre-installed on Windows, you’ll need to install the xrdp tool on Ubuntu. To do this, open a Terminal window (Ctrl + Alt + T) and enter:
Follow this with
Wait for this to install, then run the Remote Desktop application in Windows using the Start Menu or Search. Type rdp then click on Remote Desktop Connection. With the app open, input the IP address in the Computer field.
Next, click Show Options and add the Username for the Ubuntu PC. You can click Save to keep these settings for reuse on another occasion.
Click Connect to start the connection and input the Ubuntu account password when prompted. The connection will then be established, giving you full mouse and keyboard access to your remote Ubuntu computer. If you plan to use this connection often, you can create a configuration file for it to save time.
Troubleshooting RDP to Ubuntu
While RDP is a great option for remote connecting to your Ubuntu PC, it’s unreliable on Ubuntu 18.04 LTS. There appears to be an issue establishing a remote connection while already logged into the same account on Ubuntu.
As such, the simple way around this is to simply log out of the Ubuntu computer.
If this isn’t possible, try switching the RDP connection from using the Xorg server to using X11rdp. Wait for that to fail then try Xorg again.
You might also attempt connection after restarting the Linux machine.
Ubuntu 20.04 LTS should include a fix for this problem.