Установка aur в arch linux 32-bit
Содержание:
- udev
- Uninstallation
- Перед установкой
- Makepkg
- Configuration
- Philosophy
- Composite
- Querying specific packages
- Установка
- Verification and repair
- Overview
- Using package files and building packages
- Советы и рекомендации
- Adding your repository to this page
- Установка
- SIGNED PACKAGES
- Мейнтейнер пакетов
- Отношения
- Testing the PKGBUILD and package
udev
udev provides a dynamic device directory containing only the files for actually present devices. It creates or removes device node files in the directory, or it renames network interfaces.
Usually udev runs as udevd(8) and receives uevents directly from the kernel if a device is added/removed to/from the system.
If udev receives a device event, it matches its configured rules against the available device attributes provided in sysfs to identify the device. Rules that match may provide additional device information or specify a device node name and multiple symlink names and instruct udev to run additional programs as part of the device event handling.
Uninstallation
Change the default shell before removing the package.
Warning: Failure to follow the below procedure may result in users no longer having access to a working shell.
Run following command:
$ chsh -s /bin/bash user
Use it for every user with zsh set as their login shell (including root if needed). When completed, the package can be removed.
Alternatively, change the default shell back to Bash by editing as root.
Warning: It is strongly recommended to use when editing as it helps prevent invalid entries and/or syntax errors.
For example, change the following:
username:x:1000:1000:Full Name,,,:/home/username:/bin/zsh
To this:
username:x:1000:1000:Full Name,,,:/home/username:/bin/bash
Перед установкой
Проверка подписи
$ gpg --keyserver-options auto-key-retrieve --verify archlinux-версия-x86_64.iso.sig
В качестве альтернативы, можно проверить подпись из установленного Arch Linux:
$ pacman-key -v archlinux-версия-x86_64.iso.sig
Примечание:
Подготовка установочного носителя
Установочный образ можно загрузить на конечном устройстве с помощью USB-накопителя, или сети (при помощи PXE) — следуйте соответствующей статье для подготовки установочного носителя.
Загрузка live-окружения
- Загрузите устройство с установочного носителя с Arch Linux. Обычно при включении компьютера нажимается специальная клавиша (иногда она указывается на заставке) во время фазы POST для выбора загрузочного устройства. Обратитесь к руководству вашей материнской платы для получения более подробных инструкций.
- Когда появится меню установочного носителя, выберите Arch Linux install medium и нажмите для входа в установочное окружение.
- Вы загрузитесь в первую виртуальную консоль в качестве root-пользователя и увидите приглашение командной оболочки Zsh.
Установка раскладки клавиатуры
По умолчанию используется раскладка консоли US. Чтобы посмотреть список доступных раскладок, запустите:
# ls /usr/share/kbd/keymaps/**/*.map.gz
Чтобы изменить раскладку, добавьте имя соответствующего файла к команде , не указывая полного пути и расширения. Например, чтобы выбрать русскую раскладку, запустите:
# loadkeys ru
расположены в каталоге и могут быть выбраны при помощи .
Проверка режима загрузки
Чтобы проверить режим загрузки, просмотрите содержимое каталога :
# ls /sys/firmware/efi/efivars
Если содержимое отображается без каких-либо ошибок, система загружена в режиме UEFI. Если же такого каталога не существует, возможно, система загружена в режиме BIOS (или CSM). Если система не загрузилась в желаемом режиме, обратитесь к руководству пользователя вашей материнской платы.
Соединение с интернетом
Для настройки сетевого соединения, выполните следующие действия:
- Убедитесь, что ваш обнаружен и включён, например, с помощью :
# ip link
- Если планируется использовать Wi-Fi, убедитесь, что беспроводная карта не заблокирована с помощью rfkill.
- Подключитесь к сети:
- Ethernet: подключите кабель.
- Wi-Fi: подключитесь к беспроводной сети с помощью iwctl.
- Настройте сетевые соединения:
- Статический IP: см. .
- Соединение можно проверить с помощью утилиты ping:
# ping archlinux.org
Примечание: Установочный образ по умолчанию запускает службы , и , но в установленной системе автозапуск будет необходимо настроить вручную.
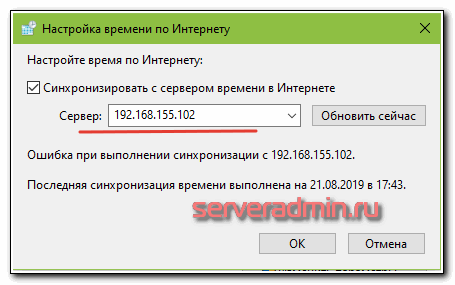
Синхронизация системных часов
Чтобы удостовериться, что время задано правильно, используйте :
# timedatectl set-ntp true
Для проверки статуса службы используйте .
Разметка дисков
Когда запущенная система распознает накопители, они становятся доступны как блочные устройства, например, , или . Чтобы посмотреть их список, используйте lsblk или fdisk.
# fdisk -l
Результаты, оканчивающиеся на , и , можно игнорировать:
На выбранном накопителе должны присутствовать следующие разделы:
- Раздел корневого каталога
- Для загрузки в режиме UEFI также необходим системный раздел EFI
Если вы хотите создать составное блочное устройство для LVM, шифрование диска или RAID, сделайте это сейчас.
Примеры схем
| Точка монтирования | Раздел | Тип раздела | Рекомендуемый размер |
|---|---|---|---|
| Linux | Остаток | ||
| Linux swap | Более 512 МБ |
| Точка монтирования | Раздел | Рекомендуемый размер | |
|---|---|---|---|
| или | системный раздел EFI | 260–512 МБ | |
| Linux x86-64 root (/) | Остаток | ||
| Linux swap | Более 512 МБ |
Также смотрите .
Примечание:
- Для редактирования таблицы разделов используйте fdisk или parted, например, .
- Пространство подкачки можно расположить в для файловых систем, поддерживающих его.
Форматирование разделов
Когда разделы созданы, каждый из них необходимо отформатировать в подходящую файловую систему. Например, если корневой раздел обозначен и необходимо отформатировать его в Ext4, выполните:
# mkfs.ext4 /dev/sdX1
Если вы создали раздел для подкачки (swap), инициализируйте его с помощью утилиты :
# mkswap /dev/sdX2
# swapon /dev/sdX2
Для получения дополнительной информации смотрите раздел .
Монтирование разделов
Смонтируйте файловую систему корневого раздела в каталог , например:
# mount /dev/sdX1 /mnt
Используя создайте точки монтирования для всех остальных разделов (например, ) и примонтируйте соответствующие разделы.
В дальнейшем обнаружит смонтированные файловые системы и пространство подкачки.
Makepkg
Если вы хотите иметь возможность устанавливать недостающие для сборки пакета зависимости, установите утилиту sudo и добавьте вашего пользователя в файл настройки утилиты: /etc/sudoers.
ЗАМЕТКА: в состав пакета sudo входит утилита visudo которая запускает редактор vi в особом режиме, позволяющем сразу-же отредактировать файл без изменения прав доступа.
USER_NAME ALL=(ALL) NOPASSWD: /usr/bin/pacman
Добавив эту строку и заменив USER_NAME именем вашего пользователя, у вас появится возможность запускать pacman без необходимости ввода пароля.
Следующий шаг — это определения папки в которой будут перемещены «свежесобранные» пакеты, например вы можете назначить здесь папку в вашем домашнем каталоге. Если этот параметр не был установлен, то пакеты будут расположены в той-же папке откуда был запущен makepkg.
Например, создайте такую папку:
$ mkdir /home/$USER/packages
и установите переменную PKGDEST в файле /etc/makepkg.conf соотвествующим образом.
Пока вы редактируете его, можете посмотреть на другие переменные влияющие на сборку ваших пакетов. Например вы можете установить переменную PACKAGER, при этом ваше имя будет добавлено к собранным пакетам, либо убрать ! перед параметром docs в массиве OPTIONS, в случае если вы не хотите чтобы makepkg удалял папку с документацией к вашему пакету. Просмотрите статью Makepkg.conf для подробной информации по возможным параметрам.
Configuration
Note: Arch supplies default configuration files in , and no extra configuration is necessary for most setups.
Xorg uses a configuration file called and files ending in the suffix for its initial setup: the complete list of the folders where these files are searched can be found in , together with a detailed explanation of all the available options.
Using .conf files
The directory stores host-specific configuration. You are free to add configuration files there, but they must have a suffix: the files are read in ASCII order, and by convention their names start with (two digits and a hyphen, so that for example 10 is read before 20). These files are parsed by the X server upon startup and are treated like part of the traditional configuration file. Note that on conflicting configuration, the file read last will be processed. For that reason the most generic configuration files should be ordered first by name. The configuration entries in the file are processed at the end.
Using xorg.conf
Xorg can also be configured via or . You can also generate a skeleton for with:
# Xorg :0 -configure
This should create a file in that you can copy over to .
Tip: If you are already running an X server, use a different display, for example .
Alternatively, your proprietary video card drivers may come with a tool to automatically configure Xorg: see the article of your video driver, NVIDIA or AMD Catalyst, for more details.
Note: Configuration file keywords are case insensitive, and «_» characters are ignored. Most strings (including Option names) are also case insensitive, and insensitive to white space and «_» characters.
Philosophy
After creating a fresh Arch Linux droplet, you have access to three standard repositories with pacman:
- core
- extra
- community
The core and extra repositories are maintained by the powers that be. Community is maintained by Arch users, but it might not be what you expect. The Arch maintainers are very strict about what becomes a standard package. In addition to achieving a vote threshold, an official community package must be adopted by what Arch refers to as a “Trusted User.” The maintainers do not see a reason for a package to be accessible with the 1st party package manager unless it is likely to be maintained at a 1st party level. This is as opposed to trying to maintain as many packages as possible, which many other distributions have tried (and often failed) to do. As of this writing, there are only 36 Trusted Users and only 2000+ community packages.
However, unlike most other distributions, Arch Linux also keeps an additional community repository where users can play fast and loose. This is the Arch User Repository. The AUR is transparent and onlyn moderated by the collective, so it encourages organic growth. As of this writing, there are 44,000+ packages in the AUR. This is in contrast to 10,000+ standard packages.
AUR packages are not source packages or binary packages. Instead, they are instructions (PKGBUILDs) for acquiring, building (if necessary), and installing software. This way of approaching package management was borrowed from FreeBSD Ports. On the source-binary spectrum, a PKGBUILD might use as a source anything from a git repository to a .deb package. In addition, there are no licensing restrictions, unlike in some repositories.
Arch Linux is a rolling release distribution, so any package you download from the AUR or the standard repositories will be the most up to date one made for Arch, even if you are using an older release of the distro. Since there is only one downloadable version of any given package, packages are easier to fix,
and fixes apply for everyone. If an update does break something, downgrading can be as easy as changing the source file version in the PKGBUILD, provided the older source file is still available.
Composite
The Composite extension for X causes an entire sub-tree of the window hierarchy to be rendered to an off-screen buffer. Applications can then take the contents of that buffer and do whatever they like. The off-screen buffer can be automatically merged into the parent window or merged by external programs, called compositing managers. See the following article for more information: compositing window manager
Some window managers (e.g. Compiz, Enlightenment, KWin, Marco, Metacity, Muffin, Mutter, Xfwm) do compositing on their own. For other window managers, a standalone composite manager can be used.
List of composite managers
Picom — Compositor (a fork of Compton)
Xcompmgr — Composite window-effects manager
Unagi — Modular compositing manager which aims written in C and based on XCB
Querying specific packages
| Action | Arch | Red Hat/Fedora | Debian/Ubuntu | SLES/openSUSE | Gentoo |
|---|---|---|---|---|---|
| Show all or most information about a package. The tools’ verbosity for the default command vary. But with options, the tools are on par with each other. | or | or | or | or | , or |
| Display local package information: Name, version, description, etc. | or | or | or | ||
| Display remote package information: Name, version, description, etc. | or | and or | |||
| Display files provided by local package | or | ||||
| Display files provided by a remote package | or (from package yum-utils) | ||||
| Query the package which provides FILE | (installed only) or (everything) or (from package yum-utils) | or | or | ||
| List the files that the package holds. Again, this functionality can be mimicked by other more complex commands. | or | or | |||
| Displays packages which provide the given exp. aka reverse provides. Mainly a shortcut to search a specific field. Other tools might offer this functionality through the search command. | or | (only installed packages) or | |||
| Search all packages to find the one which holds the specified file. auto-apt is using this functionality. | or | ||||
| Show the changelog of a package |
Установка
Выбор зеркал
Чем выше зеркало расположено в списке, тем больший приоритет оно имеет при скачивании пакета. Вы можете проверить этот файл и, при необходимости, отредактировать его вручную, переместив наверх наиболее географически близкие зеркала. При этом также учитывайте и другие критерии.
Позже pacstrap скопирует этот файл в новую систему, так что это действительно стоит сделать.
Установка основных пакетов
Используйте скрипт , чтобы установить пакет , ядро Linux и прошивки часто встречающихся устройств:
# pacstrap /mnt base linux linux-firmware
Совет:
linux можно заменить на другой желаемый пакет ядра или пропустить данный шаг, если установка происходит в контейнере.
Можно пропустить установку пакета прошивок, если установка происходит в контейнере или виртуальной машине.
Пакет не содержит все инструменты, имеющиеся на установочном носителе, из-за чего может потребоваться установка других пакетов для получения полностью функциональной базовой системы. В частности, рассмотрите возможность установки следующего программного обеспечения:
- утилиты для управления файловыми системами в пользовательском пространстве, которые будут использоваться в системе
- утилиты для доступа к RAID- или LVM-разделам
- специфические прошивки других устройств, не включённых в
- ПО, необходимое для организации сети
- текстовый редактор
- пакеты для доступа к документации в man и info: , и
Verification and repair
| Action | Arch | Red Hat/Fedora | Debian/Ubuntu | SLES/openSUSE | Gentoo |
|---|---|---|---|---|---|
| Verify single package | (can add another ) | ||||
| Verify all packages | (can add another ) | ||||
| Reinstall given package; this will reinstall the given package without dependency hassle | |||||
| Verify dependencies of the complete system; used if installation process was forcefully killed | |||||
| Use some magic to fix broken dependencies in a system | for pacman dependency level, use ; for shared library level, use AUR or (from ) | and then | |||
| Add a checkpoint to the package system for later rollback | (unnecessary, it is done on every transaction) | n/a | |||
| Remove a checkpoint from the system | n/a | n/a | n/a | ||
| Provide a list of all system checkpoints | n/a | n/a | |||
| Rolls entire packages back to a certain date or checkpoint | n/a | n/a | |||
| Undo a single specified transaction | n/a | n/a |
Overview
Packages in Arch Linux are built using the makepkg utility and the information stored in a PKGBUILD file. When runs, it searches for a in the current directory and follows the instructions in it to acquire the required files and/or compile them to be packed within a package file (). The resulting package contains binary files and installation instructions ready to be installed by pacman.
An Arch package is no more than a tar archive, or ‘tarball’, compressed using , which contains the following files generated by makepkg:
- The binary files to install.
- : contains all the metadata needed by pacman to deal with packages, dependencies, etc.
- : contains information needed for reproducible builds. This file is present only if a package is built with pacman 5.1 or newer. See .
- : contains hashes and timestamps of the files, which are included in the local database so that pacman can verify the integrity of the package.
- : an optional file used to execute commands after the install/upgrade/remove stage. (This file is present only if specified in the .)
- : an optional file kept by the package maintainer documenting the changes of the package. (It is not present in all packages.)
Using package files and building packages
| Action | Arch | Red Hat/Fedora | Debian/Ubuntu | SLES/openSUSE | Gentoo |
|---|---|---|---|---|---|
| Query a package supplied on the command line rather than an entry in the package management database | |||||
| List the contents of a package file | |||||
| Install local package file, e.g. app.rpm and uses the installation sources to resolve dependencies | |||||
| Updates package(s) with local packages and uses the installation sources to resolve dependencies | |||||
| Add a local package to the local package cache mostly for debugging purposes. | n/a | ||||
| Extract a package | |||||
| Install/Remove packages to satisfy build-dependencies. Uses information in the source package | Use ABS and | ||||
| Display the source package to the given package name(s) | n/a | ||||
| Download the corresponding source package(s) to the given package name(s) | Use ABS and | or | |||
| Build a package | (normal) or mock (in chroot) | , then build, and then | or | ||
| Check for possible packaging issues | namcap(requires ) | rpmlint | lintian | rpmlint | repoman |
Советы и рекомендации
This article or section needs expansion.
Автоматизация
В этом разделе перечислены утилиты для автоматизации операций с окнами (например, перемещение, изменение размера или фокусировка), ввода/вывода клавиатуры и мыши.
| Утилита | Пакет | Документация | Эмуляцияклавиш | Операциис окнами | Примечание |
|---|---|---|---|---|---|
| xautomation | Да | Нет | Также содержит инструменты для очистки экрана. Не может эмулировать F13+. | ||
| xdo | AUR | Нет | Да | Небольшая утилита X для выполнения элементарных действий над окнами. | |
| xdotool | Да | Да | |||
| xvkbd | AUR | Да | Нет | Виртуальная клавиатура для Xorg, также имеет параметр для отправки символов. |
Вложенная X-сессия
This article or section needs expansion.
Для запуска вложенного сеанса другой среды рабочего стола:
$ /usr/bin/Xnest :1 -geometry 1024x768+0+0 -ac -name Windowmaker & wmaker -display :1
Это запустит сеанс Window Maker в окне 1024 на 768 в рамках текущей X-сессии.
Для этого необходим установленный пакет .
Отключение и включение при необходимости устройств ввода
С помощью xinput вы можете временно отключить или включить устройства ввода. Это полезно, например, на системах, имеющих несколько мышек, таких как ThinkPads и, если вам хотелось бы использовать только одну, чтобы избежать нежелательные нажатия.
Установите пакет .
Найдите имя или ID устройства, которое вы хотите отключить:
$ xinput
Например для ноутбука Lenovo ThinkPad T500 вывод выглядит следующим образом:
$ xinput
⎡ Virtual core pointer                          id=2
⎜   ↳ Virtual core XTEST pointer                id=4
⎜   ↳ TPPS/2 IBM TrackPoint                     id=11
⎜   ↳ SynPS/2 Synaptics TouchPad                id=10
⎣ Virtual core keyboard                         id=3
    ↳ Virtual core XTEST keyboard               id=5
    ↳ Power Button                              id=6
    ↳ Video Bus                                 id=7
    ↳ Sleep Button                              id=8
    ↳ AT Translated Set 2 keyboard              id=9
    ↳ ThinkPad Extra Buttons                    id=12
Отключить устройство можно командой , где устройство это ID устройства или имя устройства, которое вы хотите отключить. В следующем примере мы отключим тачпад Synaptics с ID 10:
$ xinput --disable 10
Чтобы снова включить устройство, просто выполните противоположную команду:
$ xinput --enable 10
Так выглядит команда для выключения устройства (здесь тачпада) через его имя:
$ xinput --disable "SynPS/2 Synaptics TouchPad"
Закрытие приложения с помощью горячей клавиши
Привяжите скрипт к горячей клавише:
#!/bin/bash
windowFocus=$(xdotool getwindowfocus);
pid=$(xprop -id $windowFocus | grep PID);
kill -9 $pid
Зависимости: ,
Блокирование доступа к TTY
This article or section needs expansion.
Чтобы запретить доступ к tty в X, добавьте следующее в файл :
Section "ServerFlags"
    Option "DontVTSwitch" "True"
EndSection
Запрет пользователю закрывать, перезапускать X
Чтобы запретить пользователю закрывать, перезапускать запущенный Xorg, добавьте следующее в файл :
Section "ServerFlags"
    Option "DontZap"      "True"
EndSection
Использование Xorg без прав суперпользователя
- Запустить X через xinit; экранный менеджер не поддерживается
Если вам не удовлетворяют эти требования, повторно включите права суперпользователя в :
/etc/X11/Xwrapper.config
needs_root_rights = yes
Для получения дополнительной информации смотрите и .
Также GDM запускает Xorg без привилегий суперпользователя по умолчанию, когда используется KMS.
Неработающее перенаправление
Пока журналы пользователя Xorg хранятся в , они не включают вывод X-сессии. Чтобы повторно включить перенаправление, запустите X с флагом :
exec startx -- -keeptty > ~/.xorg.log 2>&1
Adding your repository to this page
If you have your own repository, please add it to this page, so that all the other users will know where to find your packages. Please keep the following rules when adding new repositories:
- Keep the lists in alphabetical order.
- Include some information about the maintainer: include at least a (nick)name and some form of contact information (web site, email address, user page on ArchWiki or the forums, etc.).
- If the repository is of the signed variety, please include a key-id, possibly using it as the anchor for a link to its keyserver; if the key is not on a keyserver, include a link to the key file.
- Include some short description (e.g. the category of packages provided in the repository).
- If there is a page (either on ArchWiki or external) containing more information about the repository, include a link to it.
- If possible, avoid using comments in code blocks. The formatted description is much more readable. Users who want some comments in their can easily create it on their own.
Some repositories may also have packages for architectures beside x86_64. The variable will be set automatically by pacman.
Установка
Установите пакет .
В дополнение к нему, могут понадобиться пакеты из группы для некоторых способов настроек. О них рассказано в соответствующих разделах.
К тому же имеется группа , которая включает пакеты оконной системы Xorg и пакеты из группы , а также шрифты.
Совет: Вам, скорее всего, понадобится оконный менеджер или среда рабочего стола в дополнение к X.
Установка драйвера
Ядро Linux включает в себя видеодрайверы с открытым исходным кодом и поддержку аппаратного ускорения буфера кадров. Однако, для работы OpenGL и двухмерного ускорения в X11 требуется поддержка пользовательского ПО.
Сперва определите вашу видеокарту:
$ lspci | grep -e VGA -e 3D
Затем установите соответствующий драйвер. Вы можете поискать в базе данных пакетов полный список видеодрайверов с открытым исходным кодом:
$ pacman -Ss xf86-video
Xorg автоматически ищет установленные драйверы:
- Если он не может найти установленным необходимый драйвер для оборудования (перечислены ниже), тогда он сначала ищет драйвер fbdev ().
- Если и он не найден, тогда Xorg ищет общий драйвер vesa (), который поддерживает большое количество чипсетов, но не включает 2D или 3D ускорение.
- А если и vesa не найден, тогда X обратится к режиму KMS, который включает ускорение GLAMOR (смотрите ).
Для того, чтобы ускорение видео работало, и часто для того, чтобы разблокировать все режимы, в которых может работать GPU, требуется правильный видеодрайвер:
| Бренд | Тип | Драйвер | OpenGL | OpenGL (multilib) | Документация |
|---|---|---|---|---|---|
| AMD / ATI | Свободный | AMDGPU (Русский) | |||
| ATI (Русский) | |||||
| Intel | Свободный | Intel graphics (Русский) | |||
| NVIDIA | Свободный | Nouveau (Русский) | |||
| Проприетарный | NVIDIA (Русский) | ||||
| AUR | AUR | AUR |
Примечание:
- Если Вы пользуетесь ноутбуком с поддержкой NVIDIA Optimus, который использует интегрированную видеокарту вместе с дискретной, обратитесь к статье NVIDIA Optimus (Русский) или Bumblebee (Русский).
- Чтобы узнать доступные драйверы для графики Intel 4-го поколения и выше, смотрите статью .
Другие видеодрайверы можно найти в группе .
Во избежание проблем X следует запускать без драйверов с закрытым исходным кодом, которые обычно требуются только для расширенных возможностей, таких, как быстрый 3D рендеринг в играх. Исключением из этого правила являются недавние графические процессоры (особенно видеокарты NVIDIA), которые не поддерживаются драйверами с открытым исходным кодом.
AMD
| Архитектура GPU | Карты Radeon | Драйвер с открытым исходным кодом | Проприетарный драйвер |
|---|---|---|---|
| GCN 4и новее | варианты | AMDGPU (Русский) | AMDGPU PRO (Русский) |
| GCN 3 | AMDGPU (Русский) | Catalyst (Русский) /AMDGPU PRO (Русский) | |
| GCN 2 | AMDGPU (Русский)* / ATI (Русский) | Catalyst (Русский) | |
| GCN 1 | AMDGPU (Русский)* / ATI (Русский) | Catalyst (Русский) | |
| TeraScale 2&3 | HD 5000 — HD 6000 | ATI (Русский) | Catalyst (Русский) |
| TeraScale 1 | HD 2000 — HD 4000 | устаревший Catalyst (Русский) | |
| Старые | X1000 и старше | недоступен |
- *: Экспериментальный
SIGNED PACKAGES
     When creating a package, you can optionally add a digital signature to
     the package.  You will need to have a certificate and corresponding pri-
     vate key -- together called an ``identity'' -- in one of your accessible
     keychains. To add a signature, specify the name of the identity using the
     --sign option. The identity's name is the same as the ``Common Name'' of
     the certificate.

     If you want to search for the identity in a specific keychain, specify
     the path to the keychain file using the --keychain option. Otherwise, the
     default keychain search path is used.

     pkgbuild will embed the signing certificate in the product archive, as
     well as any intermediate certificates that are found in the keychain. If
     you need to embed additional certificates to form a chain of trust
     between the signing certificate and a trusted root certificate on the
     system, use the --cert option to give the Common Name of the intermediate
     certificate. Multiple --cert options may be used to embed multiple inter-
     mediate certificates.

     The signature can optionally include a trusted timestamp. This is enabled
     by default when signing with a Developer ID identity, but it can be
     enabled explicitly using the --timestamp option. A timestamp server must
     be contacted to embed a trusted timestamp. If you aren't connected to the
     Internet, you can use --timestamp=none to disable timestamps, even for a
     Developer ID identity.

     Note that if you are going to create a signed product with the resulting
     package, using productbuild(1), there is no reason to sign the individual
     package.
Мейнтейнер пакетов
The role of the package maintainer is to update packages as new versions become available upstream and to field support questions relating to bugs in said packages. The term may be applied to any of the following:
- A core Arch Linux developer who maintains a software package in one of the official repositories (core, extra, or testing).
- A Trusted User of the community who maintains software packages in the unsupported/unofficial community repository.
- A normal user who maintains a PKGBUILD and local source files in the AUR.
The maintainer of a package is the person currently responsible for the package. Previous maintainers should be listed as contributors in the PKGBUILD along with others who have contributed to the package.
Отношения
Примечание: Вы можете использовать специфичные для разных архитектур массивы путем добавления символа подчеркивания и имени архитектуры, например, ,
provides
Массив имен пакетов, которым этот пакет придает дополнительный функционал (или виртуальный пакет вроде или ). Пакеты, предоставляющие одни и те же функции, могут быть установлены в одно и то же время только если ни в одном из них второй не указан в массиве .
Важно: Если вы используете эту переменную, вы должны добавить версию ( и, возможно, номер сборки ), которую этот пакет предоставит, если это затрагивает зависимости. Например, если вы создали модифицированный пакет qt версии 3.3.8, названный qt-foobar, массив должен выглядеть так:
Если написать , могут быть нарушены те зависимости, которые требуют конкретную версию qt. Не добавляйте в ваш массив : это будет сделано автоматически
conflicts
Массив имен пакетов, которые могут вызвать проблемы при наличии в системе. Все эти пакеты, а также пакеты, предоставляющие соответствующие программы, будут удалены. Вы также можете указать версии конфликтующих пакетов в том же формате, что и в массиве .
replaces
Массив имен устаревших пакетов, которые замещаются этим пакетом. Например, в пакете используется . После синхронизации pacman немедленно заменит установленный пакет на другой, из репозиториев, с соответствующей записью в . Если вы предоставляете альтернативную версию уже существующего пакета или загружаете его в AUR, используйте массивы и , которые необходимы только при установке конфликтующего пакета.
Testing the PKGBUILD and package
As you are writing the function, you will want to test your changes frequently to ensure there are no bugs. You can do this using the command in the directory containing the file. With a properly formatted , makepkg will create a package; with a broken or unfinished , it will raise an error.
If makepkg finishes successfully, it will place a file named in your working directory. This package can be installed with the command. However, just because a package file was built does not imply that it is fully functional. It might conceivably contain only the directory and no files whatsoever if, for example, a prefix was specified improperly. You can use pacman’s query functions to display a list of files contained in the package and the dependencies it requires with and respectively.
If the package looks sane, then you are done! However, if you plan on releasing the file, it is imperative that you check and double-check the contents of the array.
Also ensure that the package binaries actually run flawlessly! It is annoying to release a package that contains all necessary files, but crashes because of some obscure configuration option that does not quite work well with the rest of the system. If you are only going to compile packages for your own system, though, you do not need to worry too much about this quality assurance step, as you are the only person suffering from mistakes, after all.
Checking package sanity
After testing package functionality check it for errors using namcap:
$ namcap PKGBUILD
$ namcap <package file name>.pkg.tar.zst
Namcap will:
- Check PKGBUILD contents for common errors and package file hierarchy for unnecessary/misplaced files
- Scan all ELF files in package using , automatically reporting which packages with required shared libraries are missing from and which can be omitted as transitive dependencies
- Heuristically search for missing and redundant dependencies
and much more.
Get into the habit of checking your packages with namcap to avoid having to fix the simplest mistakes after package submission.