Sshfs: mounting a remote file system over ssh
Содержание:
Немного теории об SSH, FTP и SFTP
Для соединения с удаленными серверами и управления ими существует протокол — SSH, но не все знают, что у этого протокола есть расширение для передачи файлов. Да, да, по SSH можно передавать файлы прямо как с помощью старого доброго FTP, только гораздо надежнее!
Это расширение называется SFTP (не путать с FTPS, это разные вещи) и работает оно поверх SSH соединения. При этом на сервере не требуется устанавливать и настраивать дополнительное ПО для организации передачи файлов, как это было в случае с FTP. Настройки по умолчанию при установке SSH сервера (пакет ) вполне рабочие. В качестве пользователей используются пользователи ОС.
Впрочем, если требуются сложные схемы доступа, то без настроек, конечно, не обойтись, но в рамках этой статьи установку и настройку SSH мы рассматривать не будем, а сосредоточимся на клиентском ПО для SFTP соединений.
Пожалуй, нужно еще ответить на вопрос, а зачем вообще использовать SFTP, ведь есть FTP, и зачем придумывать что-то еще?
FTP до сих пор довольно распространен, однако этот протокол менее быстр, менее функционален, менее защищен и менее надежен, он не имеет никаких преимуществ перед SFTP.
SFTP же, в свою очередь, детально проработан для работы с файлами, не имеет проблем с кодировками, файлы не теряются, не бьются, установленное соединение просто так не разрывается, и может оставаться активным неделями. Одним словом, в SFTP решены многие проблемы, которые есть у FTP.
Server computer
An easier alternative for server is the Jailed SFTP accesses helper:
The server is the system/computer that contains the folders and files to serve, that is, the accessible store from other computers.
At least the package openssh-server must be installed, and also the package libpam-umask or libpam-modules
In the file /etc/pam.d/sshd we need to add (it’s not necessary to restart any service):
# Default umask mask for SSH/SFTP sessions
# Shell sessions: Settings in /etc/profile or ~/.bashrc or ~/.profile will replace this
session optional        pam_umask.so umask=0002
This sets a mask on the server over the mask from the client, when creating files and directories.
This means that, in a case with pam-server having umask=0077 and client uses umask=0227 , the elements will be created with umask=0277 (server shades client), without detriment for the client when changes attributes after (chmod). In short: this is to create folders and documents with permissions for us and others.
If in the system we haven’t a file /etc/pam.d/sshd then we can write the options in the generic /etc/pam.conf
Note1: Opening the mask at all in the pam-server (umask=0000), the elements are created transparently with the client-user permissions (his local umask), then is in the client-computer where better can be configured.
Note2: In internet you can find the trick of replacing in the server’s /etc/ssh/sshd_config file the call to sftp-server or internal-sftp by a script, that first executes umask and after makes the call to sftp-server, but this cannot work with caged SFTP (chrooted), where Shell is not enabled to allow script execution.
Chroot SFTP (caged)
Connecting with SFTP to a server as is, system directories can be explored as if we were in a local session or in a SSH terminal. To avoid this to happen, is needed to set up an specific directory that the client will see as if it were server’s root (/), and preventing terminal/console sessions.
Requirement: OpenSSH server version 4.8 or superior.
Set a user group that will have only SFTP access (without Shell), and the directory for their access paths:
groupadd sftponly
mkdir /etc/sftp-roots.d
In the file /etc/ssh/sshd_config disable the existing line «Subsystem sftp …» (inserting # as first character), and add at the end of file:
Subsystem       sftp    internal-sftp
Match Group sftponly
	# Variables for ChrootDirectory: %h ($HOME) %u ($USERNAME)
	ChrootDirectory /etc/sftp-roots.d/%u
	ForceCommand internal-sftp -u 0002
	AllowTcpForwarding no
	X11Forwarding no
Restart SSH service to make changes work (open SSH sessions aren’t interrupted):
service ssh restart
Create caged users and directories
The user accounts created with the following instructions will be the affected by the chroot system. It’s not created an own directory/profile at /home for them (optional) nor are allowed to access via terminal/SSH (necessary restriction). In this example the user will be called «narcis» and when he connects will access to the folder /mnt/mydata :
NewUser="narcis"
Destination="/mnt/mydata"
ln -s $Destination /etc/sftp-roots.d/$NewUser
adduser  --gecos "" --no-create-home --home /etc/sftp-roots.d/$NewUser --ingroup sftponly $NewUser
usermod -s /bin/false $NewUser
chown root $Destination
chmod go-w $Destination
Note that the access directory (in the example /mnt/mydata) must be protected by the superuser (root), and the external user (in the example «narcis») cannot create nor modify anything there. Write permissions can be given for a subdirectory, as for example «school»:
ModifiableFolder="/mnt/mydata/school"
mkdir $ModifiableFolder
chown $NewUser:sftponly $ModifiableFolder
chmod ug+rwX $ModifiableFolder
Create normal users and directories
It is worth showing the simple formula without caging and with own profile in /home , so certain users can access to any directory as a local user (without administration privileges), and with the possibility of entering via SSH terminal.
NewUser="narcis"
adduser  --gecos "" --add_extra_groups $NewUser
In this case, we create a user typical directory in /home/narcis , where will go if connects by SSH terminal. By SFTP the root (/) is the same as the server, so for mounting from the client computer is needed to specify /home/narcis
Note: Normal users can also open a local session, that is, they can access using physically server’s screen and the keyboard. If it’s a desktop computer working as server, may be better to create users with the graphical environment tool.
Automatically mount remote folders with SSHFS fstab entry
If you want to mount the remote folder permanently on a local system, you need to add a sshfs fstab entry.
Look at the example fstab configuration bellow,
:/media/ /home/user/sshfs fuse.sshfs defaults,_netdev,allow_other,users,IdentityFile=/home/user/.ssh/id_rsa 0 0
The above line is a bit long, better to copy-paste it somewhere for clear overview.
Note the IdentityFile mount option, that means you also need to setup key based SSH authentication. So if you’re not so familiar with password less SSH login, here an easy tutorial.
A little about other options
- _netdev , this option ensures that network access is available before trying to mount remote folders.
- allow_other, other users can read-write inside the mounted folder, this option is useful for non-root users.
- users, allow mount or unmount operations by other users than root.
You can check the man page for other available options, use the man sshfs command.
Использование ключа
Ввод пароля для подключения через SSH — раздражающая процедура. У меня почти никогда не получалось ввести его правильно с первого раза. Поэтому я начал искать информацию о том, как подключиться к серверу через SSH без пароля. Простое и безопасное решение — использование ключа. Почему это безопаснее? Потому что пароль можно подобрать. Чтобы исключить такую вероятность, многие пользователи выбирают авторизацию с помощью ключа.
Суть процедуры в формировании двух ключей: публичного и приватного. Первый копируется на сервер, а второй остается на компьютере пользователя и не передается по сети. В таком случае пароль при подключении не требуется. Когда вы подключаетесь к серверу через SSH, публичный ключ взаимодействует с приватным и открывает доступ к удаленному управлению.
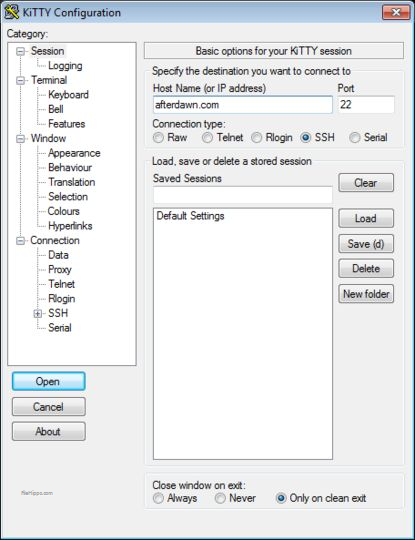
Генерирование ключа и подключение на Windows
Для удобства используем программу PuTTy. Вместе с ней устанавливается утилита PuTTYgen — в ней можно сгенерировать публичный и приватный ключи.
- Запустите программу PuTTYgen.
- Нажмите на кнопку Gengerate.
- Водите курсором мышки по рабочему столу, чтобы сгенерировать случайные значения ключей.
- Нажмите на кнопку Save private key, чтобы сохранить на жестком диске приватный ключ. Место хранения может быть любым — его нужно указать в параметрах PuTTY. Сделаем это позже.
- Скопируйте публичный ключ в буфер обмена (Ctrl + C) и закройте генератор ключей.
Теперь нужно перенести публичный ключ на сервер. Запустите программу PuTTY и подключитесь к серверу с помощью пароля. Затем последовательно введите следующие команды:
mkdir ~/.ssh

chmod 0700 ~/.ssh

touch ~/.ssh/authorized_keys

chmod 0644 ~/.ssh/authorized_keys
Эти команды создают на сервере папку и файл для хранения ключей, а также ограничивают к ним доступ — получить его может только владелец.
Следующий шаг — вставка публичного ключа из буфера обмена в файл authorized_keys. Для этого используется команда cat > .ssh/authorized_keys. После ввода команды щелкните по окну терминала правой кнопкой, чтобы вставить скопированный ранее публичный ключ. Для завершения ввода нажмите на сочетание клавиш Ctrl+D.
Вернитесь в настройки PuTTY. Перейдите в раздел Connection — SSH — Auth. Нажмите на кнопку Browse и укажите путь к приватному ключу, который вы ранее сохранили на жестком диске.
Теперь для подключения к серверу через SSH пароль не нужен — достаточно указать логин и IP-адрес сервера.
Генерирование ключа и подключение на Linux и macOS
Теперь посмотрим, как подключиться через SSH ключи на Linux и macOS.
- Запустите терминал на локальном компьютере.
- Выполните команду ssh-keygen, чтобы сгенерировать ключи.
- Нажмите на Enter, чтобы сохранить ключи.
Генератор предложит также задать кодовую фразу для ключа. Это дополнительная мера безопасности: если кто-то получит доступ к вашей локальной машине, то все равно не сможет подключиться к серверу через SSH. Минус один — вам тоже придется постоянно вводить ключевую фразу. Можно отказаться от этой меры защиты, просто нажав на клавишу Enter.
На этом процедура создания ключей завершена. Файлы d_rsa (приватный ключ) и id_rsa.pub (публичный ключ) хранятся в папке ~/.ssh/. Осталось скопировать открытую часть ключа на сервер.
- Вернитесь в терминал.
- Выполните команду ssh-copy-id root@185.104.114.90, где root — логин для подключения к серверу по SSH, а 185.104.114.90 — IP-адрес или хост сервера.
После выполнения этой команды публичный ключ будет скопирован на сервер. Теперь вы можете подключаться к удаленной машине с помощью логина и IP-адреса — например, ssh root@185.104.114.90. Ключи будут сопоставляться автоматически.
Отключение запроса пароля
Суть приватных ключей в том, что они хранятся на локальных компьютерах. Если вы попытаетесь подключиться к серверу с другой машины, на которой нет ключа, то снова увидите запрос на ввод пароля. Чтобы авторизоваться можно было только по ключу, запретите использование пароля.
- Подключитесь к удаленному серверу.
- Выполните команду sudo nano /etc/ssh/sshd_config. Файл sshd_config откроется во встроенном текстовом редакторе.
- Найдите строку PasswordAuthentication yes и измените ее на PasswordAuthentication no.
- Сохраните изменения и перезапустите службу SSH командой sudo service ssh restart.
Авторизация по паролю отключена. Теперь подключиться к серверу можно только с помощью пары ключей.
Опция idmap
Опция по умолчанию имеет значение . Если установить эту опцию в значение , то будет транслировать идентификаторы локального и удаленного пользователя. Звучит сложно, так что давайте разберем на примере:
- на сервере есть пользователь , равен
- на сервере есть пользователь , равен
- на клиенте есть пользователь , равен
- на клиенте есть пользователь , равен
Посмотрим владельца файлов на сервере в директории :
$ ls -l /var/www/ # показывается имя владельца
итого 12
drwxr-xr-x 6 developer www-data 4096 мая 31 14:45 host1.loc
drwxr-xr-x 2 developer www-data 4096 мая 31 09:07 host2.loc
drwxr-xr-x 2 developer www-data 4096 мая 31 08:55 html
$ ls -n /var/www/ # показывается UID владельца
итого 12
итого 12
drwxr-xr-x 6 1001 33 4096 мая 31 14:45 host1.loc
drwxr-xr-x 2 1001 33 4096 мая 31 09:07 host2.loc
drwxr-xr-x 2 1001 33 4096 мая 31 08:55 html
Смонтируем удаленную файловую систему без опции и посмотрим список файлов в директории :
$ sshfs developer@192.168.110.30:/var/www/ /home/evgeniy/var-www/
$ ls -l /home/evgeniy/var-www/ # показывается имя владельца
итого 12
drwxr-xr-x 1 backups www-data 4096 мая 31 14:45 host1.loc
drwxr-xr-x 1 backups www-data 4096 мая 31 09:07 host2.loc
drwxr-xr-x 1 backups www-data 4096 мая 31 08:55 html
$ ls -n /home/evgeniy/var-www/ # показывается UID владельца
итого 12
drwxr-xr-x 1 1001 33 4096 мая 31 14:45 host1.loc
drwxr-xr-x 1 1001 33 4096 мая 31 09:07 host2.loc
drwxr-xr-x 1 1001 33 4096 мая 31 08:55 html
Смонтируем удаленную файловую систему с опцией и посмотрим список файлов в директории :
$ sshfs -o idmap=user developer@192.168.110.30:/var/www/ /home/evgeniy/var-www/
$ ls -l /home/evgeniy/var-www/ # показывается имя владельца
итого 12
drwxr-xr-x 1 evgeniy www-data 4096 мая 31 14:45 host1.loc
drwxr-xr-x 1 evgeniy www-data 4096 мая 31 09:07 host2.loc
drwxr-xr-x 1 evgeniy www-data 4096 мая 31 08:55 html
$ ls -n /home/evgeniy/var-www/ # показывается UID владельца
итого 12
drwxr-xr-x 1 1000 33 4096 мая 31 14:45 host1.loc
drwxr-xr-x 1 1000 33 4096 мая 31 09:07 host2.loc
drwxr-xr-x 1 1000 33 4096 мая 31 08:55 html
Как видите, все просто. При использовании опции — все файлы, которые принадлежат на сервере пользователю , на клиенте принадлежат локальному пользователю . Утилита в процессе работы подменяет удаленного пользователя , который равен на локального пользователя , который равен . Если опция не используется, на локальной машине мы видим пользователя , потому что он совпадает с удаленного пользователя .
Эту опцию лучше использовать всегда. Либо, создать локального пользователя с таким же именем, как на сервере. И монтировать удаленную файловую систему от имени локального пользователя , передавая имя и пароль удаленного пользователя . Это не обязательно, но так проще не запутаться — почему файлы принадлежат пользователю и какое отношение он имеет к файлам веб-сервера? А никакого не имеет — просто совпали.
Поиск:
FTP • Linux • SSH • Директория • Клиент • Ключ • Настройка • Сервер • Установка • Файл • SSHFS
Настройка SSH
Открываем конфигурационный файл openssh:
vi /etc/ssh/sshd_config
Комментируем следующую строку:
#Subsystem sftp /usr/lib/openssh/sftp-server
Добавляем следующее (обязательно в самый конец файла).
Для определенного пользователя:
Subsystem sftp internal-sftp -f AUTH -l VERBOSE
Match user sftpuser
ChrootDirectory %h
ForceCommand internal-sftp
AllowTcpForwarding no
* где sftpuser — имя пользователя, для которого срабатывает набор правил; %h (home directory) — домашняя директория пользователя (здесь также можно указать конкретный каталог); ForceCommand internal-sftp — использовать только sftp, встроенный в ssh.
** если данные строки добавить не в конец файла, сервис ssh может не запуститься.
Для группы пользователей:
Subsystem sftp internal-sftp -f AUTH -l VERBOSE
Match group sftpgroup
ChrootDirectory /home/%u
ForceCommand internal-sftp
AllowTcpForwarding no
* как видим, в данном примере все то же самое — только меняем user на group. /home/%u — другой способ прописать путь к домашней директории (/home + имя пользователя).
После перезапускаем службу:
systemctl restart ssh || systemctl restart sshd || service ssh restart || service sshd restart
* команда рассчитана на запуск в разных версиях Linux (CentOS / Ubuntu / Red Hat / Debian и так далее, а также на базе systemd или ранних версий), так как служба может называться ssh или sshd.
Mounting the Remote File System #
The following instructions are applicable for all Linux distributions and macOS.
To mount a remote directory the SSH user needs to be able to access it. The SSHFS mount command takes the following form:
The sshfs command will read the SSH Config File and use per host settings. If the remote directory is not specified, it defaults to the remote user home directory.
For example, to mount the home directory of a user named “linuxize” on a remote host with IP address of “192.168.121.121”, first create a directory that will serve as a mount point, it can be any location you want:
Then use the sshfs command to mount the remote directory:
You will be prompted to enter the user password. To avoid typing the password each time you mount the remote directory generate SSH keys and setup Passwordless SSH Login .
Now you can interact with the directories and files located on a remote server in the same way as you do with the local files. For example, you can edit, delete, rename or create new files and directories.
If you want to permanently mount the remote directory you need to edit the local machine’s file an add a new mount entry. This way when your system boot up it will automatically mount the remote directory.
To mount a remote directory over SSHFS from , use as the filesystem type.
/etc/fstab
When creating a persistent mount make sure you can connect the remote host using the SSH key-based authentication.
Mounting the Remote File System on Windows
Windows users can use the Windows Explorer to map a network drive to the remote directory on the SSH server.
Open Windows Explorer, right-click on “This PC” and select “Map network drive”. Choose a drive to mount at and in the “Folder” field enter the remote user, server, and path in the following format:
At the time of writing this article SSHFS-Win doesn’t support key-based authentication so the remote ssh server needs to be configured to accept password-based authentication.
For more detailed information check the SSHFS-Win manual.
Automounting
Automounting can happen on boot, or on demand (when accessing the directory). For both, the setup happens in the fstab.
Note: Keep in mind that automounting is done through the root user, therefore you cannot use hosts configured in of your normal user.
To let the root user use an SSH key of a normal user, specify its full path in the option.
And most importantly, use each sshfs mount at least once manually while root so the host’s signature is added to the file.
On demand
This article or section needs expansion.
With systemd on-demand mounting is possible using entries.
Example:
user@host:/remote/folder /mount/point fuse.sshfs noauto,x-systemd.automount,_netdev,users,idmap=user,IdentityFile=/home/user/.ssh/id_rsa,allow_other,reconnect 0 0
The important mount options here are noauto,x-systemd.automount,_netdev.
- noauto tells it not to mount at boot
- x-systemd.automount does the on-demand magic
- _netdev tells it that it is a network device, not a block device (without it «No such device» errors might happen)
Note: After editing , (re)start the required service: where can be found by running
On boot
An example on how to use sshfs to mount a remote filesystem through
USERNAME@HOSTNAME_OR_IP:/REMOTE/DIRECTORY /LOCAL/MOUNTPOINT fuse.sshfs defaults,_netdev 0 0
Take for example the fstab line
llib@192.168.1.200:/home/llib/FAH /media/FAH2 fuse.sshfs defaults,_netdev 0 0
The above will work automatically if you are using an SSH key for the user. See Using SSH Keys.
If you want to use sshfs with multiple users:
user@domain.org:/home/user /media/user fuse.sshfs defaults,allow_other,_netdev 0 0
Again, it is important to set the _netdev mount option to make sure the network is available before trying to mount.
Secure user access
When automounting via fstab, the filesystem will generally be mounted by root. By default, this produces undesireable results if you wish access as an ordinary user and limit access to other users.
An example mountpoint configuration:
USERNAME@HOSTNAME_OR_IP:/REMOTE/DIRECTORY /LOCAL/MOUNTPOINT fuse.sshfs noauto,x-systemd.automount,_netdev,user,idmap=user,follow_symlinks,identityfile=/home/USERNAME/.ssh/id_rsa,allow_other,default_permissions,uid=USER_ID_N,gid=USER_GID_N 0 0
Summary of the relevant options:
- allow_other — Allow other users than the mounter (i.e. root) to access the share.
- default_permissions — Allow kernel to check permissions, i.e. use the actual permissions on the remote filesystem. This allows prohibiting access to everybody otherwise granted by allow_other.
- uid, gid — set reported ownership of files to given values; uid is the numeric user ID of your user, gid is the numeric group ID of your user.
Install SSHFS
Assuming you already have a working SSH setup on the server side, you need just another application there, a SFTP server.
Installing OpenSSH SFTP server is quite easy, almost every Linux distros have prebuilt packages for that.
In Debian or other Debian derivatives install the openssh-sftp-server package.
sudo apt-get install openssh-sftp-server
On OpenWrt, install the package is also openssh-sftp-server , so if you want SSHFS on OpenWrt, install it with opkg,
opkg update && opkg install openssh-sftp-server
Thankfully SSHFS works fine on OpenWrt with the default dropbear based ssh server.
Try AmazonPrime for free Enjoy free shipping and One-Day delivery, cancel any time. |
On the client side you need to install the SSHFS client, on Debian or other Debian derivatives like Ubuntu, Linux Mint install the sshfs package.
sudo apt-get install sshfs
That’s all you need to install and configure for a basic setup.
Основные команды SFTP
Оказавшись в командной строке можно получить список доступных команд с помощью команды
> help
Available commands:
bye                                Quit sftp
cd path                            Change remote directory to 'path'
chgrp grp path                     Change group of file 'path' to 'grp'
chmod mode path                    Change permissions of file 'path' to 'mode'
chown own path                     Change owner of file 'path' to 'own'
df                      Display statistics for current directory or
                                   filesystem containing 'path'
exit                               Quit sftp
get  remote        Download file
reget  remote       Resume download file
reput   remote      Resume upload file
help                               Display this help text
lcd path                           Change local directory to 'path'
lls ]            Display local directory listing
lmkdir path                        Create local directory
ln  oldpath newpath            Link remote file (-s for symlink)
lpwd                               Print local working directory
ls               Display remote directory listing
lumask umask                       Set local umask to 'umask'
mkdir path                         Create remote directory
progress                           Toggle display of progress meter
put  local        Upload file
pwd                                Display remote working directory
quit                               Quit sftp
rename oldpath newpath             Rename remote file
rm path                            Delete remote file
rmdir path                         Remove remote directory
symlink oldpath newpath            Symlink remote file
version                            Show SFTP version
!command                           Execute 'command' in local shell
!                                  Escape to local shell
?                                  Synonym for help
Текущий рабочий каталог:
> pwd # удаленный рабочий каталог
> lpwd # локальный рабочий каталог
Изменить рабочую директорию:
> cd uploads # сменить директорию на удаленной системе
> lcd uploads # сменить директорию на локальной системе
Список файлов и директорий:
> ls # список на удаленной системе
> lls # список на локальной системе
Загрузить на удаленную систему файл или директорию:
> put image.jpg # загрузить файл
> put -r images/ # загрузить директорию
Скачать с удаленной системы файл или директорию:
> get image.jpg # скачать файл
> get -r images/ # скачать директорию
Создать директорию:
> mkdir images # создать директорию на удаленной системе
> lmkdir images # создать директорию на локальной системе
Удалить директорию:
> rmdir images # удалить директорию на удаленной системе
> !rmdir images # удалить директорию на локальной системе
Выполнить произвольную команду на локальной системе:
> !команда
Выполнить несколько команд на локальной системе:
> ! # временно выходим из командной строки sftp
$ команда # выполняем команду в shell (bash)
$ команда # выполняем команду в shell (bash)
$ exit # возвращаемся к командной строке sftp
>
Завершить сеанс:
> exit # или quit или bye
Поиск:
CLI • Linux • SSH • Ubuntu • Директория • Конфигурация • Настройка • Сервер • Файл