Настройка балансирующего прокси nginx с сертификатом let’s encrypt в centos 7
Содержание:
- Further Reading
- Book Service
- Config Server
- Установка Nginx
- HTML верстка и анализ содержания сайта
- Overview
- 2. Maven Configuration
- 3. Zuul Properties
- 4. The API
- 5. The UI Application
- 7. A Custom Zuul Filter
- 8. Test Custom Zuul Filter
- 9. Conclusion
- Анализ поисковых запросов сайта
- Discovery
- Available Options:
- Создание микросервисов
- The UI Application
- Демонстрационный Upstream-сервер
- Заключение
Further Reading
If you need some kind of fallback, in the case of service unavailability, you can add to your classpath and build your client with the HystrixFeign.builder() instead.
To learn more about Hystrix, please follow this dedicated tutorial series.
If you want to integrate Spring Cloud Netflix Hystrix with Feign, you can read more about this here.
It’s also possible to add client-side load-balancing and/or service discovery to your client.
The former is done by adding to your classpath and call the builder like so:
For service discovery, you have to build up your service with Spring Cloud Netflix Eureka enabled. Then simply integrate with Spring Cloud Netflix Feign and you get Ribbon load-balancing for free. More about this can be found here.
Book Service
In microservice architecture, we are free to make as many applications to meet a business objective. Often engineers will divide their services by domain. We will follow this pattern and create a book service to handle all the operations for books in our application.
5.1. Setup
One more time. Navigate to https://start.spring.io. Set the artifact to “book-service”. Search for “web” and add that dependency. Search for “config client” and add that dependency. Search for “eureka discovery” and add that dependency. Generate that project.
Alternatively, add these dependencies to a project:
For reference, we can find the bundle on Maven Central (, , ).
5.2. Spring Config
Let’s modify our main class:
We also added a REST controller and a field set by our properties file to return a value we will set during configuration.
Let’s now add the book POJO:
5.3. Properties
Now we just need to add our two properties files:
bootstrap.properties in src/main/resources:
book-service.properties in our Git repository:
Let’s commit the changes to the repository.
5.4. Run
Once all the other applications have started we can start the book service. The console output should look like:
Once it is up we can use our browser to access the endpoint we just created. Navigate to http://localhost:8080/book-service/books and we get back a JSON object with two books we added in out controller. Notice that we are not accessing book service directly on port 8083 but we are going through the gateway server.
Config Server
When developing a cloud application, one issue is maintaining and distributing configuration to our services. We really don’t want to spend time configuring each environment before scaling our service horizontally or risk security breaches by baking our configuration into our application.
To solve this, we will consolidate all of our configuration into a single Git repository and connect that to one application that manages a configuration for all our applications. We are going to be setting up a very simple implementation.
To learn more details and see a more complex example, take a look at our Spring Cloud Configuration article.
2.1. Setup
Navigate to https://start.spring.io and select Maven and Spring Boot 2.2.x.
Set the artifact to “config“. In the dependencies section, search for “config server” and add that module. Then press the generate button and we’ll be able to download a zip file with a preconfigured project inside and ready to go.
Alternatively, we can generate a Spring Boot project and add some dependencies to the POM file manually.
These dependencies will be shared between all the projects:
Let’s add a dependency for the config server:
For reference, we can find the latest version on Maven Central (, , ).
2.2. Spring Config
To enable the configuration server we must add some annotations to the main application class:
@EnableConfigServer will turn our application into a configuration server.
2.3. Properties
Let’s add the application.properties in src/main/resources:
The most significant setting for the config server is the git.uri parameter. This is currently set to a relative file path that generally resolves to c:\Users\{username}\ on Windows or /Users/{username}/ on *nix. This property points to a Git repository where the property files for all the other applications are stored. It can be set to an absolute file path if necessary.
Tip: On a windows machine preface the value with “file:///”, on *nix then use “file://”.
2.4. Git Repository
Navigate to the folder defined by spring.cloud.config.server.git.uri and add the folder application-config. CD into that folder and type git init. This will initialize a Git repository where we can store files and track their changes.
2.5. Run
Let’s run config server and make sure it is working. From the command line type mvn spring-boot:run. This will start the server.
We should see this output indicating the server is running:
2.6. Bootstrapping Configuration
In our subsequent servers, we’re going to want their application properties managed by this config server. To do that, we’ll actually need to do a bit of chicken-and-egg: Configure properties in each application that know how to talk back to this server.
It’s a bootstrap process, and each one of these apps is going to have a file called bootstrap.properties. It will contain properties just like application.properties but with a twist:
A parent Spring ApplicationContext loads the bootstrap.properties first. This is critical so that Config Server can start managing the properties in application.properties. It’s this special ApplicationContext that will also decrypt any encrypted application properties.
It’s smart to keep these properties files distinct. bootstrap.properties is for getting the config server ready, and application.properties is for properties specific to our application. Technically, though, it’s possible to place application properties in bootstrap.properties.
Lastly, since Config Server is managing our application properties, one might wonder why have an application.properties at all? The answer is that these still come in handy as default values that perhaps Config Server doesn’t have.
Установка Nginx
В этой части урока мы установим Nginx и настроим его для балансировки трафика между двумя upstream-серверами, запущенными ранее с поддержкой сертификата LE. Установка из пакетов выполняется стандартным способом:
sudo yum install -y nginx
Теперь настроим конфигурацию для сайта, создав новый файл настроек для виртуального хоста — /etc/nginx/conf.d/ngx.cs2.netpoint-dc.com.conf. Добавим в него следующее содержимое:
# переадресация с HTTP на HTTPS
#
server {
    if ($host = ngx.cs2.netpoint-dc.com) {
        return 301 https://$host$request_uri;
    }

    listen 80;
    listen :80;
    server_name ngx.cs2.netpoint-dc.com;
}

# upstream-серверы для балансировки (python)
#
upstream dirlist {
        ip_hash; # липкая балансировка по IP-клиента
        server 127.0.0.1:8081;
        server 127.0.0.1:8082;
}

# обработка SSL и соединение с upstream-серверами
#
server {
  listen 443 ssl;
  listen :443 ssl;
  server_name ngx.cs2.netpoint-dc.com;
  ssl_certificate /etc/letsencrypt/live/ngx.cs2.netpoint-dc.com/fullchain.pem;
  ssl_certificate_key /etc/letsencrypt/live/ngx.cs2.netpoint-dc.com/privkey.pem;
  access_log /var/log/nginx/website_access.log;
  error_log /var/log/nginx/website_error.log;

  # все запросы отправляем на upstream
  location / {
    proxy_pass http://dirlist/;
  }
}
Теперь активируем созданный виртуальный хост:
sudo nginx -t && sudo systemctl restart nginx
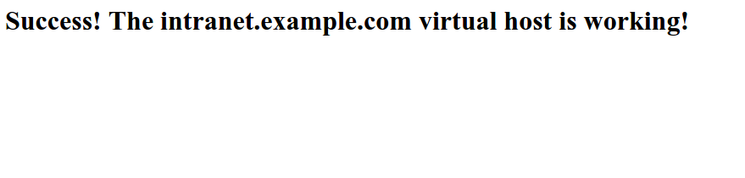
Теперь при заходе через браузер на https://ngx.cs2.netpoint-dc.com/ вы будете видеть содержимое каталога, который отдается одним из upstream-серверов. В нашей настройке мы использовали ключевой слово ip_hash, что говорит Nginx делать липкую баансировку. Это означает, что до тех пор пока upstream-сервер, на который были распределены запросы от вашего IP работает, вы будете обслуживаться на нем.
Nginx поддерживает и другие способы, кроме ip_hash, например, least_conn, при этом Nginx будет выбирать наименее загруженный upstream-сервер.
HTML верстка и анализ содержания сайта
Размещённая в данном блоке информация используется оптимизаторами для контроля наполнения контентом главной страницы сайта, количества ссылок, фреймов, графических элементов, объёма теста, определения «тошноты» страницы.
Отчёт содержит анализ использования Flash-элементов, позволяет контролировать использование на сайте разметки (микроформатов и Doctype).
IFrame – это плавающие фреймы, которые находится внутри обычного документа, они позволяет загружать в область заданных размеров любые другие независимые документы.
Flash — это мультимедийная платформа компании для создания веб-приложений или мультимедийных презентаций. Широко используется для создания рекламных баннеров, анимации, игр, а также воспроизведения на веб-страницах видео- и аудиозаписей.
Микроформат — это способ семантической разметки сведений о разнообразных сущностях (событиях, организациях, людях, товарах и так далее) на веб-страницах с использованием стандартных элементов языка HTML (или XHTML).
Overview
In this article, we’ll explore the communication between a front-end application and a REST API that are deployed separately.
The goal is to work around CORS and the Same Origin Policy restriction of the browser and allow the UI to call the API even though they don’t share the same origin.
We’ll basically create two separate applications – a UI application and a simple REST API, and we’ll use the Zuul proxy in the UI application to proxy calls to the REST API.
Zuul is a JVM based router and server side load balancer by Netflix. And Spring Cloud has a nice integration with an embedded Zuul proxy – which is what we’ll use here.
2. Maven Configuration
First, we need to add a dependency to the zuul support from Spring Cloud to our UI application’s pom.xml:
The latest version can be found here.
3. Zuul Properties
Next – we need to configure Zuul, and since we’re using Spring Boot, we’re going to do that in the application.yml:
Note that:
- We are proxying to our resource server Foos.
- All requests from the UI that starts with “/foos/” will be routed to our Foos Resource server at http://loclahost:8081/spring-zuul-foos-resource/foos/
4. The API
Our API application is a simple Spring Boot app.
Within this article, we’re going to consider the API deployed in a server running on port 8081.
Let’s first define the basic DTO for the Resource we’re going to be using:
And a simple controller:
5. The UI Application
Our UI application is also a simple Spring Boot application.
Within this article, we’re going to consider the API deployed in a server running on port 8080.
Let’s start with the main index.html – using a bit of AngularJS:
The most important aspect here is how we’re accessing the API using relative URLs!
Keep in mind that the API application isn’t deployed on the same server as the UI application, so relative URLs shouldn’t work, and won’t work without the proxy.
With the proxy, however, we’re accessing the Foo resources through the Zuul proxy, which is of course configured to route these requests to wherever the API is actually deployed.
And finally, the actually Boot enabled application:
Beyond the simple Boot annotation, notice that we’re using the enable-style of annotation for the Zuul proxy as well, which is pretty cool, clean and concise.
7. A Custom Zuul Filter
There are multiple Zuul filters available, and we can also create our own custom one:
This simple filter just adds a header called “Test” to the request – but of course, we can get as complex as we need to here augment our requests.
8. Test Custom Zuul Filter
Finally, let’s test make sure our custom filter is working – first we will modify our FooController at Foos resource server:
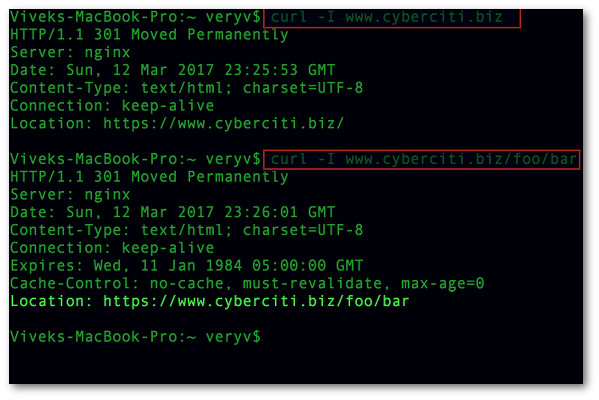
Now – let’s test it out:
9. Conclusion
In this write-up, we focused on using Zuul to route requests from a UI application to a REST API. We successfully worked around CORS and the same-origin policy and we also managed to customize and augment the HTTP request in transit.
The full implementation of this tutorial can be found in the GitHub project – this is a Maven-based project, so it should be easy to import and run as it is.
Анализ поисковых запросов сайта
Приведённый выше отчёт по частотности использования поисковых запросов, может быть использован оптимизаторами сайта при составлении его семантического ядра и подготовке контента т.н. «посадочных страниц». Статистика поисковых запросов — обобщённая сгруппированная информация по «обращениям» пользователей к поисковой системе по ключевым запросам (фразам).
В большинстве случаев, наш сервис показывает уже сгруппированную информацию, содержащую не только подборку самых популярных слов (фраз), но и словосочетания + синонимы. Собранная в данном разделе статистика показывает по каким «ключевым словам» (поисковым запросам) пользователи переходят на сайт localhost-8080.com.
Поисковый запрос – это слово или словосочетание, которое пользователь вводит в форму поиска на сайте поисковой системы, с учётом автоподбора и автоматического исправления в поиске ошибочного набора.
Discovery
Now that we have configuration taken care of, we need a way for all of our servers to be able to find each other. We will solve this problem by setting the Eureka discovery server up. Since our applications could be running on any ip/port combination we need a central address registry that can serve as an application address lookup.
When a new server is provisioned it will communicate with the discovery server and register its address so that others can communicate with it. This way other applications can consume this information as they make requests.
To learn more details and see a more complex discovery implementation take a look at Spring Cloud Eureka article.
3.1. Setup
Again we’ll navigate to start.spring.io. Set the artifact to “discovery”. Search for “eureka server” and add that dependency. Search for “config client” and add that dependency. Finally, generate the project.
Alternatively, we can create a Spring Boot project, copy the contents of the POM from config server and swap in these dependencies:
For reference, we’ll find the bundles on Maven Central (, ).
3.2. Spring Config
Let’s add Java config to the main class:
@EnableEurekaServer will configure this server as a discovery server using Netflix Eureka. Spring Boot will automatically detect the configuration dependency on the classpath and lookup the configuration from the config server.
3.3. Properties
Now we will add two properties files:
First, we add bootstrap.properties into src/main/resources:
These properties will let discovery server query the config server at startup.
And second, we add discovery.properties to our Git repository
The filename must match the spring.application.name property.
In addition, we are telling this server that it is operating in the default zone, this matches the config client’s region setting. We are also telling the server not to register with another discovery instance.
In production, we’d have more than one of these to provide redundancy in the event of failure and that setting would be true.
Let’s commit the file to the Git repository. Otherwise, the file will not be detected.
3.4. Add Dependency to the Config Server
Add this dependency to the config server POM file:
For reference, we can find the bundle on Maven Central ().
Add these properties to the application.properties file in src/main/resources of the config server:
3.5. Run
Start the discovery server using the same command, mvn spring-boot:run. The output from the command line should include:
Stop and rerun the config service. If all is good output should look like:
Available Options:
or Port to use (defaults to 8080)
Address to use (defaults to 0.0.0.0)
Show directory listings (defaults to )
Display autoIndex (defaults to )
or When enabled (defaults to ) it will serve in place of when a gzipped version of the file exists and the request accepts gzip encoding. If brotli is also enabled, it will try to serve brotli first.
or When enabled (defaults to ) it will serve in place of when a brotli compressed version of the file exists and the request accepts encoding. If gzip is also enabled, it will try to serve brotli first.
or Default file extension if none supplied (defaults to )
or Suppress log messages from output
Enable CORS via the header
Open browser window after starting the server. Optionally provide a URL path to open. e.g.: -o /other/dir/
Set cache time (in seconds) for cache-control max-age header, e.g. for 10 seconds (defaults to ). To disable caching, use .
or Use UTC time format in log messages.
Enable logging of the client’s IP address (default: ).
Username for basic authentication
Password for basic authentication
or Enable https.
or Path to ssl cert file (default: ).
or Path to ssl key file (default: ).
or Provide a /robots.txt (whose content defaults to )
Do not show dotfiles
or Print this list and exit.
or Print the version and exit.
Создание микросервисов
Сервисы были написаны на Java 11 с использованием Spring Boot. Межсервисное взаимодействие организовано с использованием REST. Проект будет включать в себя минимальное количество тестов (чтобы потом было, что тестировать в Jenkins). Исходный код сервисов доступен на GitHub: и .
Чтобы иметь иметь возможность проверить состояние каждого из сервисов, в их зависимости был добавлен Spring Actuator. Он создаст эндпойнт /actuator/health и будет возвращать 200 статус, если сервис готов принимать траффик, или 504 в случае проблем. В данном случае это довольно фиктивная проверка, так как сервисы очень просты, и при каком-то форсмажоре они скорее станут полностью недоступны, чем сохранят частичную работоспособность. Но в реальных системах Actuator может помочь диагностировать проблему до того, как об нее начнут биться пользователи. Например, при возникновении проблем с доступом к БД, мы сможем автоматически на это среагировать, прекратив обрабатывать запросы сломанным экземпляром сервиса.
Сервис бекенда будет просто считать и отдавать количество принятых запросов.
Код контроллера:
Тест на контроллер:
Сервис Gateway
Шлюз будет переадресовывать запрос сервису бекенда, дополняя его следующей информацией:
id шлюза
Он нужен, чтобы можно было по ответу сервера отличить один экземпляр шлюза от другого
Некий «секрет», который будет играть роль очень важного пароля (№ ключа шифрования важной куки). Конфигурация в application.properties:
Конфигурация в application.properties:
Адаптер для связи с бекендом:
Контроллер:
Запуск:
Запускаем бекенд:
Запускаем шлюз:
Проверяем:
Все работает. Внимательный читатель отметит, что нам ничего не мешает обратиться к бекенду напрямую в обход шлюза (). Чтоб это исправить, сервисы должны быть объединены в одну сеть, а наружу «торчать» должен только шлюз.
Также оба сервиса делят одну файловую систему, плодят потоки и в один момент могут начать мешать друг другу. Было бы неплохо изолировать наши микросервисы. Этого можно достичь с помощью разнесения приложений по разным машинам (много денег, сложно), использования виртуальных машин (ресурсоемко, долгий запуск) или же с помощью контейнеризации. Ожидаемо выбираем третий вариант и как инструмент для контейнеризации.
The UI Application
Our UI application is also a simple Spring Boot application.
Within this article, we’re going to consider the API deployed in a server running on port 8080.
Let’s start with the main index.html – using a bit of AngularJS:
The most important aspect here is how we’re accessing the API using relative URLs!
Keep in mind that the API application isn’t deployed on the same server as the UI application, so relative URLs shouldn’t work, and won’t work without the proxy.
With the proxy, however, we’re accessing the Foo resources through the Zuul proxy, which is of course configured to route these requests to wherever the API is actually deployed.
And finally, the actually Boot enabled application:
Beyond the simple Boot annotation, notice that we’re using the enable-style of annotation for the Zuul proxy as well, which is pretty cool, clean and concise.
Демонстрационный Upstream-сервер
Для демонстрации будем использовать тривиальный HTTP-сервер, реализованный на Python:
sudo yum install -y nano python36

python36 -m http.server <PORT> --bind 127.0.0.1
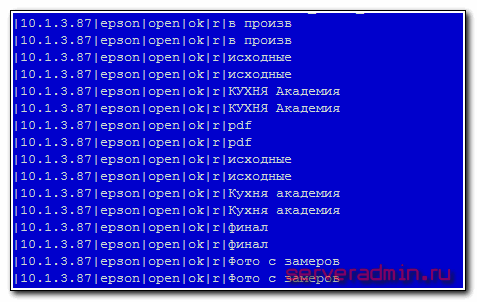
Эта команда создает тривиальный HTTP-сервер, который просто выводит структуру каталога, в котором запущен. Вы можете запустить его на локальной машине, например, на 8000 порту и проверить его работу через браузер или curl:
curl http://localhost:8000/
Для целей урока на сервере, где будет настраиваться Nginx, мы так же запустим два сервера — один на порту 8081, второй на порту 8082.
Будем использовать различные каталоги, чтобы нагляднее видеть как меняется поведение. Эти серверы не будут доступны извне, но будут использоваться в качестве Upstream-серверов, между которых будет распределять трафик Nginx:
cd /tmp; python36 -m http.server 8081 --bind 127.0.0.1 &
cd /usr; python36 -m http.server 8082 --bind 127.0.0.1 &
Обратите внимание на символ ‘&‘ в конце строки — это означает, что процесс будет запущен в фоновом режиме. Вы не должны закрывать терминал, в котором запустили эти процессы до окончания урока
Проверьте работоспособность обоих серверов с помощью curl, соединившись с ними:
curl http://localhost:8081/
curl http://localhost:8082/
Заключение
Вы научились создавать базовый проксирующий сервер Nginx с поддержкой сертификата Let’s Encrypt, освоили настройку секции upstream Nginx, которая позволяет балансировать нагрузку между несколькими серверами, познакомились с директивой балансировщика ip_hash, предназначенной для реализации липкой балансировки.
Вам могут быть интересны следующие статьи:
- Как установить сервер WordPress с Nginx, PHP-FPM и MariaDB и сертификатом Let’s Encrypt в CentOS 7https://netpoint-dc.com/blog/kak-ustanovit-wordpress-nginx-php-fpm-mariadb-v-centos-7/
- Защита, оптимизация и повышение производительности сайта с помощью CDN CloudFlare