Настройка сервера centos 7 после установки
Содержание:
Disabling SELinux
It is possible to disable SELinux temporarily or permanently. Each has its own advantages. Doing it temporarily will allow us to test without sacrificing the security of the system. Once the system is restarted, SELinux will be activated again.
On the other hand, if we deactivate SELinux permanently, we will be able to work faster especially if it is a personal or medium sized project. We must bear in mind that, at this point, most Linux distributions have very good security policies so we can afford it.
In this post, we will teach you how to do it both ways.
Disable SELinux Temporarily on CentOS 7
First, we need to access the server using SSH. If you have any questions about how to do it, check out our SSH tutorial! Run the following command:
ssh your-user@your-server
On the other hand, if we are using CentOS on our personal computer, we just need to open the terminal.
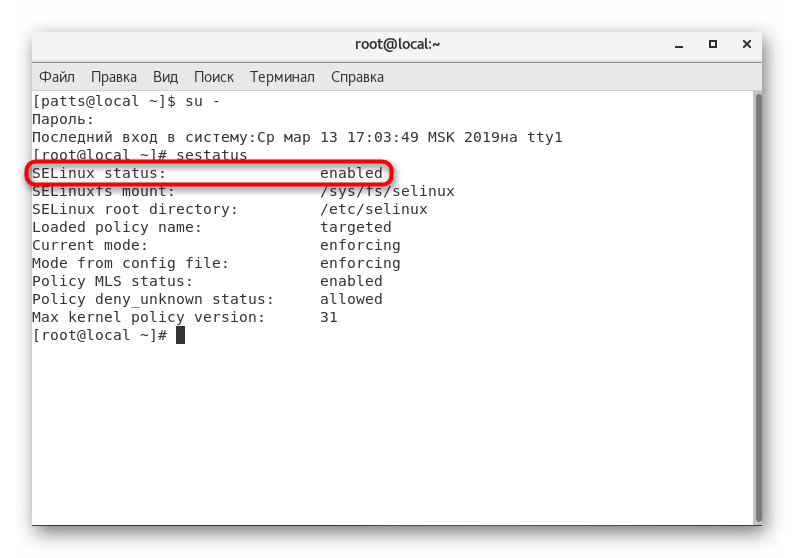
After that, we have to verify the status of SELinux. It is quite simple and we can do it with the following command:
sestatus
In the output we will be notified that, SELinux is enabled with the enforcing state.
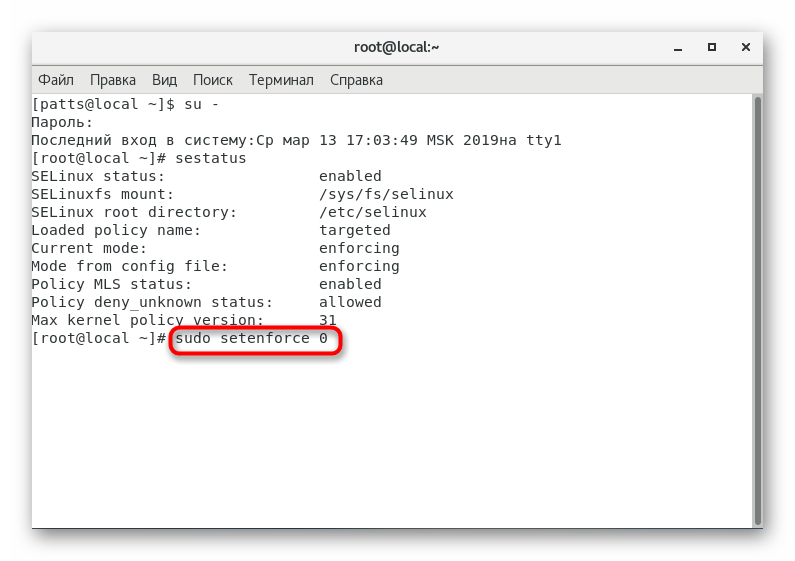
To disable it temporarily we just run the following command:
su
setenforce 0
Now, we need to check the SELinux status again.
The output will show that SELinux is now in permissive mode, meaning we can use the system easily.
As it is temporarily disabled, changes will be made automatically, at the time of restart, when SELinux is restarted. The main advantage of this method is that it is not necessary to reboot the system.
Disable SELinux permanently on CentOS 7
To permanently disable SELinux, we’ll need need to edit a configuration file.
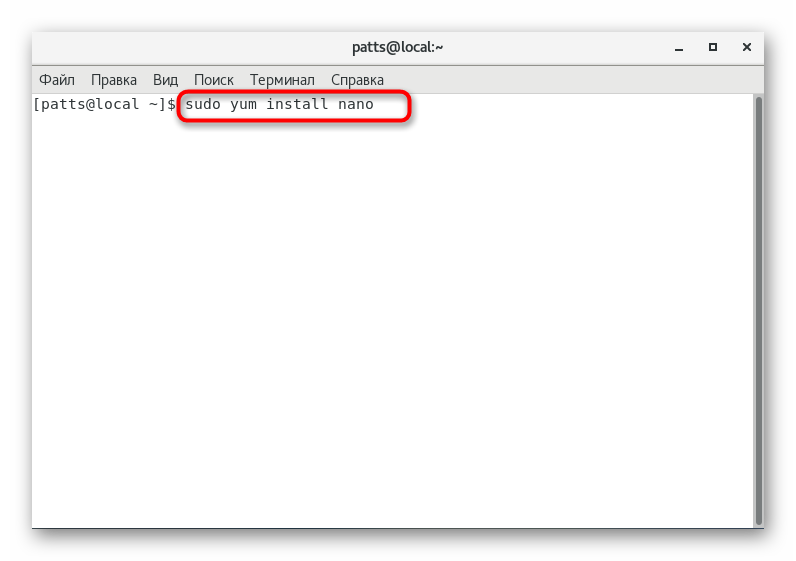
First, let’s install the nano text editor:
yum install nano
After that, we need to edit the selinux configuration file.
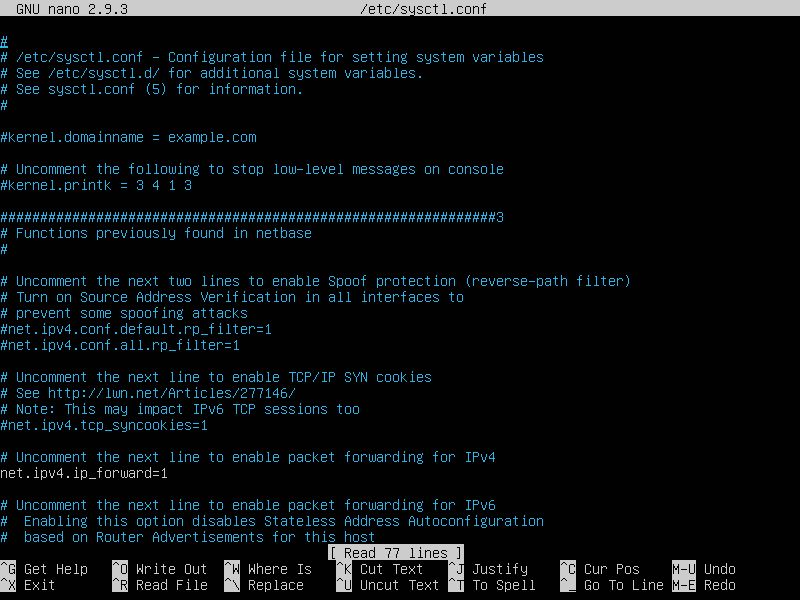
nano /etc/sysconfig/selinux
We will edit the value of SELINUX. The file is very descriptive and shows the different values we can assign. In other words, the different states that SELinux can take.
In this case, to disable it completely, we have to set the value to Disabled.
SELINUX=disabled
Then, we have to save the file by hitting CTRL+O and close it with CTRL+X. For all this to work, we need to reboot the system, and then we can check if the update worked by executing this command in the command line:
sestatus
This we will have disabled SELinux in CentOS 7.
Полезные команды для управления Apache в Linux
Для работы с веб – приложениями
В этом руководстве мы опишем некоторые из наиболее часто используемых команд управления службами Apache (HTTPD) , которые полезно знать, разработчику или системному администратору, и держать эти команды под рукой. Мы покажем команды для Systemd и SysVinit.

Убедитесь, что следующие команды должны выполняться от имени пользователя root или sudo и работать с любым дистрибутивом Linux, таким как CentOS, RHEL, Fedora, Debian и Ubuntu.
Установка Apache Server
Чтобы установить веб-сервер Apache, используйте ваш стандартный менеджер пакетов, как показано ниже.
Проверка версии Apache
Чтобы проверить установленную версию вашего веб-сервера Apache в вашей системе Linux, выполните следующую команду.
Если вы хотите увидеть номер версии Apache и параметры компиляции, используйте флаг -V, как показано ниже.
Проверка на ошибки синтаксиса конфигурации Apache
Чтобы проверить ваши файлы конфигурации Apache на наличие любых синтаксических ошибок, выполните следующую команду, которая проверит правильность файлов конфигурации, прежде чем перезапускать службу.
Запуск сервиса Apache
Чтобы запустить службу Apache, выполните следующую команду.
Включение службы Apache
Предыдущая команда пока только запускает службу Apache, чтобы включить автозапуск при загрузке системы, выполните следующую команду.
Перезапуск службы Apache
Чтобы перезапустить Apache (остановить, а затем запустить службу), выполните следующую команду.
Просмотр состояния сервиса Apache
Чтобы проверить информацию о состоянии времени выполнения службы Apache, выполните следующую команду.
Перезагрузка сервиса Apache
Если вы внесли какие-либо изменения в конфигурацию сервера Apache, вы можете указать службе перезагрузить свою конфигурацию, выполнив следующую команду.
Остановка службы Apache
Чтобы остановить службу Apache, используйте следующую команду.
Показать справку Apache Command
И последнее, но не менее важное: вы можете получить справку о служебных командах Apache в systemd, выполнив следующую команду. На этом пока все! В этой статье мы объяснили наиболее часто используемые команды управления службами Apache / HTTPD, которые полезно будет знать, включая запуск, включение, перезапуск и остановку Apache
На этом пока все! В этой статье мы объяснили наиболее часто используемые команды управления службами Apache / HTTPD, которые полезно будет знать, включая запуск, включение, перезапуск и остановку Apache.
Пожалуйста, расскажите почему?
Нам жаль, что статья не была полезна для вас Пожалуйста, если не затруднит, укажите по какой причине? Мы будем очень благодарны за подробный ответ. Спасибо, что помогаете нам стать лучше!
Подпишитесь на нашу еженедельную рассылку, и мы будем присылать самые интересные публикации Просто оставьте свои данные в форме ниже.
baltun
Бывает нужно узнать версию установленного программного обеспечения на веб-сервере. Для этого можно использовать соответствующие SSH команды.
Как узнать версию PHP из командной строки?
Setting Up a Test System
To help us learn the concepts, we will build a test server running both a web and an SFTP server. We will start with a bare installation of CentOS 7 with minimal packages installed and install the Apache and vsftp daemons on that server. However, we will not configure either of these applications.
We will also create a few test user accounts in our cloud server. We will use these accounts in different places throughout the lesson.
Finally, we will install needed SELinux-related packages. This is to ensure we can work with the latest SELinux commands.
Installing Apache and SFTP Services
First, let’s log in to the server as the root user and run the following command to install Apache:
The output will show the package being downloaded and ask you for permission to install:
Pressing y will install the Apache web server daemon.
Start the daemon manually:
Running the command will show the service is now running:
Next we will install vsftp:
The output should look similar to the following:
Press y to install the package.
Next, we will use the command to start the vsftpd daemon. The output should show something like the following:
Installing SELinux Packages
A number of packages are used in SELinux. Some are installed by default. Here is a list for Red Hat-based distributions:
- policycoreutils (provides utilities for managing SELinux)
- policycoreutils-python (provides utilities for managing SELinux)
- selinux-policy (provides SELinux reference policy)
- selinux-policy-targeted (provides SELinux targeted policy)
- libselinux-utils (provides some tools for managing SELinux)
- setroubleshoot-server (provides tools for deciphering audit log messages)
- setools (provides tools for audit log monitoring, querying policy, and file context management)
- setools-console (provides tools for audit log monitoring, querying policy, and file context management)
- mcstrans (tools to translate different levels to easy-to-understand format)
Some of these are installed already. To check what SELinux packages are installed on your CentOS 7 system, you can run a few commands like the one below (with different search terms after ) as the root user:
The output should look something like this:
You can go ahead and install all the packages with the command below (yum will just update any you already have), or just the ones that you find missing from your system:
Now we should have a system that’s loaded with all the SELinux packages. We also have Apache and SFTP servers running with their default configurations. We also have four regular user accounts ready for testing in addition to the root account.
Toggling the SELinux modes temporarily
To switch between the SELinux modes temporarily we can use the setenforce command as shown below :
# setenforce
0 –> Permissive
1 –> Enforcing
Or you can simply echo the values into the pseudo file – /sys/fs/selinux/enforce or /selinux/enforce.
# echo > /sys/fs/selinux/enforce
To check the current mode of SELinux :
# getenforce
Enforcing
or we can also use the sestatus command to get a detailed status :
# sestatus
SELinux status:                 enabled
SELinuxfs mount:                /selinux        --> virtual FS similar to /proc
Current mode:                   enforcing       --> current mode of operation
Mode from config file:          permissive      --> mode set in the /etc/sysconfig/selinux file.
Policy version:                 24
Policy from config file:        targeted
Отключаем SELinux в CentOS
Разработчики рекомендуют всегда сохранять SELinux в рабочем режиме «enforcing» — принудительное исполнение правил. Если же администратору потребуется изменить этот режим на «disabled», сделать это можно в рамках одной сессии или перманентно, внеся правки в конфигурационный файл. Для начала проверьте текущее состояние утилиты, чтобы определить, стоит ее отключать или нет. Для этого произведите всего одну команду:
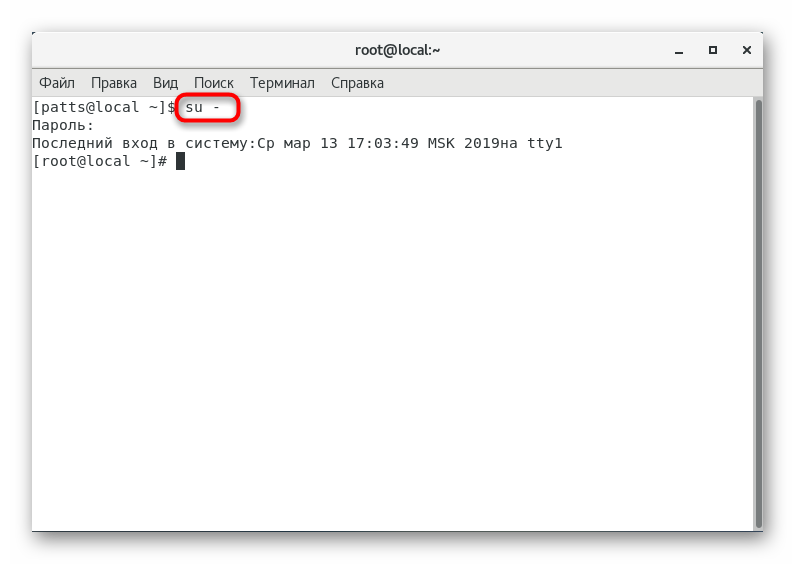
- Запустите «Терминал» любым удобным методом, например, через меню «Приложения».

Активируйте постоянные права суперпользователя, прописав . После этого потребуется ввести пароль от рут-доступа. Написанные таким образом символы никогда не отображаются в целях безопасности.
Активируйте команду , вставив ее и нажав на клавишу Enter.
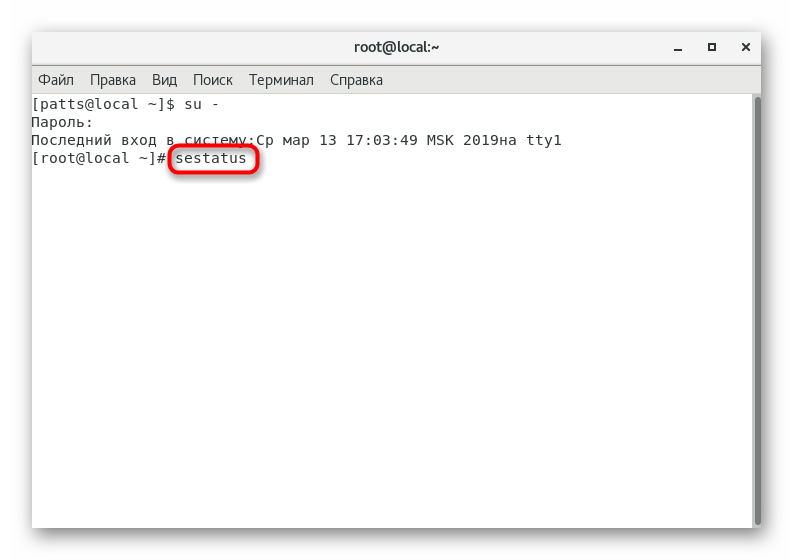
Найдите строку «SELinux status», отображающую текущее состояние. Если оно не «disabled», значит инструмент находится в активном рабочем состоянии.
Таким образом, с помощью встроенной команды можно быстро проверить статус встроенной системы безопасности. Далее советуем ознакомиться с двумя методами отключения SELinux, которые будут максимально полезны в разных ситуациях.
Способ 1: Отключение в текущей сессии
Обычно SELinux отключается в целях проверки каких-либо параметров ОС или исправления ошибок. Достаточно того, чтобы утилита была отключена на протяжении одной терминальной сессии. Для этого не нужно изменять конфигурационный файл, воспользуйтесь командой , где как раз и является значением выключения.
Можете убедиться в том, что защита была успешно отключена. После запуска нового системного терминала она продолжит свою работу в штатном режиме, то есть в том, который задан в файле настройки. Не забывайте, что после каждого перезапуска ОС указанную выше команду придется прописывать заново, чтобы повторно деактивировать SELinux.
Способ 2: Перманентное отключение
Перманентное отключение SELinux будет действовать даже после перезагрузки ОС, поскольку параметр задается через файл конфигурации. Как вы могли уже понять, изменять его придется вручную. Для этого советуем воспользоваться любым удобным текстовым редактором.
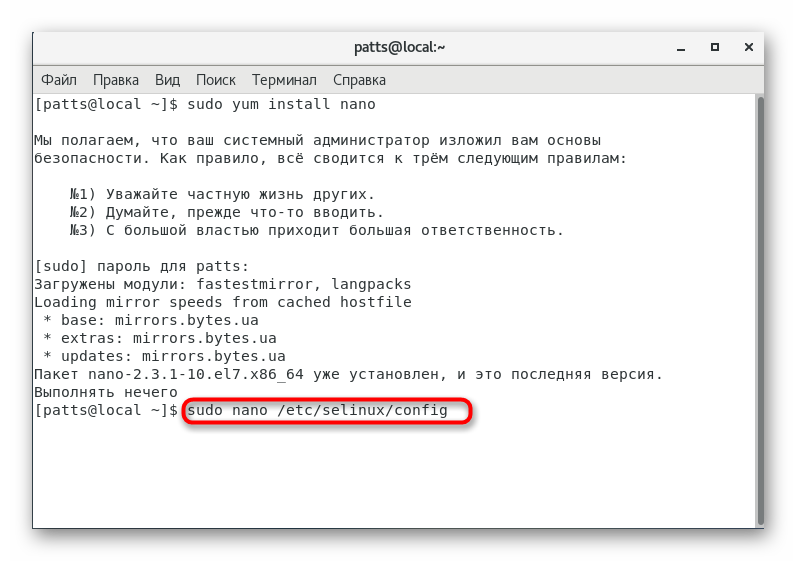
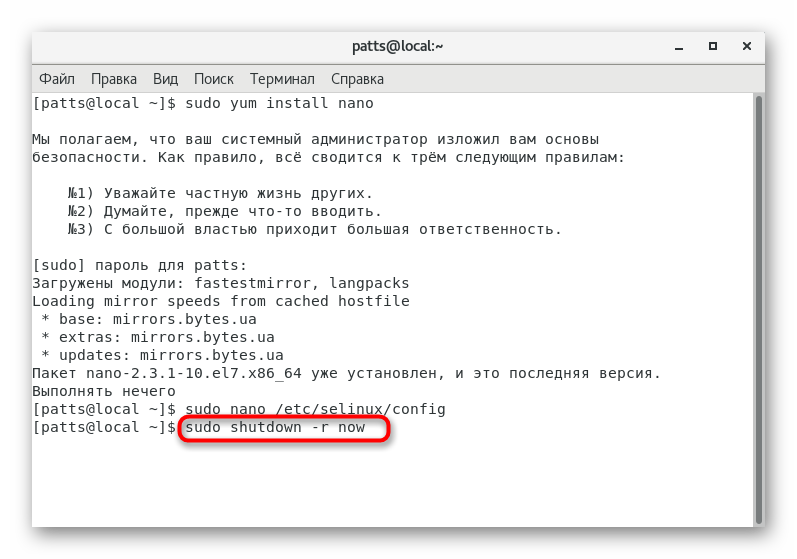
- Сегодня за пример мы возьмем редактор nano. Устанавливается пакеты этого приложения командой .
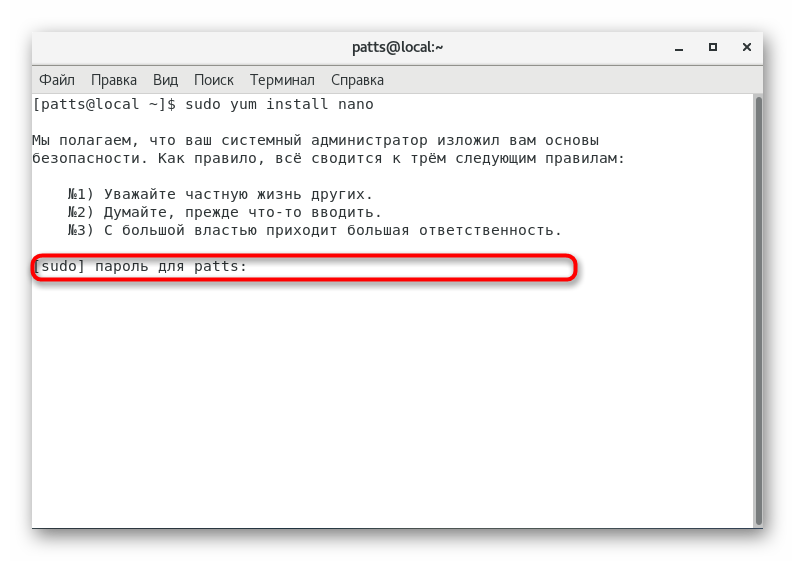
Для продолжения инсталляции понадобится ввести пароль от учетной записи суперпользователя.
После успешной установки запустите файл настроек через этот редактор, введя .
Среди всех строк отыщите «SELINUX=».
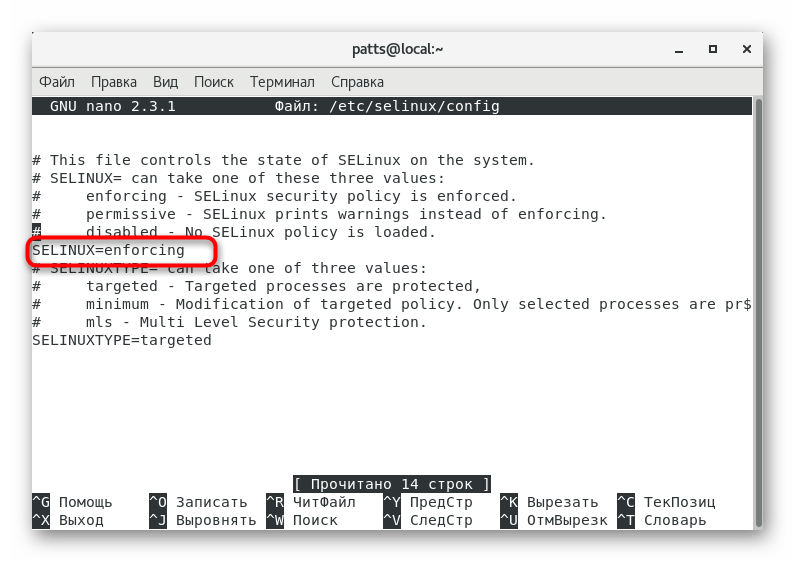
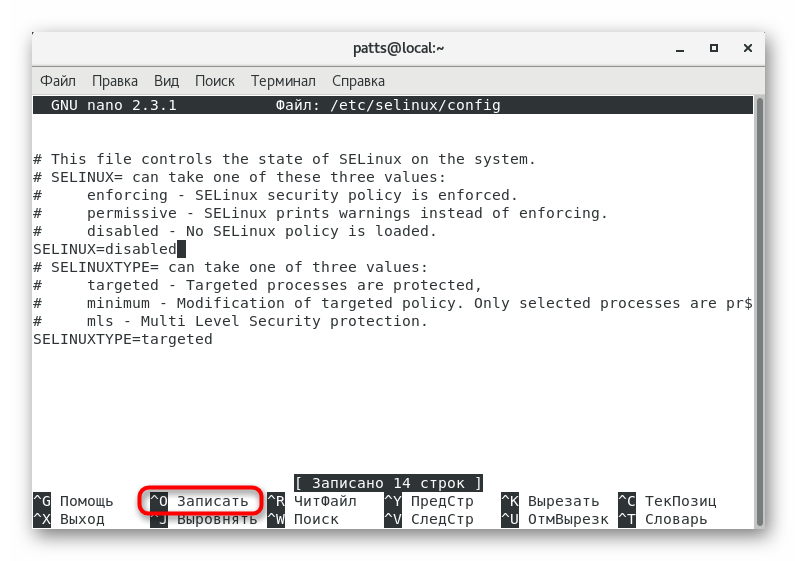
После знака «=» замените указанное там выражение на .

Сохраните настройки нажатием комбинации клавиш Ctrl + O.
Не изменяйте имя файла для записи, просто нажмите на Enter.
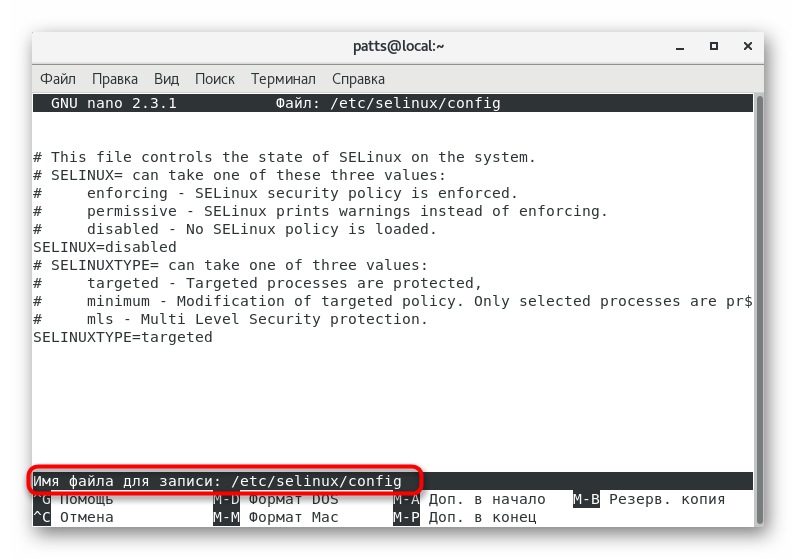
Для выхода из редактора используйте Ctrl + X.
Все настройки будут сохранены и активируются только после перезагрузки ОС, поэтому в консоль вставьте строку .
После выполнения подобных действий система безопасности будет активна только после изменения ее значения обратно на «enabled», «enforcing» или «permissive». В противном случае она так и будет оставаться выключенной всегда, при любых действиях со стороны пользователя или процессов. Разве что можно на текущую сессию активировать SELinux через команду .
Каждый пользователь сам выбирает наиболее оптимальный метод отключения рассмотренного сегодня инструмента, поскольку они различаются по принципу действия. В целом в обоих вариантах процедура осуществляется достаточно просто и не вызовет сложностей даже у неопытных юзеров.
Опишите, что у вас не получилось.
Наши специалисты постараются ответить максимально быстро.
Troubleshooting SELinux
So you have something that’s not working with SELinux enforcing mode, rather than setting SELinux to permissive or even disabled, we can troubleshoot and investigate the problem to try and fix it which is better than turning the whole thing off. Turning SELinux off should be considered a last resort.
First install the setroubleshoot-server package with ‘yum’.
~]# yum install setroubleshoot-server -y
With this package we get the ‘sealert’ command, which will help us uncover any problems along with display recommended ways of fixing the problem.
In this example I have created an index.html file in the /root directory, and then moved it to /var/www/html for Apache to serve out.
 ~]# vim index.html
 ~]# mv index.html /var/www/html/
However when I try to view the index file in Firefox, the index.html page content does not display and I get the below error in the /var/log/messages file.
Aug 28 00:15:51 localhost setroubleshoot: SELinux is preventing /usr/sbin/httpd from getattr access on the file /var/www/html/index.html. For complete SELinux messages. run sealert -l 284cb2c9-1c2e-4708-a48d-415123f558aa
Aug 28 00:15:51 localhost python: SELinux is preventing /usr/sbin/httpd from getattr access on the file /var/www/html/index.html.#012#012*****  Plugin restorecon (99.5 confidence) suggests   ************************#012#012If you want to fix the label. #012/var/www/html/index.html default label should be httpd_sys_content_t.#012Then you can run restorecon.#012Do#012# /sbin/restorecon -v /var/www/html/index.html#012#012*****  Plugin catchall (1.49 confidence) suggests   **************************#012#012If you believe that httpd should be allowed getattr access on the index.html file by default.#012Then you should report this as a bug.#012You can generate a local policy module to allow this access.#012Do#012allow this access for now by executing:#012# grep httpd /var/log/audit/audit.log | audit2allow -M mypol#012# semodule -i mypol.pp#012
This is essentially saying that Apache is not able to access the index.html file as it has the incorrect SELinux context. The SELinux context of the file is shown below with the -Z option from ‘ls’.
 ~]# ls -laZ /var/www/html/
drwxr-xr-x. root root system_u:object_r:httpd_sys_content_t:s0 .
drwxr-xr-x. root root system_u:object_r:httpd_sys_content_t:s0 ..
-rw-r--r--. root root unconfined_u:object_r:admin_home_t:s0 index.html
As this file was created in the /root directory, it has the SELinux context of ‘admin_home_t’ and by default Apache will only serve files with a context of ‘httpd_sys_content_t’. The logs suggest that this can be fixed by running the restorecon command, which will fix the SELinux context of the file, and sure enough it does and the page now loads correctly.
 ~]# restorecon -v /var/www/html/index.html
restorecon reset /var/www/html/index.html context unconfined_u:object_r:admin_home_t:s0->unconfined_u:object_r:httpd_sys_content_t:s0
Further information is also logged to the /var/log/audit/audit.log file, however the content is not very human readable. This is where the ‘sealert’ command comes into help.
 ~]# sealert -a /var/log/audit/audit.log
--------------------------------------------------------------------------------

SELinux is preventing /usr/sbin/httpd from getattr access on the file /var/www/html/index.html.

*****  Plugin restorecon (99.5 confidence) suggests   ************************

If you want to fix the label.
/var/www/html/index.html default label should be httpd_sys_content_t.
Then you can run restorecon.
Do
# /sbin/restorecon -v /var/www/html/index.html
The -a will display all alerts, however it can also be used to view specific codes that may be provided in the /var/log/messages file. Again the recommendation here provides an exact command to run to fix the problem, easy! Hopefully you can start to see that with these techniques there’s usually no real reason to disable SELinux.
Установка Nextcloud
Для загрузки и распаковки архива на нужны следующие пакеты:
dnf install wget unzip
Переходим во временную папку:
cd /tmp
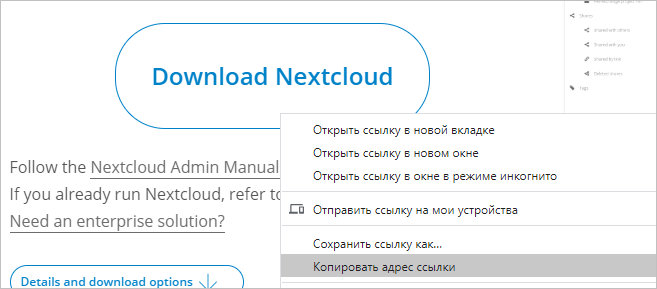
Заходим на и копируем ссылку на скачивание последней версии программы:
Скачиваем исходник для установки:
wget https://download.nextcloud.com/server/releases/nextcloud-19.0.1.zip
Распаковываем скачанный архив:
unzip nextcloud-*.zip -d /var/www
Задаем права доступа:
chown -R apache:apache /var/www/nextcloud
Открываем браузер и переходим по адресу https://nextcloud.dmosk.ru, где nextcloud.dmosk.ru — наш адрес облачного сервиса, который мы создали в NGINX. Если мы используем самоподписанный сертификат, браузер выдаст предупреждение безопасности — игнорируем его и переходим на страницу.
* так как мы настроили виртуальный домен, важно обратиться к серверу, именно, по имени. Таким образом, настроенный узел (в моем случае, nextcloud.dmosk.ru) должен разрешаться в DNS или быть внесен в локальный файл hosts
Прописываем логин и пароль администратора, которые хотим использовать для входа, кликаем по Хранилище и база данных:

Переключаемся на MySQL/MariaDB, вводим в качестве логина, пароля и базы nextcloud:

Завершаем установку, при желании, оставим галочку для установки рекомендованных приложений:

После установки мы окажемся в системе.
Установка и настройка веб-сервера
PHP
В репозитории CentOS 8 есть требуемая версия пакета php. Для ее установки просто вводим команду:
dnf install php php-fpm php-pdo php-zip php-dom php-intl php-gd php-mysqli php-mbstring php-json php-process
PHP-FPM
Сам пакет php-fpm мы установили на предыдущем шаге. Поэтому на данном этапе необходимо его настроить.
Открываем конфигурационный файл:
vi /etc/php-fpm.d/www.conf
Находим опцию listen. Проверяем ее значение:
listen = /run/php-fpm/www.sock
Разрешаем автозапуск php-fpm и запускаем его:
systemctl enable php-fpm —now
NGINX
Nextcloud можно развернуть на NGINX или Apache. В данной инструкции будем использовать первый.
Устанавливаем веб-сервер:
dnf install nginx
Для правильной работы nextcloud запросы должны идти по https. Для этого создаем виртуальный домен и настраиваем его для работы с облачным сервисом в NGINX:
vi /etc/nginx/conf.d/nextcloud.dmosk.ru.conf
server {
listen 80;
server_name nextcloud.dmosk.ru;
return 301 https://$server_name$request_uri;
}
server {
listen 443 ssl;
server_name nextcloud.dmosk.ru;
ssl_certificate /etc/nginx/ssl/cert.pem;
ssl_certificate_key /etc/nginx/ssl/cert.key;
root /var/www/nextcloud;
add_header Strict-Transport-Security «max-age=31536000; includeSubDomains» always;
client_max_body_size 10G;
fastcgi_buffers 64 4K;
rewrite ^/caldav(.*)$ /remote.php/caldav$1 redirect;
rewrite ^/carddav(.*)$ /remote.php/carddav$1 redirect;
rewrite ^/webdav(.*)$ /remote.php/webdav$1 redirect;
index index.php;
error_page 403 = /core/templates/403.php;
error_page 404 = /core/templates/404.php;
location = /robots.txt {
allow all;
log_not_found off;
access_log off;
}
location ~ ^/(data|config|\.ht|db_structure\.xml|README) {
deny all;
}
location / {
rewrite ^/.well-known/host-meta /public.php?service=host-meta last;
rewrite ^/.well-known/host-meta.json /public.php?service=host-meta-json last;
rewrite ^/.well-known/carddav /remote.php/carddav/ redirect;
rewrite ^/.well-known/caldav /remote.php/caldav/ redirect;
rewrite ^(/core/doc/+/)$ $1/index.html;
try_files $uri $uri/ index.php;
}
location ~ ^(.+?\.php)(/.*)?$ {
try_files $1 = 404;
include fastcgi_params;
fastcgi_param SCRIPT_FILENAME $document_root$1;
fastcgi_param PATH_INFO $2;
fastcgi_param HTTPS on;
fastcgi_pass unix:/run/php-fpm/www.sock;
}
location ~* ^.+\.(jpg|jpeg|gif|bmp|ico|png|css|js|swf)$ {
expires modified +30d;
access_log off;
}
}
* где dmosk.ru — домен, на котором будет работать сервис; nextcloud.dmosk.ru — имя сервера, на котором будет работать nextcloud; /etc/nginx/ssl — каталог, в котором будут храниться сертификаты; /var/www/nextcloud — каталог с порталом.
Создаем каталог для хранения сертификатов и переходим в него:
mkdir /etc/nginx/ssl
cd /etc/nginx/ssl
Генерируем сертификат:
openssl req -new -x509 -days 1461 -nodes -out cert.pem -keyout cert.key -subj «/C=RU/ST=SPb/L=SPb/O=Global Security/OU=IT Department/CN=nextcloud.dmosk.ru/CN=nextcloud»
* данная команда создаст сертификат на 4 года для URL nextcloud.dmosk.ru или nextcloud.
* в данном примере мы, всего лишь, создали самоподписанный сертификат, который не будет приниматься браузером и нужно будет пропускать предупреждение. Данный метод подходит для тестирования, а для продуктивной среды стоит купить сертификат или получить его бесплатно от Let’s Encrypt.
Проверяем конфигурацию nginx, разрешаем его автозапуск и перезапускаем сервис:
nginx -t
systemctl enable nginx —now
Встречается в статьях
Инструкции:
- Как установить и использовать OpenVZ на CentOS
- Установка и настройка OpenVPN на CentOS
- Настройка кластера Ceph на Linux CentOS 7
- Трансляция видео с веб-сервера с помощью NGINX + rtmp
- Как настроить почту на базе Postfix для корпоративной среды
- Настройка веб-сервера на CentOS 7 со всем необходимым для правильной работы
- Установка и настройка FTP-сервера vsFTPd на CentOS 7
- Сервер радиовещания на базе Icecast под Windows и Linux
- Настройка портала TeamPass для совместного хранения паролей
- Инструкция по установке и использованию GLPI на Linux CentOS
- Установка и настройка системы мониторинга Prometheus на Linux
- Использование связки Elasticsearch + Kibana + Logstash на Linux
- Настройка веб-сервера на CentOS 8 со всем необходимым для правильной работы
- Как установить и настроить панель управления виртуальными машинами VMmanager
- Установка XMPP-сервера Openfire на CentOS для мгновенного обмена сообщениями
- Установка и настройка файлового сервера Samba на CentOS 8
- Установка и настройка почтового сервера Zimbra на Linux
- Настройка L2TP VPN-сервера на CentOS 8 для возможности подкючения стандартными средствами Windows
- Как настроить почту для корпоративной среды на CentOS 8
Мини-инструкции:
- Отключение Selinux в системе Linux
- Как настроить систему безопасности с SELinux в CentOS
- Шпаргалка по настройке SELinux для различных программ
- Способы отключения использования IP версии 6 в Linux CentOS
- Настройка защиты DNS ответов от BIND при помощи DNSSEC
- Установка и настройка OwnCloud на CentOS 7 или 8
- Инструкция по установке и настройке phplist
- Настройка проксирования почты с NGINX для IMAP, POP3 и SMTP
- Настройка сервера мониторинга Zabbix на Linux CentOS
- Как настроить мониторинг репликации MySQL/MariaDB с помощью Zabbix
- Настройка потоковой репликации СУБД PostgreSQL
- Как наблюдать за репликацией в PostgreSQL с помощью Zabbix
- Установка и настройка своего локального репозитория CentOS
- Установка панели управления ISPmanager на Ubuntu или CentOS
- Как создать свой собственный образ для Docker
- Отправка логов на удаленный сервер с помощью journald
- Настройка rsyslog для хранения логов на удаленном сервере Linux
- Установка и настройка LDAP сервера FreeIPA на Linux CentOS
- Установка и настройка CRM Битрикс24 от 1С на Linux CentOS
- Настройка мониторинга RAID LSI MegaRaid на Linux с помощью Zabbix
- Как установить и настроить сервер OpenVPN на CentOS 8
- Установка и использование сервера Freeradius на Linux CentOS 8
- Настройка сервера видеоконференцсвязи OpenMeetings на Linux CentOS 8
- Как установить и настроить telegraf + InfluxDB для хранения метрик
- Установка и настройка сервера NextCloud на CentOS 8
- Установка и использование почтового клиента WebMail Lite на Linux CentOS
- Настройка сервера мониторинга Zabbix 5 на Linux CentOS 8
Change SELinux Mode
There are also many ways that we can change the mode of SELinux, with both runtime only options or permanent settings that persist on reboot.
SELinux Runtime Configuration
One of the fastest ways to switch between enforcing and permissive modes is with the ‘setenforce’ command. We can use ‘setenforce 0’ to swap to permissive mode, or ‘setenforce 1’ to swap to enforcing mode.
 ~]# getenforce
Enforcing
 ~]# setenforce 0
 ~]# getenforce
Permissive
 ~]# setenforce 1
 ~]# getenforce
Enforcing
Note that this only changes the runtime setting, if you perform a system reboot the option stored in the /etc/selinux/config file will be used at next boot. We cannot disable selinux at runtime, as swapping to or from the disabled mode requires a system reboot.
SELinux Persistent Configuration
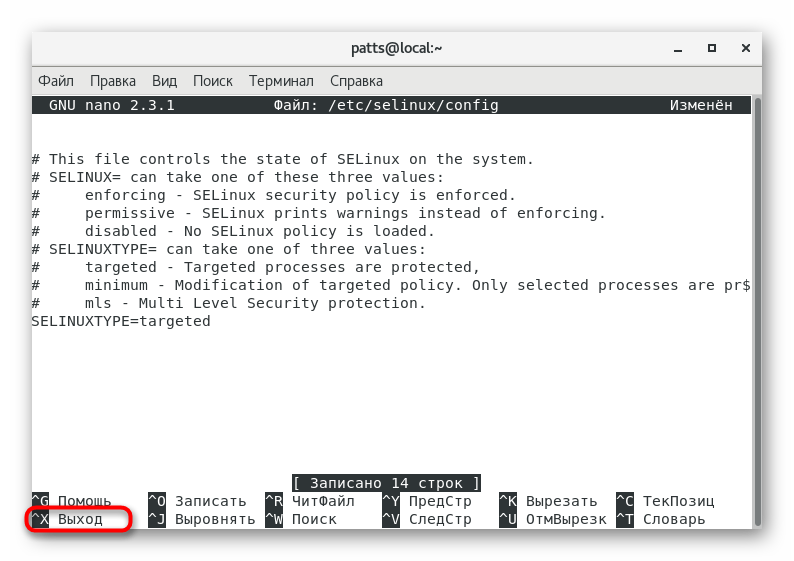
We can edit the /etc/selinux/config text file with our persistent setting, either enforcing, permissive, or disabled. By default this file appears as shown below.
# This file controls the state of SELinux on the system.
# SELINUX= can take one of these three values:
#     enforcing - SELinux security policy is enforced.
#     permissive - SELinux prints warnings instead of enforcing.
#     disabled - No SELinux policy is loaded.
SELINUX=enforcing
# SELINUXTYPE= can take one of three two values:
#     targeted - Targeted processes are protected,
#     minimum - Modification of targeted policy. Only selected processes are protected.
#     mls - Multi Level Security protection.
SELINUXTYPE=targeted
We can simply edit the SELINUX variable between enforcing, permissive, or disabled, as outlined in the comments of the file. After editing the file the changes will not be in place immediately and will only change after system reboot.
SELinux Configuration File
The main configuration file for SELinux is /etc/selinux/config. We can run the following command to view its contents:
The output will look something like this:
There are two directives in this file. The SELINUX directive dictates the SELinux mode and it can have three possible values as we discussed before.
The SELINUXTYPE directive determines the policy that will be used. The default value is . With a targeted policy, SELinux allows you to customize and fine tune access control permissions. The other possible value is “MLS” (multilevel security), an advanced mode of protection. Also with MLS, you need to install an additional package.
Enabling and Disabling SELinux
Enabling SELinux is fairly simple; but unlike disabling it, should be done in a two-step process. We assume that SELinux is currently disabled, and that you’ve installed all of the SELinux packages from the earlier section.
As a first step, we need to edit the file to change the SELINUX directive to permissive mode.
Setting the status to permissive first is necessary because every file in the system needs to have its context labelled before SELinux can be enforced. Unless all files are properly labelled, processes running in confined domains may fail because they can’t access files with the correct contexts. This can cause the boot process to fail or start with errors. We will introduce contexts and domains later in the tutorial.
Now issue a system reboot:
The reboot process will see all the files in the server labelled with an SELinux context. Since the system is running in permissive mode, SELinux errors and access denials will be reported but it won’t stop anything.
Log in to your server again as root. Next, search for the string “SELinux is preventing” from the contents of the /var/log/messages file.
If there are no errors reported, we can safely move to the next step. However, it would still be a good idea to search for text containing “SELinux” in /var/log/messages file. In our system, we ran the following command:
This showed some error messages related to the GNOME Desktop that was running. This was happening when SELInux was either disabled or in permissive mode:
These types of errors are fine.
In the second phase, we need to edit the config file to change the SELINUX directive from permissive to enforcing in the file:
Next, reboot the server again.
Once the server is back online, we can run the command to check the SELinux status. It should now show more details about the server:
Check the /var/log/messages file:
There should be no errors. The output should look something like this:
Checking SELinux Modes and Status (Again)
We can run the command to check the current SELinux mode.
If our system is running in enforcing mode the output will look like this:
The output will be different if SELinux is disabled:
We can alo run the command to get a better picture.
If SELinux isn’t disabled, the output will show its current status, its current mode, the mode defined in the configuration file, and the policy type.
When SELinux is disabled the output will show:
We can also temporarily switch between enforcing and permissive modes using the command. (Note that we can’t run when SELinux is disabled.)
First change the SELinux mode from enforcing to permissive in our CentOS 7 system:
Running the command now shows the current mode is different from the mode defined in config file:
Switch back to enforcing: