Dnf (software)
Содержание:
Detailed Description
hawkey is a library allowing clients to query and resolve dependencies of RPM packages based on the current state of RPMDB and yum repositories. While a superset of the functionality itself is available in yum, the new API promises to bring unification, fewer restrictions on clients’ implementation language (yum API is in Python) and eventually performance improvements.
The API version of hawkey in Fedora 18 will not be final one, it will more be to demonstrate the concepts of the library. Projects needing depsolving in Fedora will be encouraged to start experimenting and reporting bugs and missing features.
DNF is a fork of Yum 3.4 that uses libsolv via hawkey for a backend. The main goals of the project are:
- using a SAT solver for dependency resolving
- strict API definition for plugins
- strict API definition for extending projects (Anaconda)
- leaner codebase than Yum, allowing for easier maintenance
- better performance and memory footprint.
For Fedora 18 this is mainly meant as a preview. The package can be installed along yum so user’s workflow is not disturbed when DNF malfunctions. The users will be advised against using DNF on critical production machines.
Naming
DNF stands for Dandified yum. Since DNF is a tech preview in Fedora 18 the Python module names can not be ‘yum.*’ as that would clash with yum itself.
Why not zif/zypp?
People are asking why we didn’t choose to adopt zif (or SUSE’s zypp) instead of fixing yum. The reasons are:
- dnf looks for a middle ground between a sane API and some backwards compatibility.
- dnf and hawkey are first steps toward using the same resolver across the entire stack.
- Libsolv is a well tested and proven code base, currently the most sophisticated and optimized dependency solving implementation.
Проприетарные видеодрайверы
Nvidia «обычная»
Вариант 1 — совсем простой
jsn-techtips.blogspot.ru/2013/12/fedora-20-nvidia.htmlВариант 2 — немного другой
blog.xenodesystems.com/2014/12/como-instalar-drivers-propietarios.htmlrpmfusion.org/Howto/nVidia
Nvidia Optimus — установка Bumblebee
fedoraproject.org/wiki/Bumblebee
help.ubuntu.ru/wiki/bumblebee
https://ru.opensuse.org/SDB:Bumblebeesetiathome.berkeley.edu/forum_thread.php?id=74094kaischroed.wordpress.com/howto-install-nvidia-driver-on-fedora-replacing-nouveau
изменении настроек SELinux указана в документации к Федоре
Кроссплатформенный бенчмарк GPU — GPUTest
www.geeks3d.com/gputest57205optirun47257vblank_mode=0 optirun -b primus65943optirunvblank_mode=0 optirun -b primus
Решение проблемы с неработающим WebGL у Хрома
askubuntu.com/questions/110132/problem-with-running-webgl-with-chromeoptirun google-chrome-beta
lists.fedoraproject.org/pipermail/scm-commits/Week-of-Mon-20130506/1014107.htmlLIBGL_DEBUG=verbose primusrun… code.google.com/p/chromium/issues/detail?id=351804—disable-gpu-sandboxchrome://gpu
Бенчмарки для браузеров
www.wirple.com/bmarkТест 1peacekeeper.futuremark.comoptirunТест 2browsermark.rightware.comна дискретной картеoptirunnosandboxvblank + nosandboxDesktop Linux with Google Chrome 40 is faster than 99% of all Desktops tested so far.Тест 3www.wirple.com/bmarkoptirun
4240Your results compared to other users:
You score better than 100% of all users so far!
You score better than 100% of the people who use the same browser and OS!лучший результат+vblank_mode
Multimedia post-install
RPM Fusion repositories also provide a lot of complement packages, it’s often difficult to remember which is the exact name of each complement package. One can easily remember using the package group that the repository extends.
-
The following command will install the complements multimedia packages needed by gstreamer enabled applications:
sudo dnf groupupdate multimedia --setop="install_weak_deps=False" --exclude=PackageKit-gstreamer-plugin
-
The following command will install the sound-and-video complement packages needed by some applications:
sudo dnf groupupdate sound-and-video
Using PackageKit
Fedora 10 uses a program called PackageKit to graphically assist the user with installing and removing software. Any application from the Fedora repositories, including the ones described in this user guide, can be installed with the following method.
Installing Software
Here is how to install software using Add/Remove Software in the Gnome Desktop Environment.
Click System > Administration > Add/Remove Software. This will open the Add/Remove Software application.
In the with the binoculars icon, type the name of the application you wish to install. If you are unsure of the specific application you need to install, you can also type keywords in this box, just like you would for an internet search engine.
Next, click the button. The message «Querying» appears in the lower left corner.
Zero or more listings will appear that match your search query. Tick the box next to the description of the application or applications you wish to install. The message «Downloading repository information» appears in the lower left corner. The window area below the list of packages contains additional information about the selected software.
Select any additional packages to install or remove at this time by changing tick boxes next to the package name.
Finally, click the button. This starts the installation process and concurrently installs or removes any additional packages where you modified the tick box. Follow any prompts to install additional packages.
Unless an error is displayed, the application is now installed on your computer.
Removing Software
To remove software using PackageKit, you should follow the standard installation procedure, but untick boxes beside the programs you wish to uninstall instead of ticking boxes to install new programs.
Click System > Administration > Add/Remove Software. This will open the Add/Remove Software application.
In the with the binoculars icon, type the name of the application you wish to remove. If you are unsure of the specific application you need to remove, you can also type keywords in this box, just like you would for an internet search engine.
Next, click the button. The message «Querying» appears in the lower left corner.
Zero or more listings will appear that match your search query. Untick the box next to the description of the application or applications you wish to remove.
Software Installed Outside of PackageKit If the box is already unticked, then the program is probably not already installed. If you are sure that you’ve selected the right application, but it still appears to not be installed, then it may have been installed using a method other than PackageKit. If, for example, the program was compiled and installed from source, then it may not register as installed in PackageKit. If this is the case, you will need to find an alternate method of removing it. If it was installed from source, you may find more information in the source distribution’s Readme file.
The message «Downloading repository information» appears in the lower left corner. The window area below the list of packages contains additional information about the selected software.
Select any additional packages to install or remove at this time by changing tick boxes next to the package name.
Finally, click the button. This starts the removal process and concurrently installs or removes any additional packages where you modified the tick box. Follow any prompts to remove additional packages, such as dependencies that only your newly uninstalled program relied upon.
Unless an error is displayed, the application is now removed from your computer.
| Previous Page — Customizing the Desktop | Table of Contents |
Tainted repos
RPM Fusion has introduced «tainted» repos for free and nonfree sections. This is for Fedora, RHEL, CentOS and derived.
-
Tainted free is dedicated for FLOSS packages where some usages might be restricted in some countries. Example: to play DVD with libdvdcss:
sudo dnf install rpmfusion-free-release-tainted
sudo dnf install libdvdcss
-
Tainted nonfree is dedicated to non-FLOSS packages without a clear redistribution status by the copyright holder. But is allowed as part of hardware inter-operability between operating systems in some countries :
sudo dnf install rpmfusion-nonfree-release-tainted
sudo dnf install \*-firmware
Установка и настройка FTP-сервера
В качестве FTP-сервера будем использовать ProFTPd, так как он позволяет авторизовываться под uid системных учетных записей.
ProFTPd можно устанавливать командой:
dnf install proftpd
Загружаем скрипт ftpasswd:
wget http://www.castaglia.org/proftpd/contrib/ftpasswd -P /etc/proftpd
Разрешаем запуск на выполнение скрипта:
chmod +x /etc/proftpd/ftpasswd
Создаем виртуального пользователя:
/etc/proftpd/ftpasswd —passwd —file=/etc/proftpd/ftpd.passwd —name=ftpwww —uid=48 —gid=48 —home=/var/www —shell=/sbin/nologin
* где
- /etc/proftpd/ftpd.passwd — путь до файла, в котором хранятся пользователи;
- ftpwww — имя пользователя (логин);
- uid и gid — идентификаторы пользователя и группы системной учетной записи (apache);
- /var/www — домашний каталог пользователя;
- /sbin/nologin — оболочка, запрещающая локальный вход пользователя в систему.
Изменим права для созданного файла с паролями:
chmod 440 /etc/proftpd/ftpd.passwd
* в противном случае, при запуске proftpd мы получим ошибку «…fatal: AuthUserFile: unable to use /etc/proftpd.d/ftpd.passwd: Operation not permitted…»
Открываем на редактирование конфигурационный файл proftpd:
vi /etc/proftpd.conf
И редактируем следующее (комментируем):
#AuthOrder …
Создадим конфигурационный файл со своими настройками:
vi /etc/proftpd/conf.d/custom.conf
И добавим следующее:
UseIPv6 off
IdentLookups off
PassivePorts 60000 65535
RequireValidShell off
AuthUserFile /etc/proftpd/ftpd.passwd
AuthPAM off
LoadModule mod_auth_file.c
AuthOrder mod_auth_file.c
* где 60000 — 65535 — диапазон динамических портов для пассивного режима.
Разрешаем автозапуск FTP-серверу и запускаем его:
systemctl enable proftpd —now
Пробуем подключиться к серверу, использую любые FTP-клиенты, например, FileZilla, Total Commander или тот же браузер.
Это базовая и самая простая настройка ProFTPd, но если необходимо настроить TLS или хранить виртуальных пользователей в базе MySQL, читайте подробнее инструкцию по настройке ProFTPd на CentOS.
Рабочий стол Ubuntu
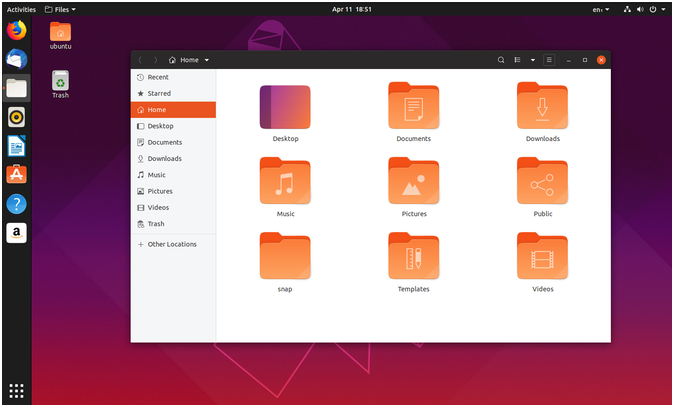
Слоганом Ubuntu изначально было «Linux для людей». Цель состояла в том, чтобы создать рабочий стол, предназначенный для обычных пользователей персональных компьютеров, который мог бы конкурировать с Windows и Mac OS X. Canonical пыталась скрыть более технические аспекты Linux и предоставить решения, которые работают сразу из коробки.
Ранние версии Ubuntu выпускались с простым установщиком и возможностью предварительно попробовать рабочий стол, а также с простой установкой Adobe Flash и мультимедийных кодеков. Canonical также приложила огромные усилия для создания уникального интерфейса для персональных компьютеров, известного как Unity, который выделялся бы среди потребителей и поставщиков ПК. Компания даже попробовала свои силы в мобильной версии Linux.
В последние годы Canonical отказалась от большинства этих проектов и переключила свое внимание на облако