Software
Содержание:
- Mumble Client[edit]
- VMware ESX(i)[edit]
- Change Passwords[edit]
- Whonix ™ Build Version[edit]
- How is Whonix different from a VPN?[edit]
- What is the disadvantage of removing a meta package?[edit]
- Easy[edit]
- Watch Tor Log[edit]
- Permissions Fixedit
- Non-Issuesedit
- Version Numberedit
- Footnotes[edit]
- How do I Check the Current Whonix ™ Version?[edit]
- Footnotesedit
- Вместо введения
- How do I Install the Latest Tor Version?[edit]
- Further Readingedit
- Footnotes / Referencesedit
- How do I Change Other Tor Settings?[edit]
- Open File with Root Rights[edit]
- Increase Virtual Machine RAM[edit]
- Sample whonixcheck Output[edit]
- System Checksedit
Mumble Client[edit]
Installationedit
Update the package lists.
sudo apt-get update
sudo apt-get update
Install mumble.
sudo apt-get install mumble
sudo apt-get install mumble
Launch Mumble.
→ → →
Or in a terminal, run.
mumble
mumble
Figure: Mumble Client in Whonix
Configure Mumble to suit your preferences.
Next, enable Force TCP mode.
→ → → →
Figure: Mumble Network Setting

Add Serveredit
Follow these steps to add a new server.
→ →
- Servername: anything — this can be same as the .onion domain name
- Address: enter your .onion domain name or if the mumble server is running in your own Whonix-Workstation , choose
- Port: 64738
- Username: anything
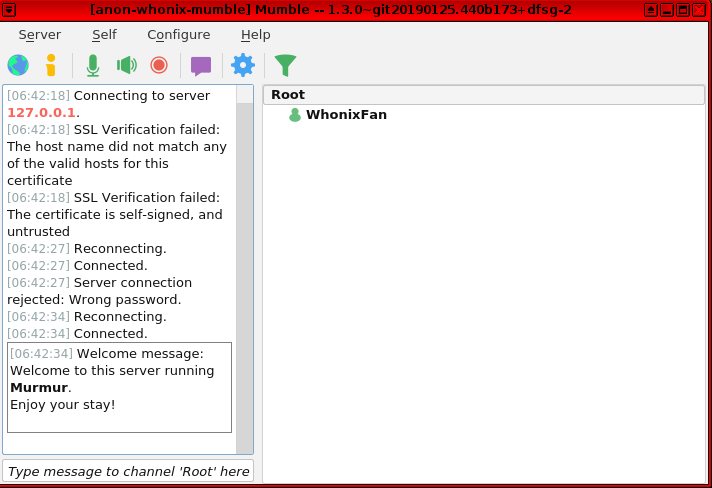
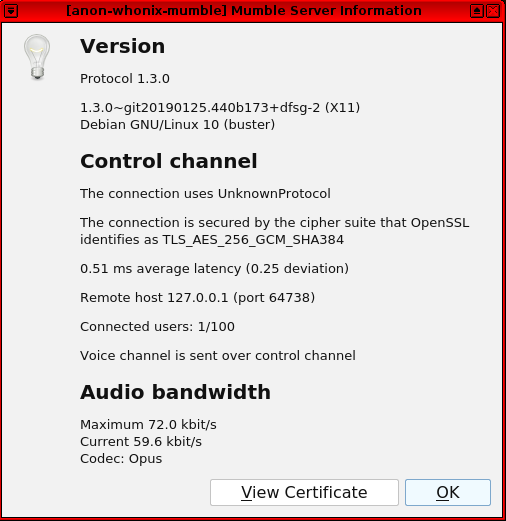
It is now possible to connect to the server.
Figure: Mumble Server Information
VMware ESX(i)[edit]
Importing the .ova templates will simply not work. ESX(i) will not recognize the hardware family.
However, there are workarounds, either extracting the .ova and editing the .ovf files or using VMware Workstation.
Importing virtual disk filesedit
One way Whonix can be made to run on ESXi is by extracting the .vmdk (VM virtual disk) files.
An example can be found here.
Importing the appliances:
- Create two virtual machines in ESX(i) with default settings, do not create a virtual disk for them.
- Import both ova templates in VirtualBox, yes, VirtualBox.
- Once they are imported, grab the .vmdk disk files from their physical location on your disk (VirtualBox has extracted them from the .ova)
- Upload both disk files to the datastore that you are using in ESX(i)
- Attach the disk files to the appropriate virtual machines.
Set the networking:
- Make sure the Whonix-Gateway has two network adapters configured as a virtual machine, the Whonix-Workstation only one.
- Attach the first Whonix-Gateway network adapter to your outside network vSwitch (this can be WAN, LAN, DMZ, …)
- Attach the second Whonix-Gateway network adapter to an isolated vSwitch. Preferably create a new vSwitch, which will be used only by Whonix-Gateway and Whonix-Workstation . Attach no physical NICs to this vSwitch! Make sure you create a new vSwitch, not simply a new portgroup. Promiscuous mode within a vSwitch might screw you over.
- Attach the Whonix-Workstation network adapter to the isolated vSwitch from previous step.
Once the machines boot, everything should come online nicely.
Double check the vSwitch logic in your setup!
Unfinished: Alternate Workflowedit
If you prefer building from source, or the previous methods did not work, here is a method that was tested with 14.0.0.9.9, & ESXi 6.7.
Build Imagesedit
Using a 64bit linux machine, build both gw & ws whonix flavors target raw
Example build phrase:
sudo ./build_whonix --flavor whonix-gateway-cli --vmsize 20G --target raw --build etc
Use qemu-img to convert the raw images to vmdk
Example:
qemu-img convert image.raw image.vmdk etc etc
Move or copy the .vmdk disks to a data store on ESXi
Example:
scp
Create VMsedit
- From ESXi, create a new virtual switch for internal traffic. IMPORTANT: Delete the uplink by clicking the x! Create a new port group for internal traffic using the virtual switch you just created.
- Create a new virtual machine named Whonix-Workstation : Guest linux Debian 9 64bit, one network interface (change network to internal switch/portgroup), delete disk, add existing disk, select vmdk created for workstation, expand dropdown and select IDE controller. Boot the machine.
- Create a new virtual machine named Whonix-Gateway : Guest linux Debian 9 64bit, two network interfaces (leave first one default, add second and change to internal switch. Delete disk, add existing disk, select .vmdk created for gateway, expand dropdown and select IDE controller. Boot the machine. Note: This machine will have no WAN access unless one of the following actions is taken: addition of static route or modification of eth0 to DHCP.
Using VMWare Workstation as intermediaryedit
If VMware Workstation is available, another option that works without manual extraction and repacking is to import both VMs to VMware Workstation, check that all settings are properly applied (as per the guide above) and then either export the VMs to ovf and import them on the ESXi server or, if the server is connected to the Workstation instance, migrate via VMware Workstation. This generally works out of the box, although the networking should be reviewed and isolated as per the guide above.
See also Security Guide and Advanced_Security_Guide.
Change Passwords[edit]
Qubes-Whonix users can skip this section.
After Whonix has finished installing, immediately change the passwords for both the user and user accounts.
1. Open a terminal (such as Konsole).
→ → →
2. Login as root.
Run.
sudo su
sudo su
3. Read the note below regarding the username and password.
default username: user default password: changeme
When typing the password it will not appear on the screen, nor will the asterisk sign () be visible. It is necessary to type blindly and trust the procedure.
4. Change the root password.
To change the (superuser / administrator) password, run.
passwd
passwd
5. Change the user password.
To change the (Whonix default user) password, run.
passwd user
passwd user
And follow the instructions.
Whonix ™ Build Version[edit]
The version number of the Whonix build never changes. This is acceptable because at build time the current Whonix version number is added to the image itself.
This information is made available so whonixcheck can determine which build script version was used to create that particular image.
This version number should remain static and be unaffected by updating or other issues, since it only applies to specific (usually older) versions of the build script. This is useful for diagnostic purposes and means specific build versions can be deprecated if they are too difficult or expensive to upgrade. In this case, whonixcheck’s function would inform users about the change.
How is Whonix different from a VPN?[edit]
Virtual Private Networks (VPNs) know your identity and online activity and can be compelled legally to share this information with authorities under various circumstances.
VPNs are usually faster than Tor, but they are not anonymity networks. VPN administrators can log both where a user is connecting from and the destination website, breaking anonymity in the process. Promises made by VPN operators are meaningless, since they cannot be verified. Tor provides anonymity by design rather than policy, making it impossible for a single point in the network to know both the origin and the destination of a connection. Anonymity by design provides much more security, since trust is removed from the equation. See also , Why does Whonix use Tor? and .
What is the disadvantage of removing a meta package?[edit]
Then changes in package dependencies will not be automatically processed by your system when you .
For example the anon-workstation-packages-recommended meta package depends on tb-updater . When you do not have the anon-workstation-packages-recommended package installed, you would not notice if we replace tb-updater with torbrowser-launcher . tb-updater might become unmaintained, broken or even have unfixed security issues. We’ll try to keep you up to date should we deprecate (security relevant) packages. If we do that, you could simply sudo apt-get purge tb-updater and consider installing what our meta package recommends as replacement.
See also .
Easy[edit]
This is the easiest, but least secure option. ()
For Qubes-Whonix , click on Expand on the right.
1. Create a new VM.
2. Set sys-whonix as your VM’s NetVM.
→ → → →
For Non-Qubes-Whonix , click on Expand on the right.
Download and Use the Default Whonix-Gateway
Download and the Whonix-Gateway using the same procedure as per the Whonix -Default / Download-Version. No other Whonix-Gateway changes are required in this case!
Set up a Whonix-Custom-Workstation
There are currently two ways to set up a Whonix-Custom-Workstation . Either:
- Manually create a VirtualBox VM (established, old method).
- Download and import a Whonix-Custom-Workstation (stable method).
Users who want to manually create a VirtualBox VM using the established and old method, click on Expand on the right.
1. Create a VirtualBox VM
Follow these steps in order:
→ → → → → → → → → → → → → → → → →
2. Switch VirtualBox VM Settings
Follow these steps in order:
- → → → →
- → → →
- → →
- → →
- → →
- →
- →
Users who want to download and import a Whonix-Custom-Workstation template using the stable method, click on Expand on the right.
This method’s advantage is that there is need to manually create a new VM. The process is greatly simplified; the Whonix-Custom-Workstation only needs to be downloaded and imported. This approach has several benefits: it is easier, all security settings are set for the VM, and users don’t have to remember and apply necessary settings.
The latest Whonix-Custom-Workstation Version is: 15.0.1.3.4
Although the version number for Whonix-Gateway and Whonix -Default / Download-Version might be far higher than the Whonix-Custom-Workstation version, this is normal.
1. Download the Whonix-Custom-Workstation
Download the following image.
2. Download the OpenPGP Signature
Download the corresponding OpenPGP signature.
3. Verify the Whonix Image
Follow these steps to verify the Whonix image.
4. Import and Rename the Virtual Machine
After importing the image, rename the virtual machine to something else. → → →
If this method was used, please report how well it worked in the Whonix forum.
Start VM and Install Operating System
- Start the newly created VM (for example: myVM).
- Insert the installation DVD.
- Updates don’t have to installed while installing the OS. Post-install, apply updates after the network has been set up.
- The username is: user. The computer name is: host
Network → Adapter 1 → NAT
Network → Adapter 2 → attached to Internal Network (Important!)
Network → Adapter 2 → Name (of Internal Network) (Important!): Whonix
→ OK
Watch Tor Log[edit]
Users can also watch Tor’s log as it is written.
sudo tail -f /var/run/tor/log
sudo tail -f /var/run/tor/log
This command is especially useful when Tor is reloaded or restarted simultaneously in another terminal window.
To , run the following command.
sudo service tor@default reload
sudo service tor@default reload
To , run the following command.
sudo service tor@default restart
sudo service tor@default restart
Permissions Fixedit
If error messages like the following appear.
Oct 24 07:22:15.693 Directory /var/lib/tor/.tor cannot be read: Permission denied
Oct 25 12:35:07.460 Directory /var/lib/tor cannot be read: Permission denied
Oct 25 12:35:07.460 Failed to parse/validate config: Couldn't access private data directory "/var/lib/tor"
Then apply the following steps.
1. Open a terminal.
If you are using Qubes-Whonix , complete the following steps.
→ →
If you are using a graphical Whonix with XFCE, run.
→
2. Apply a permissions fix for the Tor data folder.
sudo chown --recursive debian-tor:debian-tor /var/lib/tor
sudo chown —recursive debian-tor:debian-tor /var/lib/tor
3. Restart Tor.
If you are using Qubes-Whonix , complete the following steps.
→ →
If you are using a graphical Whonix-Gateway , complete the following steps.
→ → →
If you are using a terminal-only Whonix-Gateway , press on Expand on the right.
Complete the following steps.
Restart Tor.
sudo service tor@default Restart
sudo service tor@default Restart
Check Tor’s daemon status.
sudo service tor@default status
sudo service tor@default status
It should include a a message saying.
Active: active (running) since ...
In case of issues, try the following debugging steps.
Check Tor’s config.
anon-verify
anon-verify
The output should be similar to the following.
/===================================================================\
|                      Report Summary                               |
\===================================================================/
No error detected in your Tor configuration.
Error messages should no longer appear after completing these steps.
Non-Issuesedit
| Message / Question | Answer |
|---|---|
| Am I compromised? Does Tor’s log report leaks? | Tor’s output is an ineffective tool for discovering serious issues such as a compromise or leaks. |
| Socks version 71 not recognized. (Tor is not an http proxy.) |
This warning is caused by whonixcheck, specifically the function check_tor_socks_port_reachability which checks if a Tor SocksPort is reachable by trying to fetch it using curl. No warnings appear if the function works correctly. |
| Socks version 71 not recognized. (This port is not an HTTP proxy; did you want to use HTTPTunnelPort?) | Similar to above. |
| You configured a non-loopback address ‘10.152.152.10:9179’ for SocksPort. This allows everybody on your local network to use your machine as a proxy. Make sure this is what you wanted. This notice may reference other port numbers, or the DnsPort or TransPort. | This notice is not a concern because Tor really listens on that IP/port — it is the internal network interface for Whonix-Gateway () that is only available to Whonix-Workstation s because Whonix-Gateway () is firewalled. See /usr/bin/whonix_firewall or the Whonix source code for further information. |
| New control connection opened. A higher number of duplicate messages may also appear. | This notice is not a concern because it is caused by whonixcheck’s Tor Bootstrap Status Test, which uses Tor’s ControlPort or CPFP. |
Version Numberedit
To discover what Tor version is currently in use, run the following command inside Whonix-Gateway (Qubes-Whonix : ).
anon-info
anon-info
The output should be similar to the following.
INFO: version of the 'tor' package: 0.4.2.7-1~d10.buster+1
Footnotes[edit]
- https://forums.whonix.org/t/setting-up-vpn-with-whonix-is-it-a-good-idea/7568
- https://www.computerweekly.com/news/252466203/Top-VPNs-secretly-owned-by-Chinese-firms
- The implication is that traffic might be routinely examined in a high percentage of cases, despite corporate promises to the contrary.
- https://www.theregister.com/2020/07/17/ufo_vpn_database/
-
Quote https://blog.torproject.org/critique-website-traffic-fingerprinting-attacks
-
Quote
- https://forums.whonix.org/t/hiding-tor-whonix-is-difficult-beyond-practicality/7408
- From Whonix 14 onward.
- https://forums.whonix.org/t/whonix-virtualbox-14-0-1-4-4-unified-ova-downloads-point-release/6996
- https://forums.whonix.org/t/whonix-kvm-14-0-1-4-4-unified-tar-gz-download-point-release/7061
Whonix is Supported by Evolution Host DDoS
Protected VPS. Stay private and get your VPS with Bitcoin or Monero.
Search engines: YaCy | Qwant | ecosia | MetaGer | peekier | Whonix Wiki
Follow:
Donate:
Share:
|
Want to get involved with Whonix ? Check out our Contribute page.
This is a wiki. Want to improve this page? Help is welcome and volunteer contributions are happily considered! Read, understand and agree to , then Edit! Edits are held for moderation. Policy of Whonix Website and Whonix Chat and Policy On Nonfreedom Software applies.
Copyright (C) 2012 — 2020 ENCRYPTED SUPPORT LP. Whonix is a trademark. Whonix is a licensee of the Open Invention Network . Unless otherwise noted, the content of this page is copyrighted and licensed under the same Freedom Software as Whonix itself. (Why?)
Whonix is a derivative of and not affiliated with Debian . Debian is a registered trademark owned by Software in the Public Interest, Inc .
Whonix is produced independently from the Tor anonymity software and carries no guarantee from The Tor Project about quality, suitability or anything else.
By using our website, you acknowledge that you have read, understood and agreed to our Privacy Policy, Cookie Policy, Terms of Service, and E-Sign Consent. Whonix is provided by ENCRYPTED SUPPORT LP. See Imprint, Contact.
How do I Check the Current Whonix ™ Version?[edit]
See .
Whonix-Gateway edit
Open a terminal.
If you are using Qubes-Whonix , complete the following steps.
→ →
If you are using a graphical Whonix with XFCE, run.
→
cat /etc/whonix_version
cat /etc/whonix_version
Should show.
Whonix-Workstation edit
Open a terminal.
If you are using Qubes-Whonix , complete the following steps.
→ →
If you are using a graphical Whonix with XFCE, run.
→
cat /etc/whonix_version
cat /etc/whonix_version
Should show.
Footnotesedit
-
Qubes has dynamic RAM assignment.
-
Higher performance during upgrades, lower likelihood of issues .
-
Non-ideal but swap-file-creator will create an encrypted swap file and the system is configured to swap as little as possible .
- https://www.tenforums.com/tutorials/66809-determine-system-memory-size-speed-type-windows-10-a.html
-
- https://support.apple.com/en-us/HT201191
- This command works in Red Hat, CentOS, Suse, Ubuntu, Fedora, Debian and other distributions. Alternative commands include: , , and .
-
By default, Qubes does not require a password for superuser access.
-
https://www.qubes-os.org/doc/vm-sudo/
- ↑ Type the command in the terminal and press .
-
To view the system time in UTC on Linux platforms, run.
date --utc
date —utc
-
TODO: Show desktop clock in local time; keep system in UTC
- ↑ This is because the clock will be incorrect after system resume. A correct clock is important for anonymity (see Dev/TimeSync to learn more).
-
Qubes does not dispatch the / hooks upon pause / resume using Qube Manager.
-
https://github.com/QubesOS/qubes-issues/issues/1764
- This process was simplified in Whonix 15 and only requires one command, instead of two, see: https://github.com/Whonix/sdwdate/blob/master/usr/lib/sdwdate/restart_fresh
Whonix is Supported by Evolution Host DDoS
Protected VPS. Stay private and get your VPS with Bitcoin or Monero.
Search engines: YaCy | Qwant | ecosia | MetaGer | peekier | Whonix Wiki
Follow:
Donate:
Share:
|
Want to make Whonix safer and more usable? We’re looking for helping hands. Check out the Open Issues and development forum .
This is a wiki. Want to improve this page? Help is welcome and volunteer contributions are happily considered! Read, understand and agree to , then Edit! Edits are held for moderation. Policy of Whonix Website and Whonix Chat and Policy On Nonfreedom Software applies.
Copyright (C) 2012 — 2020 ENCRYPTED SUPPORT LP. Whonix is a trademark. Whonix is a licensee of the Open Invention Network . Unless otherwise noted, the content of this page is copyrighted and licensed under the same Freedom Software as Whonix itself. (Why?)
Whonix is a derivative of and not affiliated with Debian . Debian is a registered trademark owned by Software in the Public Interest, Inc .
Whonix is produced independently from the Tor anonymity software and carries no guarantee from The Tor Project about quality, suitability or anything else.
By using our website, you acknowledge that you have read, understood and agreed to our Privacy Policy, Cookie Policy, Terms of Service, and E-Sign Consent. Whonix is provided by ENCRYPTED SUPPORT LP. See Imprint, Contact.
Вместо введения
Чтобы обеспечить анонимность своего пребывания в Сети, мало установить Tor и завернуть в него весь исходящий трафик. Необходимо позаботиться о таких вещах, как утечки DNS, обнаружение твоего географического положения на основе настроек часового пояса, утечки имени пользователя (через SSH, например), утечки IP-адреса, свойственные некоторым сетевым протоколам, побороть проблему идентификации машины на выходных узлах Tor путем сравнения типов трафика. Ну и в целом придется серьезно повозиться, чтобы заставить все установленные сетевые приложения использовать Tor и не выдавать данных о твоей машине.
Ты можешь сделать все это сам, но лучше взять проверенное готовое решение, а именно дистрибутив TAILS. Он включает в себя множество преднастроенных приложений, корректно настроенный Tor и брандмауэр, так что в целом это достаточно надежная в плане сохранения анонимности и приватности система, которой не гнушался пользоваться сам Эдвард Сноуден.
Однако у TAILS есть два серьезных ограничения. Во-первых, это Live CD, изначально позиционируемый как «одноразовый»: TAILS не умеет запоминать свое состояние между выключениями и не оставляет никаких следов на машине. Как средство для слива секретных документов АНБ несколько раз за всю жизнь это превосходный инструмент, как повседневно используемая система — ужасный. Во-вторых, запуская TAILS на голом железе, юзер автоматически открывает серьезную дыру в своей анонимности. Ведь конфигурация ПК тоже позволяет идентифицировать человека.
Плюс TAILS никак не защищена от компрометации системы. Любой взломавший твою машину сразу деанонимизирует и твой IP, и тебя самого. Чтобы этого избежать, запланировано размещать ключевые системные сервисы в песочницах — но только в версии 3.0, которая непонятно когда выйдет, да это и не даст стопроцентной защиты. А самое печальное, что «благодаря» необновляемости системы ты не сможешь быстро залатать дыру, с помощью которой тебя взломали, придется ждать официальный релиз свежей версии TAILS (при условии, что информация о дыре находится в открытом доступе).
Для решения всех этих проблем как раз и предназначен Linux-дистрибутив Whonix, преследующий те же цели, но достигающий их несколько иным путем.
How do I Install the Latest Tor Version?[edit]
Follow the instructions here to install later Tor versions from either:
- the Whonix repository; or
- Tor Project APT repositories; or
- Tor Project source code.
Further Readingedit
- Why does Whonix use Tor?
- Why is Tor slow?
- Censorship Circumvention — Configure (Private) (Obfuscated) Tor Bridges
- Hide Tor and Whonix use from the ISP
- Control and Monitor Tor
- Hosting Tor Onion Services (any Hidden Webserver)
- Comparison of Tor with CGI Proxies, Proxy Chains and VPN Services
- Newer Tor Versions
Footnotes / Referencesedit
-
Folder is not a real drop-in folder yet due to an upstream issue .
-
is auto generated. It can be examined but changes should only be made to .
-
/var/run/tor/log is a Tor configuration file specific to Whonix and an alternative to /var/log/tor/log. The former only contains Tor’s output since Whonix-Gateway () last booted. The latter is a permanent log that persists across reboots. The former has a small usability advantage because it is shorter and should therefore contain more relevant information.
- whonixcheck check /var/lib/tor folder permission
-
UWT_DEV_PASSTHROUGH=1 curl 10.152.152.10:9100
UWT_DEV_PASSTHROUGH=1 curl 10.152.152.10:9100
- https://trac.torproject.org/projects/tor/ticket/15261
- obfs3 bridges have been deprecated.
-
ClientTransportPlugin fte exec /usr/bin/fteproxy --managed
ClientTransportPlugin fte exec /usr/bin/fteproxy —managed
-
fte example text to add to /usr/local/etc/torrc.d/50_user.conf.
fte is supported in Whonix 15, but further testing is required; see: https://phabricator.whonix.org/T520ClientTransportPlugin fte exec /usr/bin/fteproxy --managed bridge fte 10.200.100.60:95128 4352e58420e68f5e40bf7c74faddccd9d1349413 bridge fte 300.100.300.80:23521 4352e58420e68f5e40bf7c74faddccd9d1349413
ClientTransportPlugin fte exec /usr/bin/fteproxy —managed
bridge fte 10.200.100.60:95128 4352e58420e68f5e40bf7c74faddccd9d1349413
bridge fte 300.100.300.80:23521 4352e58420e68f5e40bf7c74faddccd9d1349413 - meek_lite actually uses a different implementation of obfs4proxy. Forum discussion: https://forums.whonix.org/t/censorship-circumvention-tor-pluggable-transports/2601/3
- https://trac.torproject.org/projects/tor/ticket/7830
- Deferring to their expertise on the possible adverse anonymity effects.
- Changes to the configuration file are made by the anon-gw-anonymizer-config package.
- This means changes occur for all Tor users and not a subset relying on a particular distribution.
- ↑ https://en.wikipedia.org/wiki/Fork_(software_development)
-
http://forums.whonix.org/t/how-to-set-an-exit-node-in-wonix-of-qubesos/9070
Whonix is Supported by Evolution Host DDoS
Protected VPS. Stay private and get your VPS with Bitcoin or Monero.
Search engines: YaCy | Qwant | ecosia | MetaGer | peekier | Whonix Wiki
Follow:
Donate:
Share:
|
Love Whonix and want to help spread the word? You can start by telling your friends or posting news about Whonix on your website, blog or social media.
This is a wiki. Want to improve this page? Help is welcome and volunteer contributions are happily considered! Read, understand and agree to , then Edit! Edits are held for moderation. Policy of Whonix Website and Whonix Chat and Policy On Nonfreedom Software applies.
Copyright (C) 2012 — 2020 ENCRYPTED SUPPORT LP. Whonix is a trademark. Whonix is a licensee of the Open Invention Network . Unless otherwise noted, the content of this page is copyrighted and licensed under the same Freedom Software as Whonix itself. (Why?)
Whonix is a derivative of and not affiliated with Debian . Debian is a registered trademark owned by Software in the Public Interest, Inc .
Whonix is produced independently from the Tor anonymity software and carries no guarantee from The Tor Project about quality, suitability or anything else.
By using our website, you acknowledge that you have read, understood and agreed to our Privacy Policy, Cookie Policy, Terms of Service, and E-Sign Consent. Whonix is provided by ENCRYPTED SUPPORT LP. See Imprint, Contact.
How do I Change Other Tor Settings?[edit]
Questions are often raised in forums about how other Tor-specific changes can be made in Whonix , such as excluding specific exit nodes.
In many cases, making such changes is already documented Whonix Documentation. In other cases such changes are discouraged.
In all instances:
- Changes must be made to the Tor configuration file as per .
- Refer to the Tor Project Manual for specific configuration details.
For example, to exclude exit nodes from the Five Eyes countries the Tor configuration would include the following lines:
ExcludeExitNodes {us},{au},{ca},{nz},{gb}
StrictNodes 1
A should be run afterwards inside Whonix-Gateway (Qubes-Whonix : ) to confirm there are no Tor configuration syntax errors. As these configurations are specific to Tor (and not Whonix ), the Free Support Principle applies.
Open File with Root Rights[edit]
Prefer for better security. Replace with the actual file name.
sudoedit /path/to/file
sudoedit /path/to/file
To use a different editor. Replace with the name of the editor you wish to use.
SUDO_EDITOR=mousepad sudoedit /path/to/file
SUDO_EDITOR=mousepad sudoedit /path/to/file
An alternative would be to install these tools and so you can keep copying and pasting these instructions.
Install .
1. Update the package lists.
sudo apt-get update
sudo apt-get update
2. Upgrade the system.
sudo apt-get dist-upgrade
sudo apt-get dist-upgrade
3. Install the package.
sudo apt-get install --no-install-recommends sudo lxsudo mousepad
sudo apt-get install —no-install-recommends sudo lxsudo mousepad
The procedure of installing is complete.
lxsudo mousepad /path/to/file
lxsudo mousepad /path/to/file
Increase Virtual Machine RAM[edit]
Qubes-Whonix users can skip this section.
- Whonix-Workstation : No changes required for most users.
- Whonix-Gateway : If you have enough RAM on the host, ideally users should increase the virtual RAM setting of Whonix-Gateway to MB RAM.
If this is not feasible, this is okay too.
If you are unsure of how much RAM is available, follow these steps on the host:
-
Windows 10:
- → → ; or
- →
- macOS: →
- Linux: →
Related:
KVMedit
1. Shutdown the virtual machine(s).
virsh -c qemu:///system shutdown <vm_name>
virsh -c qemu:///system shutdown <vm_name>
2. Increase the maximum memory.
virsh setmaxmem <vm_name> <memsize> --config
virsh setmaxmem <vm_name> <memsize> —config
3. Set the actual memory.
virsh setmem <vm_name> <memsize> --config
virsh setmem <vm_name> <memsize> —config
4. Restart the virtual machine(s).
virsh -c qemu:///system start <vm_name>
virsh -c qemu:///system start <vm_name>
Sample whonixcheck Output[edit]
System Checksedit
In all the checks below, whonixcheck warnings appear if a problem is detected. Conversely, whonixcheck output is otherwise quiet unless using the option. Any operating system updates, downloads or other network activity are stream-isolated by default.
Table: whonixcheck System Checks
| Check | Description |
|---|---|
| Clock Source | Check if the clock source is KVMClock and warn if that is the case. |
| Control Port Filter Proxy | Check if Control Port Filter Proxy is running. |
| Entropy Test | An entropy availability check confirms /proc/sys/kernel/random/entropy_avail contains no less than 112 bytes. |
| Hostname | Check if:
Also inform if Whonix-APT-Repository is enabled, and if so, which repository has been selected. |
| IP Address Routing | Check if IP forwarding is disabled on Whonix-Gateway (). |
| Log Inspection | When using the option, check if ~/.whonix/msgdispatcher-error.log or ~/.whonix/whonix_torbrowser_updater_error.log exist and report this if confirmed. |
| Meta-package Check | Check if the relevant meta-packages are installed on Whonix-Gateway () or Whonix-Workstation (). Also see: Whonix Debian Packages. |
| Network Connection | Check whonixsetup has properly configured networking. |
| Operating System Updates | apt-get update is run through a separate apt-get SocksPort for stream isolation. A notification is provided whether the system is up-to-date or requires updating. |
| Package Manager | Check if a package manager is currently running and wait until the process is finished. This prevents connection failures during concurrent upgrades of the Tor or Control Port Filter Proxy packages. |
| Tor | Check:
Notify about the Tor connection / IP address. |
| Tor Bootstrap and Browser Version | Tor Bootstrap Status:
On Whonix-Workstation (), a Stream Isolation test checks the IP addresses from (1) and (2) differ. Download https://check.torproject.org/RecommendedTBBVersions with curl through an extra SocksPort. |
| Virtualization Platform | Check Whonix is being run on one of the supported virtualizer platforms, including bare metal (Physical Isolation), VirtualBox, KVM or Qubes. |
| Whonix Version and News |
.
Download Whonix News Files with curl through an extra Whonix news SocksPort. This check is designed to be functional:
News features:
|