Докеризируем socket.io, redis и php
Содержание:
- Features
- The web framework
- Emitting events
- dgram module functions#
- Node.js и socket.io
- What Socket.IO is
- Фронтенд с Vue.js (разметка)
- Пространства и «комнаты»
- Serving HTML
- Minimal working example
- Initialization examples
- Установка
- IPC support#
- os.networkInterfaces()#
- Настройка кода клиентской части
- os.setPriority([pid, ]priority)#
- Features
- How to use
Features
Its main features are:
Reliability
Connections are established even in the presence of:
- proxies and load balancers.
- personal firewall and antivirus software.
For this purpose, it relies on Engine.IO, which first establishes a long-polling connection, then tries to upgrade to better transports that are “tested” on the side, like WebSocket. Please see the section for more information.
Auto-reconnection support
Unless instructed otherwise a disconnected client will try to reconnect forever, until the server is available again. Please see the available reconnection options .
Disconnection detection
A heartbeat mechanism is implemented at the Engine.IO level, allowing both the server and the client to know when the other one is not responding anymore.
That functionality is achieved with timers set on both the server and the client, with timeout values (the pingInterval and pingTimeout parameters) shared during the connection handshake. Those timers require any subsequent client calls to be directed to the same server, hence the sticky-session requirement when using multiples nodes.
Binary support
Any serializable data structures can be emitted, including:
- ArrayBuffer and Blob in the browser
- ArrayBuffer and Buffer in Node.js
Multiplexing support
In order to create separation of concerns within your application (for example per module, or based on permissions), Socket.IO allows you to create several , which will act as separate communication channels but will share the same underlying connection.
The web framework
The first goal is to set up a simple HTML webpage that serves out a form and a list of messages. We’re going to use the Node.JS web framework to this end. Make sure Node.JS is installed.
First let’s create a manifest file that describes our project. I recommend you place it in a dedicated empty directory (I’ll call mine ).
{ "name": "socket-chat-example", "version": "0.0.1", "description": "my first socket.io app", "dependencies": {}}
|
Now, in order to easily populate the property with the things we need, we’ll use :
npm install express@4.15.2 |
Once it’s installed we can create an file that will set up our application.
var app = require('express')();var http = require('http').createServer(app);app.get('/', (req, res) => { res.send('<h1>Hello world</h1>');});http.listen(3000, () => { console.log('listening on *:3000');});
|
This means that it:
- Express initializes to be a function handler that you can supply to an HTTP server (as seen in line 2).
- We define a route handler that gets called when we hit our website home.
- We make the http server listen on port 3000.
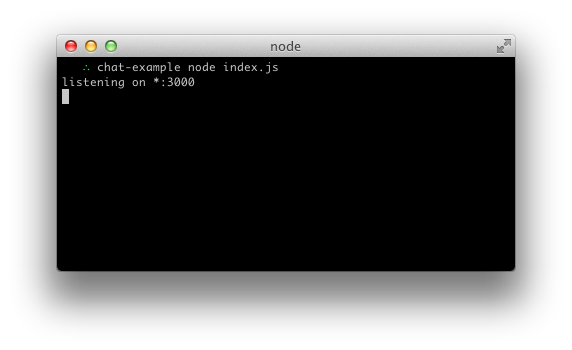
If you run you should see the following:
And if you point your browser to :

Emitting events
The main idea behind Socket.IO is that you can send and receive any events you want, with any data you want. Any objects that can be encoded as JSON will do, and is supported too.
Let’s make it so that when the user types in a message, the server gets it as a event. The section in should now look as follows:
<script src="/socket.io/socket.io.js"></script><script src="https://code.jquery.com/jquery-3.4.1.min.js"></script><script> $(function () { var socket = io(); $('form').submit(function(e) { e.preventDefault(); socket.emit('chat message', $('#m').val()); $('#m').val(''); return false; }); });</script>
|
And in we print out the event:
io.on('connection', (socket) => { socket.on('chat message', (msg) => { console.log('message: ' + msg); });});
|
The result should be like the following video:
dgram module functions#
History
| Version | Changes |
|---|---|
| v11.4.0 |
The option is supported. |
| v8.7.0 |
The and options are supported now. |
| v8.6.0 |
The option is supported. |
| v0.11.13 |
Added in: v0.11.13 |
-
<Object> Available options are:
-
The family of socket. Must be either or .
Required. -
When will reuse the
address, even if another process has already bound a socket on it.
Default: . -
Setting to will
disable dual-stack support, i.e., binding to address won’t make
be bound. Default: . - Sets the socket value.
- Sets the socket value.
- <Function> Custom lookup function. Default: .
-
The family of socket. Must be either or .
- <Function> Attached as a listener for events. Optional.
- Returns:
Creates a object. Once the socket is created, calling
will instruct the socket to begin listening for datagram
messages. When and are not passed to the
method will bind the socket to the «all interfaces» address on a random port
(it does the right thing for both and sockets). The bound address
and port can be retrieved using and
.
Added in: v0.1.99
- Either or .
- <Function> Attached as a listener to events.
- Returns:
Creates a object of the specified .
Once the socket is created, calling will instruct the
socket to begin listening for datagram messages. When and are
not passed to the method will bind the socket to the «all
interfaces» address on a random port (it does the right thing for both
and sockets). The bound address and port can be retrieved using
and .
Node.js и socket.io
Для использования в Node.js WebSocket необходимо установить npm модуль socket.io.
Рассмотрим пример.
app.js
index.html
Для подключения WebSocket на клиентской стороне используется модуль , экземпляру которого передается адрес сервера, с которым необходимо установить соединение по WebSocket.
При установке соединения между клиентом и сервером Node.js по WebSocket генерируется событие , которое обрабатывается с помощью метода модуля . Передаваемая вторым параметром методу callback-функция единственным параметром принимает экземпляр соединения (далее просто сокет).
Каждое соединение имеет свой уникальный идентификатор, зная который можно отправить сообщение конкретному клиенту (см. в примере маршрут ).
При разрыве соединения генерируется событие . Соединение разрывается, когда пользователь закрывает вкладку или когда сервер вызывает у сокета метод .
Для отправки данных от сервера Node.js к клиенту (и наоборот), используется метод , которые принимает следующие параметры:
- имя события;
- данные, которые необходимо отправить (могут быть отправлены в виде REST-аргументов);
- callback-функция (передается последним параметром), которая будет вызвана, когда вторая сторона получит сообщение.
Обработка отправляемых данных на стороне получателя происходит с использованием уже знакомого метода , первым параметром принимающего имя события, указанного в , вторым — callback-функцию с переданными данными в качестве ее параметров.
Для отправки данных всем клиентам, используйте метод применительно к объекту .
Чтобы узнать текущее количество соединений, используйте метод , вызываемый применительно к свойству экземпляра модуля (см. в примере маршрут ).
В качестве необязательного параметра методу можно передать имя «комнаты», количество соединений для который вы хотите узнать.
What Socket.IO is
Socket.IO is a library that enables real-time, bidirectional and event-based communication between the browser and the server. It consists of:
- a Node.js server: Source | API
- a Javascript client library for the browser (which can be also run from Node.js): Source | API

There are also several client implementation in other languages, which are maintained by the community:
- Java: https://github.com/socketio/socket.io-client-java
- C++: https://github.com/socketio/socket.io-client-cpp
- Swift: https://github.com/socketio/socket.io-client-swift
- Dart: https://github.com/rikulo/socket.io-client-dart
- Python: https://github.com/miguelgrinberg/python-socketio
- .Net: https://github.com/Quobject/SocketIoClientDotNet
How does that work?
The client will try to establish a WebSocket connection if possible, and will fall back on HTTP long polling if not.
WebSocket is a communication protocol which provides a full-duplex and low-latency channel between the server and the browser. More information can be found here.
So, in the best-case scenario, provided that:
- the browser supports WebSocket ( of all browsers in 2020)
- there is no element (proxy, firewall, …) preventing WebSocket connections between the client and the server
you can consider the Socket.IO client as a “slight” wrapper around the WebSocket API. Instead of writing:
const socket = new WebSocket('ws://localhost:3000');socket.onopen(() => { socket.send('Hello!');});socket.onmessage(data => { console.log(data);});
|
You will have, on the client-side:
const socket = io('ws://localhost:3000');socket.on('connect', () => { socket.send('Hello!'); socket.emit('salutations', 'Hello!', { 'mr': 'john' }, Uint8Array.from());});socket.on('message', data => { console.log(data);});socket.on('greetings', (elem1, elem2, elem3) => { console.log(elem1, elem2, elem3);});
|
The API on the server-side is similar, you also get an object which extends the Node.js class:
const io = require('socket.io')(3000);io.on('connect', socket => { socket.send('Hello!'); socket.emit('greetings', 'Hey!', { 'ms': 'jane' }, Buffer.from()); socket.on('message', (data) => { console.log(data); }); socket.on('salutations', (elem1, elem2, elem3) => { console.log(elem1, elem2, elem3); });});
|
Socket.IO provides additional features over a plain WebSocket object, which are listed .
But first, let’s detail what the Socket.IO library is not.
Фронтенд с Vue.js (разметка)
Интерфейс приложения мы сделаем в Vue.js. Его нужно установить в нашу директорию и добавить bootstrap 4.3.1.
Создадим файл index.html.
touch index.html
Для включения в проекты Vue.js и bootstrap скопируем CDN и добавим в раздел со скриптами файла index.html.
<!DOCTYPE html><html lang="en"><head> <meta charset="UTF-8"> <meta name="viewport" content="width=device-width, initial-scale=1.0"> <meta http-equiv="X-UA-Compatible" content="ie=edge"> <title>ChatApp_Socket</title> <link href="https://stackpath.bootstrapcdn.com/bootstrap/4.3.1/css/bootstrap.min.css" rel="stylesheet" integrity="sha384-ggOyR0iXCbMQv3Xipma34MD+dH/1fQ784/j6cY/iJTQUOhcWr7x9JvoRxT2MZw1T" crossorigin="anonymous" /> <script src="https://cdnjs.cloudflare.com/ajax/libs/vue/2.6.10/vue.js"></script> <script src="/socket.io/socket.io.js"></script></head>
После успешной установки Vue и bootstrap перейдем к созданию разметки.
<body> <div id="app"> <div class="container"> <div class="col-lg-6 offset-lg-3"> <div v-if="ready"> <p v-for="user in info"> {{user.username}} {{user.type}} </p> </div> <div v-if="!ready"> <h4>Enter your username</h4> <form @submit.prevent="addUser"> <div class="form-group row"> <input type="text" class="form-control col-9" v-model="username" placeholder="Enter username here"> <input type="submit" value="Join" class="btn btn-sm btn-info ml-1"> </div> </form> </div> <h2 v-else>{{username}}</h2> <div class="card bg-info" v-if="ready"> <div class="card-header text-white"> <h4>My Chat App <span class="float-right">{{connections}} connections</span></h4> </div> <ul class="list-group list-group-flush text-right"> <small v-if="typing" class="text-white">{{typing}} is typing</small> <li class="list-group-item" v-for="message in messages"> <span :class="{'float-left':message.type === 1}"> {{message.message}} <small>:{{message.user}}</small> </span> </li> </ul> <div class="card-body"> <form @submit.prevent="send"> <div class="form-group"> <input type="text" class="form-control" v-model="newMessage" placeholder="Enter message here"> </div> </form> </div> </div> </div> </div> </div></body>
Для подключения Socket.IO сервера к клиенту добавим клиентские JavaScript библиотеки.
<script src="/socket.io/socket.io.js"></script>
Это будет наш файл Vue и bootstrap (HTML) для фронтенда. Можете скопировать код целиком, чтобы не отставать.
Также можете скачать клиентскую библиотеку Socket.IO.
Можно разграничить функционал, вынеся JavaScript-код из общей разметки. Это решать вам. Но я для удобства этого делать не буду.
Пространства и «комнаты»
В протоколе WebSocket существуют такие понятия, как пространства и «комнаты». По умолчанию посылаемые данные отправляются всем сокетам, но принимают эти данные лишь некоторые из них. Получается, что в определенные моменты времени будет установлено избыточное количество соединений. Чтобы избежать этого, используйте пространства.
Пространства позволяют изолировать одни сокеты от других.
app.js
В приведенном примере с помощью метода на сервере определяются два пространства: и . На клиентской стороне подключение к тому или иному пространству происходит в зависимости от текущего маршрута. Таким образом, при отправке данных, например, из пространства , об этом будут оповещены только сокеты этого пространства. По умолчанию все сокеты находятся в пространстве .
Также и в пределах пространства можно распределять сокеты по так называемым «комнатам».
Чтобы отнести сокет к определенной «комнате» используется метод пространства , который принимает имя «комнаты» (задается пользователем модуля ). Для вынесения сокета из комнаты используйте метод .
Отправка данных в «комнату» осуществляется с помощью метода .
Обработка инициируемых в пределах «комнаты» событий осуществляется с использованием метода .
Serving HTML
So far in we’re calling and passing it a string of HTML. Our code would look very confusing if we just placed our entire application’s HTML there, so instead we’re going to create a file and serve that instead.
Let’s refactor our route handler to use instead.
app.get('/', (req, res) => { res.sendFile(__dirname + '/index.html');});
|
Put the following in your file:
<!doctype html><html> <head> <title>Socket.IO chat</title> <style> * { margin: 0; padding: 0; box-sizing: border-box; } body { font: 13px Helvetica, Arial; } form { background: #000; padding: 3px; position: fixed; bottom: 0; width: 100%; } form input { border: 0; padding: 10px; width: 90%; margin-right: 0.5%; } form button { width: 9%; background: rgb(130, 224, 255); border: none; padding: 10px; } #messages { list-style-type: none; margin: 0; padding: 0; } #messages li { padding: 5px 10px; } #messages li:nth-child(odd) { background: #eee; } </style> </head> <body> <ul id="messages"></ul> <form action=""> <input id="m" autocomplete="off" /><button>Send</button> </form> </body></html>
|
If you restart the process (by hitting Control+C and running again) and refresh the page it should look like this:

Minimal working example
If you are new to the Node.js ecosystem, please take a look at the Get Started guide, which is ideal for beginners.
Else, let’s start right away! The server library can be installed from NPM:
$ npm install socket.io |
More information about the installation can be found in the Server installation page.
Then, let’s create an file, with the following content:
const content = require('fs').readFileSync(__dirname + '/index.html', 'utf8');const httpServer = require('http').createServer((req, res) => { res.setHeader('Content-Type', 'text/html'); res.setHeader('Content-Length', Buffer.byteLength(content)); res.end(content);});const io = require('socket.io')(httpServer);io.on('connect', socket => { console.log('connect');});httpServer.listen(3000, () => { console.log('go to http://localhost:3000');});
|
Here, a classic Node.js is started to serve the file, and the Socket.IO server is attached to it. Please see the Server initialization page for the various ways to create a server.
Let’s create the file next to it:
<!DOCTYPE html><html lang="en"><head> <meta charset="UTF-8"> <title>Minimal working example</title></head><body> <ul id="events"></ul> <script src="/socket.io/socket.io.js"></script> <script> const $events = document.getElementById('events'); const newItem = (content) => { const item = document.createElement('li'); item.innerText = content; return item; }; const socket = io(); socket.on('connect', () => { $events.appendChild(newItem('connect')); }); </script></body></html>
|
Finally, let’s start our server:
$ node index.js |
And voilà!
The object on both sides extends the EventEmitter class, so:
- sending an event is done with:
- receiving an event is done by registering a listener:
To send an event from the server to the client
Let’s update the file (server-side):
io.on('connect', socket => { let counter = ; setInterval(() => { socket.emit('hello', ++counter); }, 1000);});
|
And the file (client-side):
const socket = io();socket.on('connect', () => { $events.appendChild(newItem('connect'));});socket.on('hello', (counter) => { $events.appendChild(newItem(`hello - ${counter}`));});
|
Demo:
To send a message from the client to the server
Let’s update the file (server-side):
io.on('connect', socket => { socket.on('hey', data => { console.log('hey', data); });});
|
And the file (client-side):
const socket = io();socket.on('connect', () => { $events.appendChild(newItem('connect'));});let counter = ;setInterval(() => { ++counter; socket.emit('hey', { counter }); }, 1000);
|
Demo:
Now, let’s detail the features provided by Socket.IO.
Initialization examples
With multiplexing
By default, a single connection is used when connecting to different namespaces (to minimize resources):
const socket = io();const adminSocket = io('/admin');
|
That behaviour can be disabled with the option:
const socket = io();const adminSocket = io('/admin', { forceNew: true });
|
Note: reusing the same namespace will also create two connections
const socket = io();const socket2 = io(); |
With custom
const socket = io('http://localhost', { path: '/myownpath'});const io = require('socket.io')({ path: '/myownpath'});
|
The request URLs will look like:
const socket = io('http://localhost/admin', { path: '/mypath'});
|
Here, the socket connects to the namespace, with the custom path .
The request URLs will look like: (the namespace is sent as part of the payload).
With query parameters
const socket = io('http://localhost?token=abc');const io = require('socket.io')();io.use((socket, next) => { let token = socket.handshake.query.token; if (isValid(token)) { return next(); } return next(new Error('authentication error'));});io.on('connection', (socket) => { let token = socket.handshake.query.token;});
|
With query option
const socket = io({ query: { token: 'cde' }});
|
The query content can also be updated on reconnection:
socket.on('reconnect_attempt', () => { socket.io.opts.query = { token: 'fgh' }});
|
With
This only works if transport is enabled (which is the default). Custom headers will not be appended when using as the transport. This happens because the WebSocket handshake does not honor custom headers. (For background see the )
const socket = io({ transportOptions: { polling: { extraHeaders: { 'x-clientid': 'abc' } } }});const io = require('socket.io')();io.use((socket, next) => { let clientId = socket.handshake.headers; if (isValid(clientId)) { return next(); } return next(new Error('authentication error'));});
|
With transport only
By default, a long-polling connection is established first, then upgraded to “better” transports (like WebSocket). If you like to live dangerously, this part can be skipped:
const socket = io({ transports: });socket.on('reconnect_attempt', () => { socket.io.opts.transports = ;});
|
With a custom parser
The default parser promotes compatibility (support for , , binary check) at the expense of performance. A custom parser can be provided to match the needs of your application. Please see the example here.
const parser = require('socket.io-msgpack-parser'); const socket = io({ parser: parser});const io = require('socket.io')({ parser: parser});
|
With a self-signed certificate
const fs = require('fs');const server = require('https').createServer({ key: fs.readFileSync('server-key.pem'), cert: fs.readFileSync('server-cert.pem')});const io = require('socket.io')(server);server.listen(3000);const socket = io({ ca: fs.readFileSync('server-cert.pem'), rejectUnauthorized: false});
|
Установка
Для работы нам понадобятся Node.js и NPM. Если у вас еще нет установленного Node.JS, то качайте его отсюда.
- Вам потребуются базовые знания JavaScript.
- Пригодятся небольшие знания по Vue.js (но это не принципиально).
Если все готово, то можно начинать.
Создайте директорию для приложения и откройте ее в любимом редакторе. Я пользуюсь Visual Studio Code.
Если хотите, можете работать в терминале.
mkdir ChatApp && cd ChatApp && code
Давайте инициализируем директорию через NPM.
npm init
Если вам предлагают ввести какую-то информацию, смело ее вводите или нажимайте Enter для настроек по умолчанию. Такая информация используется для настройки пакета .json файла.
IPC support#
The module supports IPC with named pipes on Windows, and Unix domain
sockets on other operating systems.
Identifying paths for IPC connections
, , and
take a parameter to identify IPC endpoints.
On Unix, the local domain is also known as the Unix domain. The path is a
filesystem pathname. It gets truncated to an OS-dependent length of
. Typical values are 107 bytes on Linux and
103 bytes on macOS. If a Node.js API abstraction creates the Unix domain socket,
it will unlink the Unix domain socket as well. For example,
may create a Unix domain socket and
will unlink it. But if a user creates the Unix domain
socket outside of these abstractions, the user will need to remove it. The same
applies when a Node.js API creates a Unix domain socket but the program then
crashes. In short, a Unix domain socket will be visible in the filesystem and
will persist until unlinked.
On Windows, the local domain is implemented using a named pipe. The path must
refer to an entry in or . Any characters are permitted,
but the latter may do some processing of pipe names, such as resolving
sequences. Despite how it might look, the pipe namespace is flat. Pipes will
not persist. They are removed when the last reference to them is closed.
Unlike Unix domain sockets, Windows will close and remove the pipe when the
owning process exits.
JavaScript string escaping requires paths to be specified with extra backslash
escaping such as:
os.networkInterfaces()#
Added in: v0.6.0
Returns:
Returns an object containing network interfaces that have been assigned a
network address.
Each key on the returned object identifies a network interface. The associated
value is an array of objects that each describe an assigned network address.
The properties available on the assigned network address object include:
- The assigned IPv4 or IPv6 address
- The IPv4 or IPv6 network mask
- Either or
- The MAC address of the network interface
-
if the network interface is a loopback or
similar interface that is not remotely accessible; otherwise -
The numeric IPv6 scope ID (only specified when
is ) -
The assigned IPv4 or IPv6 address with the routing prefix
in CIDR notation. If the is invalid, this property is set
to .
Настройка кода клиентской части
Откройте index.html. В нижней части файла добавьте следующий код в тег script.
<script> var socket = io(); let vue = new Vue({ el: '#app', data: { newMessage: null, messages: [], typing: false, username: null, ready: false, info: [], connections: 0, }, created() { window.onbeforeunload = () => { socket.emit('leave', this.username); } socket.on('chat-message', (data) => { this.messages.push({ message: data.message, type: 1, user: data.user, }); }); socket.on('typing', (data) => { this.typing = data; }); socket.on('stopTyping', () => { this.typing = false; }); socket.on('joined', (data) => { this.info.push({ username: data, type: 'joined' }); setTimeout(() => { this.info = []; }, 5000); }); socket.on('leave', (data) => { this.info.push({ username: data, type: 'left' }); setTimeout(() => { this.info = []; }, 5000); }); socket.on('connections', (data) => { this.connections = data; }); }, watch: { newMessage(value) { value ? socket.emit('typing', this.username) : socket.emit('stopTyping') } }, methods: { send() { this.messages.push({ message: this.newMessage, type: 0, user: 'Me', }); socket.emit('chat-message', { message: this.newMessage, user: this.username }); this.newMessage = null; }, addUser() { this.ready = true; socket.emit('joined', this.username) } }, });</script></html>
Мы добавили и создали новый экземпляр Vue. Далее внутри этого экземпляра прописали наш элемент как и объявили наш объект данных с помощью пустых массивов и свойств.
Давайте перейдем к объекту. Мы видим метод. Он хранит информацию о чате в массиве message и отправляет события чата на сервер с помощью флага .
methods: { send() { this.messages.push({ message: this.newMessage, type: 0, user: 'Me', }); socket.emit('chat-message', { message: this.newMessage, user: this.username }); this.newMessage = null; }, .....
На серверной стороне мы получаем событие с флагом и через флаг пересылаем его другим подключенным клиентам.
В хуке Vue мы прослушиваем все события, отправленные сервером. Сюда же включено событие chat-message, которое мы пересылали с сервера ранее.
Через трансляцию событий сервер отправляет их всем подключенным клиентам, кроме самого отправителя.
os.setPriority([pid, ]priority)#
Added in: v10.10.0
-
The process ID to set scheduling priority for.
Default . - The scheduling priority to assign to the process.
Attempts to set the scheduling priority for the process specified by . If
is not provided or is , the process ID of the current process is used.
The input must be an integer between (high priority) and
(low priority). Due to differences between Unix priority levels and Windows
priority classes, is mapped to one of six priority constants in
. When retrieving a process priority level, this range
mapping may cause the return value to be slightly different on Windows. To avoid
confusion, set to one of the priority constants.
On Windows, setting priority to requires elevated user
privileges. Otherwise the set priority will be silently reduced to
.
Features
Socket.IO enables real-time bidirectional event-based communication. It consists of:
- a Node.js server (this repository)
Some implementations in other languages are also available:
Its main features are:
Connections are established even in the presence of:
- proxies and load balancers.
- personal firewall and antivirus software.
A heartbeat mechanism is implemented at the Engine.IO level, allowing both the server and the client to know when the other one is not responding anymore.
That functionality is achieved with timers set on both the server and the client, with timeout values (the and parameters) shared during the connection handshake. Those timers require any subsequent client calls to be directed to the same server, hence the requirement when using multiples nodes.
Any serializable data structures can be emitted, including:
Sample code:
io.on('connection',socket=>{socket.emit('request',);io.emit('broadcast',);socket.on('reply',()=>{});});
Browser support is tested in Saucelabs:
In order to create separation of concerns within your application (for example per module, or based on permissions), Socket.IO allows you to create several , which will act as separate communication channels but will share the same underlying connection.
Within each , you can define arbitrary channels, called , that sockets can join and leave. You can then broadcast to any given room, reaching every socket that has joined it.
This is a useful feature to send notifications to a group of users, or to a given user connected on several devices for example.
How to use
The following example attaches socket.io to a plain Node.JS
HTTP server listening on port .
constserver=require('http').createServer();constio=require('socket.io')(server);io.on('connection',client=>{client.on('event',data=>{});client.on('disconnect',()=>{});});server.listen(3000);
constio=require('socket.io')();io.on('connection',client=>{...});io.listen(3000);
Starting with 3.0, express applications have become request handler
functions that you pass to or instances. You need
to pass the to , and not the express application
function. Also make sure to call on the , not the .
constapp=require('express')();constserver=require('http').createServer(app);constio=require('socket.io')(server);io.on('connection',()=>{});server.listen(3000);
Like Express.JS, Koa works by exposing an application as a request
handler function, but only by calling the method.
constapp=require('koa')();constserver=require('http').createServer(app.callback());constio=require('socket.io')(server);io.on('connection',()=>{});server.listen(3000);