Alerts
Содержание:
- Z-index
- Beta 3 changes
- Распаковка архива Bootstrap
- Глификонс
- Important globals
- Beta 2 changes
- Supported content
- Подключение Bootstrap к HTML странице
- Beta 3 changes
- Glyphicons
- How do they work?
- Why it’s important to respect brand guidelines
- This is it?
- Responsive behaviors
- Community
- Examples
- Lists
- What are Glyphicons?
Z-index
Several Bootstrap components utilize , the CSS property that helps control layout by providing a third axis to arrange content. We utilize a default z-index scale in Bootstrap that’s been designed to properly layer navigation, tooltips and popovers, modals, and more.
These higher values start at an arbitrary number, high and specific enough to ideally avoid conflicts. We need a standard set of these across our layered components—tooltips, popovers, navbars, dropdowns, modals—so we can be reasonably consistent in the behaviors. There’s no reason we couldn’t have used + or +.
We don’t encourage customization of these individual values; should you change one, you likely need to change them all.
To handle overlapping borders within components (e.g., buttons and inputs in input groups), we use low single digit values of , , and for default, hover, and active states. On hover/focus/active, we bring a particular element to the forefront with a higher value to show their border over the sibling elements.
Beta 3 changes
While Beta 2 saw the bulk of our breaking changes during the beta phase, but we still have a few that needed to be addressed in the Beta 3 release. These changes apply if you’re updating to Beta 3 from Beta 2 or any older version of Bootstrap.
Miscellaneous
- Removed the unused variable. We weren’t transitioning anything, so it was just extra code.
- The npm package no longer includes any files other than our source and dist files; if you relied on them and were running our scripts via the folder, you should adapt your workflow.
Forms
-
Rewrote both custom and default checkboxes and radios. Now, both have matching HTML structure (outer with sibling and ) and the same layout styles (stacked default, inline with modifier class). This allows us to style the label based on the input’s state, simplifying support for the attribute (previously requiring a parent class) and better supporting our form validation.
As part of this, we’ve changed the CSS for managing multiple s on custom form checkboxes and radios. Previously, the now removed element had the background color, gradient, and SVG icon. Customizing the background gradient meant replacing all of those every time you needed to change just one. Now, we have for the fill and gradient and handles the icon.
To make a custom check inline, add .
-
Updated selector for input-based button groups. Instead of for style and behavior, we use the attribute just for JS behaviors and rely on a new class for styling.
-
Removed in favor of a slightly improved . This way and can be used on elements with ease.
-
Custom file inputs received a change to their Sass variable. It’s no longer a nested Sass map and now only powers one string—the button as that is now the only pseudo-element generated from our Sass. The text now comes from the .
Input groups
-
Input group addons are now specific to their placement relative to an input. We’ve dropped and for two new classes, and . You must explicitly use an append or a prepend now, simplifying much of our CSS. Within an append or prepend, place your buttons as they would exist anywhere else, but wrap text in .
-
Validation styles are now supported, as are multiple inputs (though you can only validate one input per group).
-
Sizing classes must be on the parent and not the individual form elements.
Распаковка архива Bootstrap
После скачивания архива (с готовыми к применению CSS и JavaScript файлами), его необходимо распаковать в каталог вашего веб-проекта.
Если рассмотреть архив, то можно заметить, что он имеет следующее содержимое (на примере Bootstrap 3.4.1):
bootstrap/
├── css/
│   ├── bootstrap.css
│   ├── bootstrap.min.css
│   ├── bootstrap-theme.css
│   └── bootstrap-theme.min.css
├── js/
│   ├── bootstrap.js
│   └── bootstrap.min.js
└── fonts/
    ├── glyphicons-halflings-regular.eot
    ├── glyphicons-halflings-regular.svg
    ├── glyphicons-halflings-regular.ttf
    └── glyphicons-halflings-regular.woff
В каталоге находятся стили фреймворка Bootstrap, а в — плагины для обеспечения работы некоторых компонентов. Плагины написаны с использованием функций библиотеки jQuery. Поэтому перед Bootstrap JS необходимо подключить библиотеку jQuery.
Как вы можете заметить, в архиве есть 2 версии CSS и JavaScript файлов, т.е. с суффиксом min и без него. Версия файла с min ничем ни отличается от без min, она просто минимизирована (сжата).
В продакшене (на рабочем сайте) лучше использовать минимизированные версии файлов. Эти файлы имеют меньший размер, и, следовательно, обеспечивают более быструю загрузку страниц сайта.
Не минимизированные версии более удобно использовать при разработке, а также для изучения.
Кроме этих файлов, в данный архив ещё входит иконочный шрифт «Glyphicons». Шрифт «Glyphicons» насчитывает более 250 иконок из набора «Glyphicon Halflings». Шрифт представлен с помощью 4 файлов: , , , ).
Такое разнообразие форматов одного и того же шрифта необходимо для того чтобы обеспечить его отображение во всех браузерах.
Архив фреймворка Bootstrap 4 практически ничем ни отличается от Bootstrap 3. Основное его отличие в том, что он не содержит шрифт «Glyphicons». Если вам нужны шрифтовые иконки, то их необходимо будет подключить самостоятельно. Например, воспользовавшись одним из следующих наборов: FontAwesome, Octicons, Glyphicons, IcoMoon или др. Если же вы не хотите использовать готовый шрифт, а создать свой, который будет состоять только из нужных значков, то воспользуйтесь этой информацией.
Кроме этого архив Bootstrap 4 содержит ещё файлы и . Данные файлы необходимы только тем, кому нужен не целый фреймворк, а только его часть.
Первый файл () содержит сетку Bootstrap, а второй () — нормализатор, который устанавливает базовые стили, для того чтобы они у всех HTML-элементов во всех браузерах были одинаковыми.
Глификонс
Bootstrap включает 260 глифов из набора глификон полуросликов.
Глификонс полуросликов, как правило, не доступны бесплатно, но их создатель сделал их доступными для Bootstrap бесплатно. В качестве благодарности, вы должны включить ссылку на
Глификонс , когда это возможно.
Используйте глификонс в тексте, кнопках, панелях инструментов, навигации, или формах:
Пример глифа Bootstrap
<p>Envelope icon: <span class=»glyphicon glyphicon-envelope»></span></p>
<p>Search icon: <span class=»glyphicon glyphicon-search»></span></p>
<p>Print icon: <span class=»glyphicon glyphicon-print»></span></p>
Important globals
Bootstrap employs a handful of important global styles and settings that you’ll need to be aware of when using it, all of which are almost exclusively geared towards the normalization of cross browser styles. Let’s dive in.
HTML5 doctype
Bootstrap requires the use of the HTML5 doctype. Without it, you’ll see some funky incomplete styling, but including it shouldn’t cause any considerable hiccups.
Responsive meta tag
Bootstrap is developed mobile first, a strategy in which we optimize code for mobile devices first and then scale up components as necessary using CSS media queries. To ensure proper rendering and touch zooming for all devices, add the responsive viewport meta tag to your .
You can see an example of this in action in the .
Box-sizing
For more straightforward sizing in CSS, we switch the global value from to . This ensures does not affect the final computed width of an element, but it can cause problems with some third party software like Google Maps and Google Custom Search Engine.
On the rare occasion you need to override it, use something like the following:
With the above snippet, nested elements—including generated content via and —will all inherit the specified for that .
Learn more about box model and sizing at CSS Tricks.
Reboot
For improved cross-browser rendering, we use Reboot to correct inconsistencies across browsers and devices while providing slightly more opinionated resets to common HTML elements.
Beta 2 changes
While in beta, we aim to have no breaking changes. However, things don’t always go as planned. Below are the breaking changes to bear in mind when moving from Beta 1 to Beta 2.
Breaking
- Removed variable and its usage on . We use a color contrast function to pick a based on the , so the variable is unnecessary.
- Renamed function to to avoid breaking conflict with the CSS native filter.
- Renamed , , and to and , matching our color schemes used elsewhere.
- Responsive tables now generate classes for each grid breakpoint. This breaks from Beta 1 in that the you’ve been using is more like . You may now use or as needed.
- Dropped Bower support as the package manager has been deprecated for alternatives (e.g., Yarn or npm). See bower/bower#2298 for details.
- Bootstrap still requires jQuery 1.9.1 or higher, but you’re advised to use version 3.x since v3.x’s supported browsers are the ones Bootstrap supports plus v3.x has some security fixes.
- Removed the unused class. If you did make use of this class, it was duplicate of the class that vertically centered a with it’s associated input in horizontal form layouts.
- Changed the from a mixin that included the property to a function that returns a value, allowing you to use it for any CSS property. For example, instead of , you’d write .
Highlights
Introduced new pointer-events usage on modals. The outer .modal-dialog passes through events with pointer-events: none for custom click handling (making it possible to just listen on the .modal-backdrop for any clicks), and then counteracts it for the actual .modal-content with pointer-events: auto.
Supported content
Navbars come with built-in support for a handful of sub-components. Choose from the following as needed:
- for your company, product, or project name.
- for a full-height and lightweight navigation (including support for dropdowns).
- for use with our collapse plugin and other behaviors.
- for any form controls and actions.
- for adding vertically centered strings of text.
- for grouping and hiding navbar contents by a parent breakpoint.
Here’s an example of all the sub-components included in a responsive light-themed navbar that automatically collapses at the (large) breakpoint.
This example uses color () and spacing (, , , ) utility classes.
Brand
The can be applied to most elements, but an anchor works best as some elements might require utility classes or custom styles.
Navbar
Adding images to the will likely always require custom styles or utilities to properly size. Here are some examples to demonstrate.
Navbar navigation links build on our options with their own modifier class and require the use of for proper responsive styling. Navigation in navbars will also grow to occupy as much horizontal space as possible to keep your navbar contents securely aligned.
Active states—with —to indicate the current page can be applied directly to s or their immediate parent s.
And because we use classes for our navs, you can avoid the list-based approach entirely if you like.
You may also utilize dropdowns in your navbar nav. Dropdown menus require a wrapping element for positioning, so be sure to use separate and nested elements for and as shown below.
Forms
Place various form controls and components within a navbar with .
Immediate children elements in use flex layout and will default to . Use additional flex utilities as needed to adjust this behavior.
Navbar
Input groups work, too:
Various buttons are supported as part of these navbar forms, too. This is also a great reminder that vertical alignment utilities can be used to align different sized elements.
Text
Navbars may contain bits of text with the help of . This class adjusts vertical alignment and horizontal spacing for strings of text.
Navbar text with an inline element
Mix and match with other components and utilities as needed.
Navbar text with an inline element
Подключение Bootstrap к HTML странице
Процесс установки фреймворка Bootstrap 3 состоит из подключения следующих файлов к HTML 5 странице:
- Bootstrap CSS ();
- Последней версии библиотеки jQuery (необходима для работы JS плагинов Bootstrap);
- Bootstrap JavaScript ().
Примечание: Файлы JavaScript лучше подключать перед закрывающим тегом body (</body>), так как это обеспечит более быструю загрузку и отображение основного контента веб-страницы.
<!DOCTYPE html>
<html lang="ru">
<head>
    <!-- Кодировка веб-страницы -->
    <meta charset="utf-8">
    <!-- Настройка viewport -->
    <meta name="viewport" content="width=device-width, initial-scale=1, shrink-to-fit=no">

    <!-- Подключаем Bootstrap CSS -->
    <link rel="stylesheet" href="css/bootstrap.min.css" >
</head>
<body>

    <!-- Контент страницы -->
    ...

    <!-- Подключаем jQuery -->
    <script src="https://ajax.googleapis.com/ajax/libs/jquery/3.5.1/jquery.min.js"></script>
    <!-- Подключаем Bootstrap JS -->
    <script src="js/bootstrap.min.js"></script>
</body>
</html>
Подключение фреймворка Bootstrap 4 осуществляется так:
<!DOCTYPE html>
<html lang="ru">
<head>
    <!-- Кодировка веб-страницы -->
    <meta charset="utf-8">
    <!-- Настройка viewport -->
    <meta name="viewport" content="width=device-width, initial-scale=1, shrink-to-fit=no">

    <!-- Подключаем Bootstrap CSS -->
    <link rel="stylesheet" href="css/bootstrap.min.css" >
</head>
<body>

    <!-- Контент страницы -->
    ...

    <!-- Подключаем jQuery -->
    <script src="https://ajax.googleapis.com/ajax/libs/jquery/3.5.1/jquery.min.js"></script>
    <!-- Подключаем плагин Popper (необходим для работы компонента Dropdown и др.) -->
    <script src="js/popper.min.js"></script>
    <!-- Подключаем Bootstrap JS -->
    <script src="js/bootstrap.min.js"></script>
</body>
</html>
Подключить Bootstrap 4 можно также с помощью CDN (при этом скачивать Bootstrap в проект не нужно):
<!DOCTYPE html>
<html lang="ru">
<head>
    <!-- Кодировка веб-страницы -->
    <meta charset="utf-8">
    <!-- Настройка viewport -->
    <meta name="viewport" content="width=device-width, initial-scale=1, shrink-to-fit=no">

    <!-- Подключаем Bootstrap CSS -->
    <link rel="stylesheet" href="https://stackpath.bootstrapcdn.com/bootstrap/4.5.0/css/bootstrap.min.css" integrity="sha384-9aIt2nRpC12Uk9gS9baDl411NQApFmC26EwAOH8WgZl5MYYxFfc+NcPb1dKGj7Sk" crossorigin="anonymous">

</head>
<body>

    <!-- Контент страницы -->
    ...

    <!-- Подключаем jQuery -->
    <script src="https://ajax.googleapis.com/ajax/libs/jquery/3.5.1/jquery.min.js"></script>

    <!-- Подключаем плагин Popper -->
    <script src="https://cdn.jsdelivr.net/npm/popper.js@1.16.0/dist/umd/popper.min.js" integrity="sha384-Q6E9RHvbIyZFJoft+2mJbHaEWldlvI9IOYy5n3zV9zzTtmI3UksdQRVvoxMfooAo" crossorigin="anonymous"></script>

    <!-- Подключаем Bootstrap JS -->
    <script src="https://stackpath.bootstrapcdn.com/bootstrap/4.5.0/js/bootstrap.min.js" integrity="sha384-OgVRvuATP1z7JjHLkuOU7Xw704+h835Lr+6QL9UvYjZE3Ipu6Tp75j7Bh/kR0JKI" crossorigin="anonymous" ></script>

</body>
</html>
CDN Bootstrap 3.4.1:
<!-- Bootstrap CSS -->
<link rel="stylesheet" href="https://stackpath.bootstrapcdn.com/bootstrap/3.4.1/css/bootstrap.min.css" integrity="sha384-HSMxcRTRxnN+Bdg0JdbxYKrThecOKuH5zCYotlSAcp1+c8xmyTe9GYg1l9a69psu" crossorigin="anonymous">

<!-- Дополнительные стили (не обязательно) -->
<link rel="stylesheet" href="https://stackpath.bootstrapcdn.com/bootstrap/3.4.1/css/bootstrap-theme.min.css" integrity="sha384-6pzBo3FDv/PJ8r2KRkGHifhEocL+1X2rVCTTkUfGk7/0pbek5mMa1upzvWbrUbOZ" crossorigin="anonymous">

<!-- Подключаем jQuery (необходим для Bootstrap JavaScript) -->
<script src="https://ajax.googleapis.com/ajax/libs/jquery/3.5.1/jquery.min.js"></script>

<!-- Bootstrap JavaScript -->
<script src="https://stackpath.bootstrapcdn.com/bootstrap/3.4.1/js/bootstrap.min.js" integrity="sha384-aJ21OjlMXNL5UyIl/XNwTMqvzeRMZH2w8c5cRVpzpU8Y5bApTppSuUkhZXN0VxHd" crossorigin="anonymous"></script>
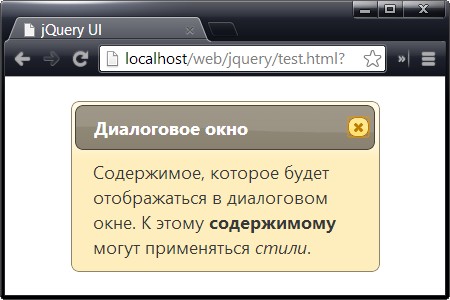
Для проверки работоспособности фреймворка, создадим кнопку, при поднесении к которой будет показываться всплывающая подсказка popover.
<button type="button" class="btn btn-primary" data-toggle="popover"
  title="Сообщение" data-content="Ура, Bootstrap 4 работает">
    Поднеси ко мне курсор
</button>

<!-- После подключения jQuery, Popper и Bootstrap JS -->
<script>
    $(function () {
        $('').popover({trigger:'hover'});
    });
</script>
Скачать пример
Beta 3 changes
While Beta 2 saw the bulk of our breaking changes during the beta phase, but we still have a few that needed to be addressed in the Beta 3 release. These changes apply if you’re updating to Beta 3 from Beta 2 or any older version of Bootstrap.
Miscellaneous
- Removed the unused variable. We weren’t transitioning anything, so it was just extra code.
- The npm package no longer includes any files other than our source and dist files; if you relied on them and were running our scripts via the folder, you should adapt your workflow.
Forms
-
Rewrote both custom and default checkboxes and radios. Now, both have matching HTML structure (outer with sibling and ) and the same layout styles (stacked default, inline with modifier class). This allows us to style the label based on the input’s state, simplifying support for the attribute (previously requiring a parent class) and better supporting our form validation.
As part of this, we’ve changed the CSS for managing multiple s on custom form checkboxes and radios. Previously, the now removed element had the background color, gradient, and SVG icon. Customizing the background gradient meant replacing all of those every time you needed to change just one. Now, we have for the fill and gradient and handles the icon.
To make a custom check inline, add .
-
Updated selector for input-based button groups. Instead of for style and behavior, we use the attribute just for JS behaviors and rely on a new class for styling.
-
Removed in favor of a slightly improved . This way and can be used on elements with ease.
-
Custom file inputs received a change to their Sass variable. It’s no longer a nested Sass map and now only powers one string—the button as that is now the only pseudo-element generated from our Sass. The text now comes from the .
Input groups
-
Input group addons are now specific to their placement relative to an input. We’ve dropped and for two new classes, and . You must explicitly use an append or a prepend now, simplifying much of our CSS. Within an append or prepend, place your buttons as they would exist anywhere else, but wrap text in .
-
Validation styles are now supported, as are multiple inputs (though you can only validate one input per group).
-
Sizing classes must be on the parent and not the individual form elements.
Glyphicons
Bootstrap includes 260 glyphs from the Glyphicon Halflings set.
Glyphicons Halflings are normally not available for free, but their creator has
made them available for Bootstrap free of cost. As a thank you, you should include a link back to
Glyphicons whenever possible.
Use glyphicons in text, buttons, toolbars, navigation, or forms:
Bootstrap Glyph Example
<p>Envelope icon: <span class=»glyphicon glyphicon-envelope»></span></p>
<p>Search icon: <span class=»glyphicon glyphicon-search»></span></p>
<p>Print icon: <span class=»glyphicon glyphicon-print»></span></p>
How do they work?
So, how do I add an icon to my webpage? Well, Glyphicons can be used on the web in one of three ways.
You can use a simple tag to place an glyphicon in your
page, like this:
=
- The first class—glyphicon—is a base class. It tells
the tag, «hey, heads up: this is going to be an icon.» - The second class (in this example, glyphicon-home)
points the specific icon you want to use. This one is an icon of a
house!
To use a HTML Tag for an icon, simply copy and paste anywhere
within the of your page.
Warning: Don’t mix glyphicons with other
components
Icon classes shouldn’t be combined with other elements in Bootstrap. They’re
designed to be standalone.
This works slightly differently, by:
- Specifying the Glyphicon web-font in a CSS rule with
- Using the Unicode HTML Entity to display the icon
Firstly, the CSS rule. This should be placed inside a tag, or better yet, in a
seperate stylesheet:
          span.icon {
            font-family 'Glyphicons Halflings'; }
Next, the HTML Entity part:
<span class="icon"></span>
The CSS rule specifies that any Unicode HTML Entity inside a
tag will be rendered on the page as an icon.
The HTML entity inside the tag (in this case,
) is a string of characters that tells the
web-font to display a certain icon.
Note: This method may offer you more
flexibility (for example, you could use a or
tag instead).
This method works by including the rendering of the icon before the content using the
CSS psuedo-element.
Firstly, the web-font is specified with , and then the icon
is specified by using the property alongside a unicode hex
entity (in this case, f015).
Because the hex entity is inside a style tag, it must be prepended with an escaped
backslash, making it \f015.
This should be placed inside a tag, or better yet, in a
seperate stylesheet:
          span.icon:before {
            font-family 'Glyphicons Halflings';
            content "\f015"; }
To add this icon to a page, add this HTML tag anywhere in the of
your page.
<span class="icon"></span>
Note: This method is useful because it
seperates the visual elements of your design—like icons—from the structural HTML, so
you can add glyphicons to existing elements. Particularly useful for tasks like WordPress or Moodle theme development, for
example.
Why it’s important to respect brand guidelines
First thing you have to keep in mind is that logos are intellectual property of their owners and they have the right to control how and when their logo will be displayed.
So, if you’d want to be 100 % correct, you’d have to (for most of the brands):
- have the permission to use the logo itself, mostly needed in writing, signed by the legal brand owner
- follow brands guidelines and use only unmodified versions of each logo, without any effects or changes in their visual appearance
- last but not least, pay attention to whether you use the logo in an appropriate context
It may seem too complicated, but that’s how things are. When you decide to ignore it, it may happen that brand owners can decide to sue you for violating their brand rights.
Just imagine, if you’d have a unique logo for your own product (maybe you already have it) and somebody start using it wrong — in a context you do not like and even recklessly alter its shape and look to fit his own requirements, it wouldn’t feel good, am I right?
Each brand has a number of custom rules, which you can’t ignore, but here we will try to cover those, that are common to most of them.
This is it?
The aim of this page is not to be 100 % correct, but it should help you to use these logos as rightly as possible. To be honest, myself, I did some mistakes mentioned above, ironically with GLYPHICONS Social set (which was the predecessor of this page), that’s one of the reasons this page exists, to replace this set.
If you’ve read this far, you may be a little depressed. You do not have to be. If you are ever in doubt when using logos or icons of well-known brands, use common sense, read at least briefly each logo guidelines and if you don’t completely ignore the basic rules above, it should be ok.
If you look for more color specification for each logo, I can recommend brandcolors.net, where you can quickly search and even download colors of many global brands.
Responsive behaviors
Navbars can utilize , , and classes to change when their content collapses behind a button. In combination with other utilities, you can easily choose when to show or hide particular elements.
For navbars that never collapse, add the class on the navbar. For navbars that always collapse, don’t add any class.
Toggler
Navbar togglers are left-aligned by default, but should they follow a sibling element like a , they’ll automatically be aligned to the far right. Reversing your markup will reverse the placement of the toggler. Below are examples of different toggle styles.
With no shown in lowest breakpoint:
With a brand name shown on the left and toggler on the right:
With a toggler on the left and brand name on the right:
External content
Sometimes you want to use the collapse plugin to trigger hidden content elsewhere on the page. Because our plugin works on the and matching, that’s easily done!
Community
Stay up to date on the development of Bootstrap and reach out to the community with these helpful resources.
- Follow @getbootstrap on Twitter.
- Read and subscribe to The Official Bootstrap Blog.
- Join the official Slack room.
- Chat with fellow Bootstrappers in IRC. On the server, in the channel.
- Implementation help may be found at Stack Overflow (tagged ).
- Developers should use the keyword on packages which modify or add to the functionality of Bootstrap when distributing through npm or similar delivery mechanisms for maximum discoverability.
You can also follow @getbootstrap on Twitter for the latest gossip and awesome music videos.
Examples
Alerts are available for any length of text, as well as an optional dismiss button. For proper styling, use one of the eight required contextual classes (e.g., ). For inline dismissal, use the .
A simple primary alert—check it out!
A simple secondary alert—check it out!
A simple success alert—check it out!
A simple danger alert—check it out!
A simple warning alert—check it out!
A simple info alert—check it out!
A simple light alert—check it out!
A simple dark alert—check it out!
Conveying meaning to assistive technologies
Using color to add meaning only provides a visual indication, which will not be conveyed to users of assistive technologies – such as screen readers. Ensure that information denoted by the color is either obvious from the content itself (e.g. the visible text), or is included through alternative means, such as additional text hidden with the class.
Link color
Use the utility class to quickly provide matching colored links within any alert.
A simple primary alert with . Give it a click if you like.
A simple secondary alert with . Give it a click if you like.
A simple success alert with . Give it a click if you like.
A simple danger alert with . Give it a click if you like.
A simple warning alert with . Give it a click if you like.
A simple info alert with . Give it a click if you like.
A simple light alert with . Give it a click if you like.
A simple dark alert with . Give it a click if you like.
Additional content
Alerts can also contain additional HTML elements like headings, paragraphs and dividers.
Well done!
Aww yeah, you successfully read this important alert message. This example text is going to run a bit longer so that you can see how spacing within an alert works with this kind of content.
Whenever you need to, be sure to use margin utilities to keep things nice and tidy.
Dismissing
Using the alert JavaScript plugin, it’s possible to dismiss any alert inline. Here’s how:
- Be sure you’ve loaded the alert plugin, or the compiled Bootstrap JavaScript.
- If you’re building our JavaScript from source, it . The compiled version includes this.
- Add a dismiss button and the class, which adds extra padding to the right of the alert and positions the button.
- On the dismiss button, add the attribute, which triggers the JavaScript functionality. Be sure to use the element with it for proper behavior across all devices.
- To animate alerts when dismissing them, be sure to add the and classes.
You can see this in action with a live demo:
Holy guacamole! You should check in on some of those fields below.
×
Lists
All lists—, , and —have their removed and a . Nested lists have no .
- Lorem ipsum dolor sit amet
- Consectetur adipiscing elit
- Integer molestie lorem at massa
- Facilisis in pretium nisl aliquet
- Nulla volutpat aliquam velit
- Phasellus iaculis neque
- Purus sodales ultricies
- Vestibulum laoreet porttitor sem
- Ac tristique libero volutpat at
- Faucibus porta lacus fringilla vel
- Aenean sit amet erat nunc
- Eget porttitor lorem
- Lorem ipsum dolor sit amet
- Consectetur adipiscing elit
- Integer molestie lorem at massa
- Facilisis in pretium nisl aliquet
- Nulla volutpat aliquam velit
- Faucibus porta lacus fringilla vel
- Aenean sit amet erat nunc
- Eget porttitor lorem
For simpler styling, clear hierarchy, and better spacing, description lists have updated s. s reset to and add . s are bolded.
- Description lists
- A description list is perfect for defining terms.
- Euismod
- Vestibulum id ligula porta felis euismod semper eget lacinia odio sem.
- Donec id elit non mi porta gravida at eget metus.
- Malesuada porta
- Etiam porta sem malesuada magna mollis euismod.
What are Glyphicons?
Glyphicons are basically little symbols, icons, or pictograms (whatever you prefer to call them) that
you can use in a webpage. They’re implemented in Bootstrap as an icon font — a custom font that
contains these glyphs instead of letters.
If you’re creating a site based on Bootstrap 3.3.7, you already have access to all 260 glyphs in the
Glyphicons 1.9 set.
Don’t know how to set up Bootstrap? Go check out the offical getting started guide, or
simply just include these two lines in your tag:
(Bootstrap hosting very kindly provided by bootstrapcdn.com)
Counterpoint
Icon fonts aren’t the only way to implement icons on the web. If you’re looking for a explanation
of using icon fonts vs. SVG files (another possible method), I’d suggest reading this excellent
post by Ian Feather: Ten
reasons we switched from an icon font to SVG.