Порт telnet — что такое? подключение и запуск telnet
Содержание:
- Using Powershell Test-NetConnection to test for open ports
- How to Check if a Port is Open on Mac
- По данным портала ЗАЧЕСТНЫЙБИЗНЕСОБЩЕСТВО С ОГРАНИЧЕННОЙ ОТВЕТСТВЕННОСТЬЮ «ТЕЛНЕТ»По данным портала ЗАЧЕСТНЫЙБИЗНЕС3817021540
- Installing Telnet Server in Centos /RedHat Linux
- [edit] Обзор
- Как получить доступ к службе Telnet
- How to install Telnet client on Windows
- Telnet LINEMODE Option
- Telnet и POP3 получение почты
- Using Portqry.exe to test for open ports
- Примеры
Using Powershell Test-NetConnection to test for open ports
You can also use Powershell to test for open ports and this is a great option because it works well both interactively and for usage within a script. It’s built in to recent versions of Powershell and it is very easy to use.
Example Test-NetConnection Powershell to check a single port on a Web server
Again, this code shows how to test port 443 of this blog using Powershell:
Test-NetConnection -ComputerName www.tachytelic.net -Port 443
Here is the output of the successful test:
Example Test-NetConnection Powershell to check an SMTP Server
Test-NetConnection -ComputerName tachytelic-net.mail.protection.outlook.com -Port 25
And the successful output:
- Not available on all versions of Windows by default.
- Only available via Powershell – which isn’t a problem, but might not fit in with some of your existing scripts.
How to Check if a Port is Open on Mac
High Sierra users: Apple removed telnet client from macOS 10.13 High Sierra. There is no official way to return it, but you can still copy it from an older OS or compile from sources and use on High Sierra. See more details here and here.
Just like on Windows, telnet can be accessed through Terminal, the command prompt on macOS. To open telnet, click “Go” > “Utilities” > «Terminal», then run the following command (the numbers are example IP address and port): telnet [domainname or ip] [port], e.g.>telnet 192.168.1.1 443
When a computer port is open a blank screen will show up, meaning that the connection has been successful. An unsuccessful connection will be accompanied by an error message.
An alternative to telnet in checking ports is Network Utility. In order to check ports on a Mac, follow the plan below:
Open «Network Utility» > Click «Port Scan» > Indicate the hostname and ports to scan the remote host e.g. myserver.com from 995 to 995 > Check the output
По данным портала ЗАЧЕСТНЫЙБИЗНЕСОБЩЕСТВО С ОГРАНИЧЕННОЙ ОТВЕТСТВЕННОСТЬЮ «ТЕЛНЕТ»По данным портала ЗАЧЕСТНЫЙБИЗНЕС3817021540
О компании:
ООО «ТЕЛНЕТ» ИНН 3817021540, ОГРН 1023802006601 зарегистрировано 22.06.2001 в регионе Иркутская Область по адресу: 666681, Иркутская обл, город Усть-Илимск, улица Карла Маркса, 23/1. Статус: Действующее. Размер Уставного Капитала — руб.
Руководителем организации является: Директор — Капкан Сергей Витальевич, ИНН . У организации 1 Учредитель. Основным направлением деятельности является «деятельность в области связи на базе проводных технологий». На 01.01.2020 в ООО «ТЕЛНЕТ» числится 11 сотрудников.
|
ОГРН ? |
1023802006601 присвоен: 25.12.2002 |
|
ИНН ? |
3817021540 |
|
КПП ? |
381701001 |
|
ОКПО ? |
55566906 |
|
ОКТМО ? |
25738000001 |
Реквизиты для договора
?
…Скачать
Проверить блокировку cчетов
?
Контактная информация 7-39… Посмотреть
?
Отзывы об организации
?: 0 Написать отзыв
Юридический адрес: ?
По данным портала ЗАЧЕСТНЫЙБИЗНЕС
666681, Иркутская обл, город Усть-Илимск, улица Карла Маркса, 23/1
получен 10.01.2013
зарегистрировано по данному адресу:
По данным портала ЗАЧЕСТНЫЙБИЗНЕС
По данным портала ЗАЧЕСТНЫЙБИЗНЕС
Руководитель Юридического Лица ?По данным портала ЗАЧЕСТНЫЙБИЗНЕС
ДиректорПо данным портала ЗАЧЕСТНЫЙБИЗНЕС
Капкан Сергей Витальевич
| ИНН ? |
По данным портала ЗАЧЕСТНЫЙБИЗНЕС |
| действует с | По данным портала ЗАЧЕСТНЫЙБИЗНЕС 26.06.2006 |
Учредители ? ()
|
Капкан Сергей Витальевич 10 000,00руб., 29.12.2006 , ИНН |
Основной вид деятельности: ?По данным портала ЗАЧЕСТНЫЙБИЗНЕС
61.10 деятельность в области связи на базе проводных технологий
Дополнительные виды деятельности:
Единый Реестр Проверок (Ген. Прокуратуры РФ) ?
Реестр недобросовестных поставщиков: ?
По данным портала ЗАЧЕСТНЫЙБИЗНЕС
не числится.
Данные реестра субъектов МСП: ?
| Критерий организации |
По данным портала ЗАЧЕСТНЫЙБИЗНЕС Микропредприятие |
Лицензии: ?По данным портала ЗАЧЕСТНЫЙБИЗНЕС
Налоговый орган ?
По данным портала ЗАЧЕСТНЫЙБИЗНЕС
Межрайонная Инспекция Федеральной Налоговой Службы № 9 По Иркутской Области
Дата постановки на учет: По данным портала ЗАЧЕСТНЫЙБИЗНЕС
06.07.2001
Регистрация во внебюджетных фондах
| Фонд | Рег. номер | Дата регистрации |
|---|---|---|
|
ПФР ? |
048027007668 |
По данным портала ЗАЧЕСТНЫЙБИЗНЕС 27.01.2003 |
|
ФСС ? |
381400349238141 |
По данным портала ЗАЧЕСТНЫЙБИЗНЕС 22.01.2002 |
Уплаченные страховые взносы за 2018 год (По данным ФНС):
— на обязательное социальное страхование на случай временной нетрудоспособности и в связи с материнством: 0,00 руб. ↓ -0 млн. (0,00 руб. за 2017 г.)
— на обязательное медицинское страхование работающего населения, зачисляемые в бюджет Федерального фонда обязательного медицинского страхования: 0,00 руб. ↓ -0 млн.
Коды статистики
|
ОКАТО ? |
25438000000 |
|
ОКОГУ ? |
4210014 |
|
ОКОПФ ? |
12300 |
|
ОКФС ? |
16 |
Финансовая отчетность ООО «ТЕЛНЕТ» ?
?
Финансовый анализ отчетности за 2019 год
Коэффициент текущей ликвидности:
>2
Коэффициент капитализации:
Рентабельность продаж (ROS):
0.1 Подробный анализ…
|
В качестве Поставщика: , на сумму |
|
В качестве Заказчика: , на сумму |
По данным портала ЗАЧЕСТНЫЙБИЗНЕС
Судебные дела ООО «ТЕЛНЕТ» ?
|
найдено по ИНН: По данным портала ЗАЧЕСТНЫЙБИЗНЕС |
|
Ответчик: По данным портала ЗАЧЕСТНЫЙБИЗНЕС , на сумму: — руб. |
|
найдено по наименованию (возможны совпадения): По данным портала ЗАЧЕСТНЫЙБИЗНЕС |
По данным портала ЗАЧЕСТНЫЙБИЗНЕС
Исполнительные производства ООО «ТЕЛНЕТ»
?
|
найдено по наименованию и адресу (возможны совпадения): По данным портала ЗАЧЕСТНЫЙБИЗНЕС |
По данным портала ЗАЧЕСТНЫЙБИЗНЕС
Лента изменений ООО «ТЕЛНЕТ»
?
Не является участником проекта ЗАЧЕСТНЫЙБИЗНЕС ?
Installing Telnet Server in Centos /RedHat Linux
By default RHEL does not install Telnet Server in standard installation. To find out whether the Telnet Sever is installed or not we can use following rpm query command.
rpm –qa telnet-server
If above command does not return any output then telnet-server is not installed.
We can install telnet server from two commands; yum and rpm. To install telnet server from yum command use following:-
yum install telnet-server
yum command depends on repository. If system is connected with repository, above command will install the Telnet Sever. If system is not connected with any repository, above command will not work.
Alternatively if we have RHEL installation disk (or local copy of Packages directory from RHEL installation disk), we can use rpm command to install the Telnet Server. Packages directory on RHEL installation media contents all RPMs. To install telnet server from rpm command use following:-
rpm –ivh telnet-server-[version number]
We can use shell’s auto complete command feature to automatically populate the version number. To use auto complete command features type following command and press tab key.
rpm –ivh telnet-server-
To verify the installation we can use rpm query command again.
Following figure illustrates telnet-server rpm query, installation and verification process.
[edit] Обзор
SSH, или Secure Shell, является зашифрованным протоколом и связанной программой, предназначенной для замены telnet. Его также можно использовать для создания безопасных туннелей, что-то вроде виртуальных частных сетей VPN, и для использования в качестве сетевой файловой системы (SSHFS). По умолчанию SSH работает на порту 22.
SSH работает так же, как telnet с комбинацией имени пользователя и пароля, или на основе открытого и закрытого ключей. Чтобы последние работали, серверу предоставляется короткий открытый ключ, а сервер отдает клиенту свой открытый ключ. Клиент шифрует информацию, отправляемую на сервер, используя открытый ключ сервера, а сервер шифрует информацию, отправляемую клиенту, используя открытый ключ от клиента. Закрытые ключи никуда не отправляются и используются для расшифровки полученной информации, зашифрованной с помощью соответствующего открытого ключа.
Подключение к DD-WRT может выполняться с использованием имени пользователя и пароля или только от клиентов, чьи открытые ключи были введены вручную через веб-интерфейс. Несколько ключей можно ввести, разместив каждый в отдельной строке. Если вы хотите использовать имя пользователя и пароль для входа в систему с использованием SSH, используйте имя «root» с паролем, который установлен для веб-интерфейса.
На самом деле можно вручную установить (через telnet или SSH) переменную NVRAM sshd_authorized_keys командой:
nvram set sshd_authorized_keys=ключ1 ключ2 ключ3
Также можно вручную отредактировать файл /tmp/root/.ssh/authorized_keys и добавить в него ключи (хотя они исчезнут при перезагрузке, если у вас нет автоматически запускающегося сценария командной строки, изменяющего файл).
Стоит отметить, что SSH-ключи — это довольно длинные строки символов, поэтому, если вы вставляете их из буфера обмена, следует быть осторожным, чтобы не допустить разрывов строк, иначе ключи не будут работать (т.е. ключ — это одна длинная непрерывная строка).
Как получить доступ к службе Telnet
Для подключения к службе Telnet все, что вам нужно, — это эмулятор терминала и адрес компьютера, к которому вы хотите подключиться.
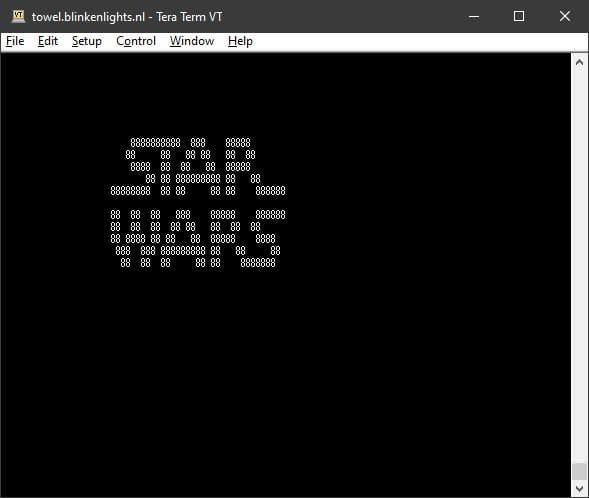
Есть много терминальных эмуляторов. Большинство из них бесплатны. В этом случае мы будем использовать популярный термин Tera. В качестве демонстрации мы подключимся к службе Telnet, которая использует текст ASCII, чтобы пересказать весь первый фильм «Звездные войны».
Обычно в традиционном терминальном приложении вы набираете «telnet», затем пробел и адрес службы. Вам также может понадобиться указать порт в команде, обычно это порт 23 для Telnet. Тем не менее, Tera Term имеет графический интерфейс, поэтому все, что нам нужно сделать, это заполнить экран следующим образом.
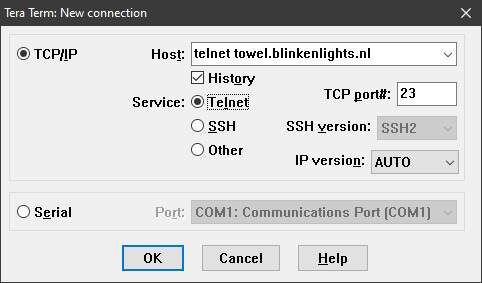
Как вы можете сказать, адрес для этой услуги — towel.blinkenlights.nl. Когда все настроено, как указано выше, просто нажмите ОК, и это произойдет.
Потрясающие! Правильно? Давайте не будем останавливать веселье там. Вот еще несколько сервисов Telnet, с которыми вы можете поиграть, пока у вас нет этого терминального приложения.
How to install Telnet client on Windows
Unlike Linux we do not need to install Telnet client in Windows system separately. Telnet Server and Telnet Client application are the part of the standard installation in Windows. But these applications are not activated by default. We will get following error, if run telnet command before activating telnet client application:-
‘telnet’ is not recognized as an internal or external command, operable program or batch file.
To enable Telnet client open Control Panel and click Program and Click Turn Windows features on or off
From the opened window, check Telnet Client and click OK. In few minutes Telnet client service will be activated.
So far we have installed Telnet server in server computer and Telnet client in remaining computers.
We have also enabled necessary services. With this setup client computers should be able to connect
with server computer via telnet protocol.
Let’s try to connect with server from all three computers one by one
As output indicates we are unable to access telnet server computer from all three telnet client computers.
So what went wrong? We have installed necessary packages. We have also enabled necessary services, then what is blocking telnet traffic?
Configure firewall to allow telnet service and traffic
Yes…. you guess right it is firewall which is blocking telnet traffic.
In a standard network implementation all services are secured by firewall. To view the status of firewall use following command
systemctl status firewalld
As above figure illustrates firewall is running on server. We must have to tell the firewall, which client computers are allowed to access the telnet service. Let’s allow one computer (named-client) to access the telnet server. Use following command to add allow rule in firewall for client computer.
firewall-cmd --add-rich-rule 'rule family="ipv4" source address="192.168.1.100/32" service name="telnet" log prefix="Telnet Access Allowed" level="info" accept' --permanent.
If rule is successfully added, shell prompt will return with a Success message.
To add new rule in existing rules chain we have to reload the firewall. Next command will reload the firewall
firewall-cmd --reload
If firewall is reloaded successfully, shell prompt will return with a Success message.
To verify that our rule is successfully added we can use following command.
firewall-cmd --list-rich-rule
Following figure illustrates above process step by step.
Let’s try again from client computer. This time we should be able to connect with telnet server. We can use any normal account (created on server computer) to login.
root account is not allowed to login through the telnet service. So if you are unable to login from root account then it’s not an error, it’s a security feature.
If we try to access telnet server from remaining two computers (ipa and win) at this time, we will get same error. As we have allowed only one computer (client) to access the server.
Okay let’s allow one more computer (named-win) to access the telnet server.
Test the setup from second computer (named-win)
Notice we haven’t allowed the third computer (named-ipa) so far. For a successful implementation it should not be able to access the server computer.
Let’s try again to connect with telnet server from this computer.
As output shows we are still unable to connect with server from this computer. While at this moment are able to connect with server from remaining two client computers (named client & ipa). This way we can control computers which are allowed to access the telnet server from network.
Telnet is the most insecure way to connect with remote computer. It does not encrypt the data. In addition it sends username and password in clear text format. Anyone who has access in network may sniff login credential from sniffer tools. Originally Telnet was developed for the private network and it should be used only in private network where outsider computers are not allowed to connect with network. Telnet should never be used on public network under any circumstances.
Telnet LINEMODE Option
Once a connection has been opened, telnet attempts to enable the TELNET LINEMODE option. If this fails, telnet reverts to one of two input modes: either character at a time or old line by line depending on what the remote system supports.
When LINEMODE is enabled, character processing is done on the local system, under the control of the remote system. When input editing or character echoing is to be disabled, the remote system relays that information. The remote system also relays changes to any special characters that happen on the remote system so that these take effect on the local system.
In character at a time mode, most text typed is immediately sent to the remote host for processing.
In old line by line mode, all text is echoed locally, and (normally) only completed lines are sent to the remote host. The local echo character (initially ^E) may be used to turn off and on the local echo (this is mostly used to enter passwords without the password being echoed).
If the LINEMODE option is enabled, or if the localchars toggle is TRUE (the default for old line by line; see below), the user’s quit intr and flush characters are trapped locally and sent as TELNET protocol sequences to the remote side.
If LINEMODE has ever been enabled, then the user’s susp and eof are also sent as TELNET protocol sequences, and quit is sent as a TELNET ABORT instead of BREAK. There are options (see toggle autoflush and toggleautosynch below) which cause this action to flush subsequent output to the terminal (until the remote host acknowledges the TELNET sequence) and flush previous terminal input (in the case of quit and intr).
While connected to a remote host, telnet command mode may be entered by typing the telnet escape character (initially ^]). When in command mode, the normal terminal editing conventions are available. Note that the escape character returns to the command mode of the initial invocation of telnet that has the controlling terminal. Use the send escape command to switch to command mode in subsequent telnet processes on remote hosts.
Telnet и POP3 получение почты
Попробуем получить почту с сервера POP3. С pop3 все относительно просто:
exim# telnet localhost 110
Trying ::1...
telnet: connect to address ::1: Connection refused
Trying 127.0.0.1...
Connected to localhost.
Escape character is '^]'.
+OK Hello there.
-1> user test@exim.teachers
+OK Password required.
-2> pass pass
+OK logged in.
-3> list
+OK POP3 clients that break here, they violate STD53.
1 1953
2 337
.
-4> retr 1
+OK 1953 octets follow.
Return-path: <root@exim.teachers>
Envelope-to: test@exim.teachers
Delivery-date: Tue, 20 Feb 2007 18:46:12 +0300
Received: from root by mx.exim.teachers with local (Exim 4.66 (FreeBSD))
        (envelope-from <root@exim.teachers>)
        id 1HJXC0-000597-6r
        for test@exim.teachers; Tue, 20 Feb 2007 18:46:12 +0300
To: test@exim.teachers
Subject: test
Message-Id: <E1HJXC0-000597-6r@mx.exim.teachers>
From: Charlie Root <root@exim.teachers>
Date: Tue, 20 Feb 2007 18:46:12 +0300

# $FreeBSD: src/etc/master.passwd,v 1.40 2005/06/06 20:19:56 brooks Exp $
#
root:*:0:0:Charlie &:/root:/bin/csh
toor:*:0:0:Bourne-again Superuser:/root:
daemon:*:1:1:Owner of many system processes:/root:/usr/sbin/nologin
operator:*:2:5:System &:/:/usr/sbin/nologin
bin:*:3:7:Binaries Commands and Source:/:/usr/sbin/nologin
tty:*:4:65533:Tty Sandbox:/:/usr/sbin/nologin
kmem:*:5:65533:KMem Sandbox:/:/usr/sbin/nologin
games:*:7:13:Games pseudo-user:/usr/games:/usr/sbin/nologin
news:*:8:8:News Subsystem:/:/usr/sbin/nologin
man:*:9:9:Mister Man Pages:/usr/share/man:/usr/sbin/nologin
sshd:*:22:22:Secure Shell Daemon:/var/empty:/usr/sbin/nologin
smmsp:*:25:25:Sendmail Submission User:/var/spool/clientmqueue:/usr/sbin/nologin
mailnull:*:26:26:Sendmail Default User:/var/spool/mqueue:/usr/sbin/nologin
bind:*:53:53:Bind Sandbox:/:/usr/sbin/nologin
proxy:*:62:62:Packet Filter pseudo-user:/nonexistent:/usr/sbin/nologin
_pflogd:*:64:64:pflogd privsep user:/var/empty:/usr/sbin/nologin
_dhcp:*:65:65:dhcp programs:/var/empty:/usr/sbin/nologin
uucp:*:66:66:UUCP pseudo-user:/var/spool/uucppublic:/usr/local/libexec/uucp/uucico
pop:*:68:6:Post Office Owner:/nonexistent:/usr/sbin/nologin
www:*:80:80:World Wide Web Owner:/nonexistent:/usr/sbin/nologin
nobody:*:65534:65534:Unprivileged user:/nonexistent:/usr/sbin/nologin
clamav:*:106:106:Clam Antivirus:/nonexistent:/sbin/nologin
courier:*:465:465:Courier Mail System:/var/spool/courier:/sbin/nologin
.
-5> quit
+OK Bye-bye.
Connection closed by foreign host
Итак, описание по командам:
- Команда user указывает имя пользователя
- команда pass указывает пароль пользователя
- list выводит список всех сообщений, хранящихся на сервере
- retr заставляет сервер вывести сообщение. В качестве параметра передается номер сообщения, который выводится по команде List
- аналогично smtp команде
Using Portqry.exe to test for open ports
Portqry.exe is an old tool but still works well and has extensive options for port testing. It’s much easier to use within scripts or automated checks. It can be used to check multiple ports in a single command and makes it easy to check UDP ports as well as TCP ports.
Example Portqry command to check a single port on a web server
In this example I am checking port 443 (https) of this blog:
portqry -n www.tachytelic.net -p tcp -e 443
Here you can see the test was successful:
Example Portqry to check multiple ports on a Web server
This example shows how to use Portqry to test multiple ports at the same time, in this case ports 80 and 443:
portqry -n www.tachytelic.net -p tcp -o 80,443
Again, the results are good:
Example Portqry to check an SMTP Server
Portqry is aware of some types of applications and can show you additional information returned from the server, SMTP is a good example:
portqry -n tachytelic-net.mail.protection.outlook.com -p tcp -e 25
As you can see from the screenshot, Portqry.exe returns the initial response from the SMTP Server:
Portqry.exe is excellent for scripting because of the vast number of options and that it can operate in quiet mode where it will simply return a status code, which is exactly what you would want if you were building this into a script. Portqry.exe has many options so it is well worth reading the documentation.
Примеры
andrei@DESKTOP-OP43ER5:~$ telnet httpbin.org 80
Trying 34.230.193.231…
Connected to httpbin.org.
Escape character is ‘^]’.
Дописываем следующие строки
GET / HTTP/1.1
Host: httpbin.org
Не бойтесь нажимать Enter — один раз можно.
andrei@DESKTOP-OP43ER5:~$ telnet httpbin.org 80
Trying 34.230.193.231…
Connected to httpbin.org.
Escape character is ‘^]’.
GET / HTTP/1.1
Host: httpbin.org
Теперь нажимаем Enter два раза подряд и получаем содержимое страницы
HTTP/1.1 200 OK
Date: Fri, 08 May 2020 18:28:53 GMT
Content-Type: text/html; charset=utf-8
Content-Length: 9593
Connection: keep-alive
Server: gunicorn/19.9.0
Access-Control-Allow-Origin: *
Access-Control-Allow-Credentials: true
<!DOCTYPE html>
<html lang=»en»>
<head>
<meta charset=»utf-8″>
<title>httpbin.org</title>
…
Весь ответ я не привожу, но Вы уже представляете, что там будет содержимое главной страницы сайта httpbin.org
Попробуем POST
andrei@DESKTOP-OP43ER5:~$ telnet httpbin.org 80
Trying 34.230.193.231…
Connected to httpbin.org.
Escape character is ‘^]’.
POST /post HTTP/1.1
Host: httpbin.org
Connection: close
Content-type: application/json
Content-length: 19
{«site»:heihei.ru}
Количество символов в {«site»:heihei.ru} равно 18.
Таким образом если после {«site»:heihei.ru} нажать Enter, то перевод строки
становится 19-м символом и сообщение уходит в обработку.
Если все прошло успешно, то сразу после нажатия Enter после закрывающей фигурной скобки,
от сервера придёт следующий ответ:
HTTP/1.1 200 OK
Date: Fri, 08 May 2020 18:49:46 GMT
Content-Type: application/json
Content-Length: 355
Connection: close
Server: gunicorn/19.9.0
Access-Control-Allow-Origin: *
Access-Control-Allow-Credentials: true
{
«args»: {},
«data»: «{\»site\»:heihei.ru}\r»,
«files»: {},
«form»: {},
«headers»: {
«Content-Length»: «19»,
«Content-Type»: «application/json»,
«Host»: «httpbin.org»,
«X-Amzn-Trace-Id»: «Root=1-5eb5a9c1-ae41c22c17663ab8255820a7»
},
«json»: null,
«origin»: «37.219.127.133»,
«url»: «http://httpbin.org/post»
}
Connection closed by foreign host.
Обратим внимание на следующую строку:
«data»: «{\»site\»:heihei.ru}\r«,
Отправим всё тоже самое но длину увеличим на два символа
andrei@DESKTOP-OP43ER5:~$ telnet httpbin.org 80
Trying 34.230.193.231…
Connected to httpbin.org.
Escape character is ‘^]’.
POST /post HTTP/1.1
Host: httpbin.org
Connection: close
Content-type: application/json
Content-length: 21
{«site»:heihei.ru}
Теперь сообщение уйдёт только после второго нажатия Enter
а в ответе мы в той же строке увидим больше символов.
Дополнительные два символа это новая линия \n и перевод каретки \r
«data»: «{\»site\»:heihei.ru}\r\n\r«,
Динамический порт