Squid
Содержание:
- Which file do I download to get Squid?
- squid command line options
- Using ICMP to Measure the Network
- I set up my access controls, but they don’t work! why?
- How do I implement an ACL ban list?
- Установка SAMS
- Изучаем acl (списки контроля доступа)
- What »cache_dir» size should I use?
- Исходящий сетевой интерфейс
- Problems with IP ACL’s that have complicated netmasks
- Managing the Cache Storage
- How can I make Squid NOT cache some servers or URLs?
- How can I purge an object from my cache?
- How can I purge multiple objects from my cache?
- How can I find the biggest objects in my cache?
- How can I add a cache directory?
- How can I delete a cache directory?
- I want to restart Squid with a clean cache
- I want to restart Squid with an empty cache
- Установка веб-сервера
- Can I prevent users from downloading large files?
- Настройки файервола для прозрачного проксирования
- Оптимизируем кеширование объектов в squid
- How do I make Windows Updates cache?
- What is the Reverse Proxy (httpd-accelerator) mode?
Which file do I download to get Squid?
That depends on the version of Squid you have chosen to try. The list of current versions released can be found at http://www.squid-cache.org/Versions/. Each version has a page of release bundles. Usually you want the release bundle that is listed as the most current.
You must download a source archive file of the form squid-x.y.tar.gz or squid-x.y.tar.bz2 (eg, squid-2.6.STABLE14.tar.bz2).
We recommend you first try one of our mirror sites for the actually download. They are usually faster.
Alternatively, the main Squid WWW site www.squid-cache.org, and FTP site ftp.squid-cache.org have these files.
Context diffs are usually available for upgrading to new versions. These can be applied with the patch program (available from the GNU FTP site or your distribution).
squid command line options
These are the command line options for Squid-2:
-a Specify an alternate port number for incoming HTTP requests. Useful for testing a configuration file on a non-standard port.
-d Debugging level for «stderr» messages. If you use this option, then debugging messages up to the specified level will also be written to stderr.
-f Specify an alternate squid.conf file instead of the pathname compiled into the executable.
-h Prints the usage and help message.
-k reconfigure Sends a HUP signal, which causes Squid to re-read its configuration files.
-k rotate Sends an USR1 signal, which causes Squid to rotate its log files. Note, if logfile_rotate is set to zero, Squid still closes and re-opens all log files.
-k shutdown Sends a TERM signal, which causes Squid to wait briefly for current connections to finish and then exit. The amount of time to wait is specified with shutdown_lifetime.
-k interrupt Sends an INT signal, which causes Squid to shutdown immediately, without waiting for current connections.
-k kill Sends a KILL signal, which causes the Squid process to exit immediately, without closing any connections or log files. Use this only as a last resort.
-k debug Sends an USR2 signal, which causes Squid to generate full debugging messages until the next USR2 signal is recieved. Obviously very useful for debugging problems.
-k check Sends a «ZERO» signal to the Squid process. This simply checks whether or not the process is actually running.
-s Send debugging (level 0 only) message to syslog.
-u Specify an alternate port number for ICP messages. Useful for testing a configuration file on a non-standard port.
-v Prints the Squid version.
-z Creates disk swap directories. You must use this option when installing Squid for the first time, or when you add or modify the cache_dir configuration.
-D Do not make initial DNS tests. Normally, Squid looks up some well-known DNS hostnames to ensure that your DNS name resolution service is working properly. obsolete in 3.1 and later.
-F If the swap.state logs are clean, then the cache is rebuilt in the «foreground» before any requests are served. This will decrease the time required to rebuild the cache, but HTTP requests will not be satisfied during this time.
-N Do not automatically become a background daemon process.
-R Do not set the SO_REUSEADDR option on sockets.
-X Enable full debugging while parsing the config file.
-Y Return ICP_OP_MISS_NOFETCH instead of ICP_OP_MISS while the swap.state file is being read. If your cache has mostly child caches which use ICP, this will allow your cache to rebuild faster.
Using ICMP to Measure the Network
As of version 1.1.9, Squid is able to utilize ICMP Round-Trip-Time (RTT) measurements to select the optimal location to forward a cache miss. Previously, cache misses would be forwarded to the parent cache which returned the first ICP reply message. These were logged with FIRST_PARENT_MISS in the access.log file. Now we can select the parent which is closest (RTT-wise) to the origin server.
Supporting ICMP in your Squid cache
It is more important that your parent caches enable the ICMP features. If you are acting as a parent, then you may want to enable ICMP on your cache. Also, if your cache makes RTT measurements, it will fetch objects directly if your cache is closer than any of the parents.
If you want your Squid cache to measure RTT’s to origin servers, Squid must be compiled with the USE_ICMP option. This is easily accomplished by uncommenting «-DUSE_ICMP=1» in src/Makefile and/or src/Makefile.in.
An external program called pinger is responsible for sending and receiving ICMP packets. It must run with root privileges. After Squid has been compiled, the pinger program must be installed separately. A special Makefile target will install pinger with appropriate permissions.
% make install
% su
# make install-pinger
There are three configuration file options for tuning the measurement database on your cache. netdb_low and netdb_high specify high and low water marks for keeping the database to a certain size (e.g. just like with the IP cache). The netdb_ttl option specifies the minimum rate for pinging a site. If netdb_ttl is set to 300 seconds (5 minutes) then an ICMP packet will not be sent to the same site more than once every five minutes. Note that a site is only pinged when an HTTP request for the site is received.
Another option, minimum_direct_hops can be used to try finding servers which are close to your cache. If the measured hop count to the origin server is less than or equal to minimum_direct_hops, the request will be forwarded directly to the origin server.
Utilizing your parents database
Your parent caches can be asked to include the RTT measurements in their ICP replies. To do this, you must enable query_icmp in your config file:
query_icmp on
This causes a flag to be set in your outgoing ICP queries.
If your parent caches return ICMP RTT measurements then the eighth column of your access.log will have lines similar to:
CLOSEST_PARENT_MISS/it.cache.nlanr.net
In this case, it means that it.cache.nlanr.net returned the lowest RTT to the origin server. If your cache measured a lower RTT than any of the parents, the request will be logged with
CLOSEST_DIRECT/www.sample.com
Inspecting the database
The measurement database can be viewed from the cachemgr by selecting «Network Probe Database.» Hostnames are aggregated into /24 networks. All measurements made are averaged over time. Measurements are made to specific hosts, taken from the URLs of HTTP requests. The recv and sent fields are the number of ICMP packets sent and received. At this time they are only informational.
A typical database entry looks something like this:
    Network          recv/sent     RTT  Hops Hostnames
    192.41.10.0        20/  21    82.3   6.0 www.jisedu.org www.dozo.com
bo.cache.nlanr.net        42.0   7.0
uc.cache.nlanr.net        48.0  10.0
pb.cache.nlanr.net        55.0  10.0
it.cache.nlanr.net       185.0  13.0
This means we have sent 21 pings to both www.jisedu.org and www.dozo.com. The average RTT is 82.3 milliseconds. The next four lines show the measured values from our parent caches. Since bo.cache.nlanr.net has the lowest RTT, it would be selected as the location to forward a request for a www.jisedu.org or www.dozo.com URL.
I set up my access controls, but they don’t work! why?
If ACLs are giving you problems and you don’t know why they aren’t working, you can use this tip to debug them.
In squid.conf enable debugging for section 33 at level 2. For example:
debug_options ALL,1 33,2
Then restart or reconfigure squid.
From now on, your cache.log should contain a line for every request that explains if it was allowed, or denied, and which ACL was the last one that it matched.
If this does not give you sufficient information to nail down the problem you can also enable detailed debug information on ACL processing
debug_options ALL,1 33,2 28,9
Then restart or reconfigure squid as above.
From now on, your cache.log should contain detailed traces of all access list processing. Be warned that this can be quite some lines per request.
See also SquidFaq/TroubleShooting.
How do I implement an ACL ban list?
As an example, we will assume that you would like to prevent users from accessing cooking recipes.
One way to implement this would be to deny access to any URLs that contain the words «cooking» or «recipe.» You would use these configuration lines:
acl Cooking1 url_regex cooking
acl Recipe1 url_regex recipe
acl myclients src 172.16.5.0/24
http_access deny Cooking1
http_access deny Recipe1
http_access allow myclients
http_access deny all
The url_regex means to search the entire URL for the regular expression you specify. Note that these regular expressions are case-sensitive, so a url containing «Cooking» would not be denied.
Another way is to deny access to specific servers which are known to hold recipes. For example:
acl Cooking2 dstdomain www.gourmet-chef.com
http_access deny Cooking2
http_access allow all
The dstdomain means to search the hostname in the URL for the string «www.gourmet-chef.com.» Note that when IP addresses are used in URLs (instead of domain names), Squid may have to do a DNS lookup to determine whether the ACL matches: If a domain name for the IP address is already in the Squid’s «FQDN cache», then Squid can immediately compare the destination domain against the access controls. Otherwise, Squid does an asynchronous reverse DNS lookup and evaluates the ACL after that lookup is over. Subsequent ACL evaluations may be able to use the cached lookup result (if any).
Asynchronous lookups are done for http_access and other directives that support so called «slow» ACLs. If a directive does not support a required asynchronous DNS lookup, then modern Squids use «none» instead of the actual domain name to determine whether a dstdomain ACL matches, but you should not rely on that behavior. To disable DNS lookups, use the «-n» ACL option (where supported).
Установка SAMS
Установку панели управления выполняем в два этапа — сборка из исходников и веб-установка.
Сборка из исходников
Устанавливаем пакеты, которые нужны для сборки sams:
yum install wget unzip autoconf automake libtool pcre-devel libstdc++-devel gcc-c++ mariadb-devel
Скачиваем исходник sams:
wget https://github.com/PavelVinogradov/sams2/archive/master.zip
Распаковываем архив:
unzip master.zip
Переходим в распакованный каталог:
cd sams2-master
Открываем исходный файл proxy.h:
vi src/proxy.h
И добавляем : long ко всем значения параметров, которые начинаются на enum — получится:
…
enum TrafficType: long
…
enum usrAuthType: long
…
enum RedirType: long
…
enum ParserType: long
…
enum CharCase: long
…
Компилируем исходник:
make -f Makefile.cvs
Конфигурируем его:
sh ./configure
Мы получим что-то на подобие:
Use MySQL API: yes
Use PostgreSQL API: no
Use unixODBC API: no
Use LDAP API: no
Using pcre: pcre
Use dynamic plugin: yes
* где для нас важна строка Use MySQL API, обозначающая поддержку MySQL — она должна иметь значение yes.
Создаем каталог для копирования данных:
mkdir /usr/local/share/sams2/data
Собираем исходник и инсталлируем sams:
make
make install
Настройка веб-сервера
Создаем конфигурационный файл в apache:
vi /etc/httpd/conf.d/sams.conf
Alias /sams /usr/local/share/sams2
<Directory /usr/local/share/sams2/>
AddDefaultCharset UTF-8
<RequireAny>
Require ip 192.168.0.0/16
</RequireAny>
</Directory>
* в данном примере мы создаем алиас — при обращении к странице /sams веб-сервер будет искать скрипты в каталоге /usr/local/share/sams2. Доступ к порталу будет разрешен из подсети 192.168.0.0/16.
Перезагружаем httpd:
systemctl restart httpd
Входим в оболочку mysql:
mysql -uroot -p
Создаем базу данных и предоставляем к ней доступ новому пользователю:
> CREATE DATABASE sams2db DEFAULT CHARACTER SET utf8 DEFAULT COLLATE utf8_general_ci;
> GRANT ALL PRIVILEGES ON sams2db.* TO sams2user@localhost IDENTIFIED BY ‘sams2password’;
> \q
Веб-установка
Открываем конфигурационный файл sams:
vi /usr/local/etc/sams2.conf
Редактируем следующие строки:
…
DB_USER=sams2user
…
DB_PASSWORD=sams2password
…
* где DB_USER — имя mysql-пользователя; DB_PASSWORD — пароль mysql-пользователя.
Открываем веб-браузер и переходим по адресу http://<IP-адрес сервера>/sams/ — откроется страница установки SAMS2:
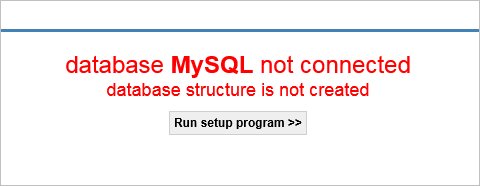
… кликаем по Run setup program >>.
В следующем окне выбираем язык и кодировку:
… нажимаем Next >>.
Система проведет начальную проверку:
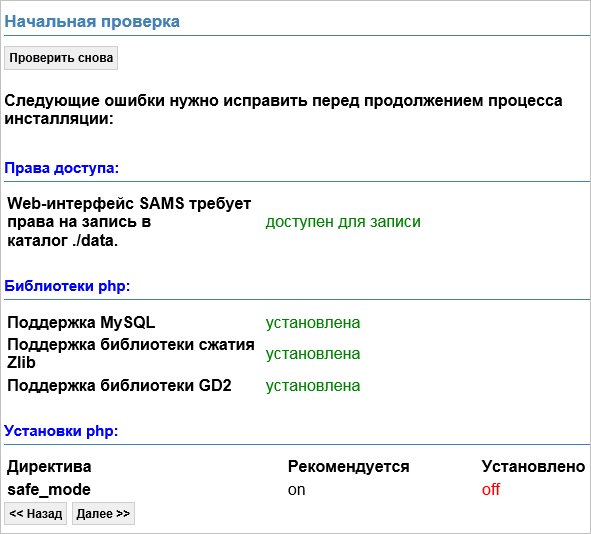
Директиву safe_mode можно проигнорировать — кликаем по Далее >>.
Заполняем поля пользователя mysql, снимаем галочку Создать пользователя SAMS для доступа к базе данных:
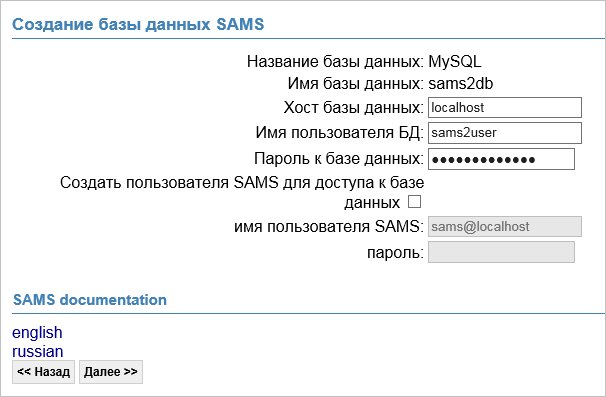
* пользователь и пароль — те, которые мы создали в оболочке mysql.
На последней странице завершаем установку:
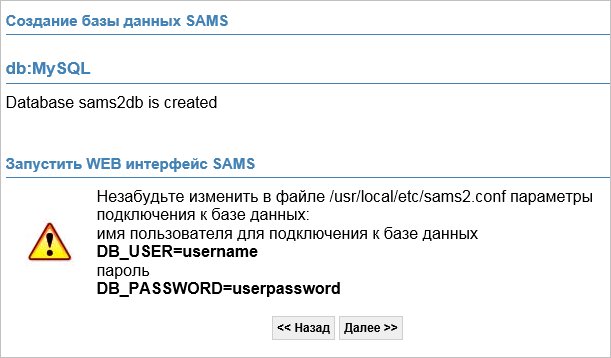
После завершения установки авторизовываемся в системе. Логин и пароль по умолчанию — admin / qwerty.
Изучаем acl (списки контроля доступа)
Система управления доступом в прокси сервере Squid является очень гибкой и обширной. Она состоит из элементов со значениями и списков доступа c указанием allow (разрешение) или deny (запрещение).
Формат Acl следующий:
Формат списка доступа:
Мы рассмотрим некоторые элементы, которые позволяет использовать прокси сервер Squid, конечно же с примерами:
С помощью этого элемента (src) мы указываем IP-адрес источника, то есть клиента от которого пришел запрос к нашему прокси серверу. В следующем примере мы разрешим Васе Пупкину (Pupkin) и отделу программирования (Progs) доступ к нашему прокси серверу, а всем остальным запретим:
Данный элемент (dst) указывает IP-адрес назначения, то есть IP-адрес того сервера, доступ к которому желает получить клиент прокси сервера. В следующем примере мы запретим Васе доступ к подсети 194.67.0.0/16 (к примеру, в ней находится тот же aport.ru):
С помощью этого элемента (dstdomain) мы указываем домен, доступ к которому желает получить клиент прокси сервера. В следующем примере мы запретим Васе доступ к варезным сайтам nnm.ru и kpnemo.ru:
В случае, если будет необходимо указать домен источника, то используйте srcdomain.
Данные элементы отличаются от srcdomain и dstdomain лишь тем, что в них используются регулярные выражения, которые в данной статье мы не рассматриваем, но пример всё-таки приведём:
В данном примере мы запретили доступ Пупкину Василию на все домены, содержащие слово sex и на все домены в зонах .com и .net. Ключ -i призван игнорировать регистр символов в регулярных выражениях.
С помощью этого элемента (url_regex) мы указываем шаблон регулярного выражения для URL. Пример указания файлов с расширением avi, начинающихся на слово sex:
В случае, если Вы желаете указать шаблон только для пути URL, то есть исключая протокол и имя хоста (домена), то используйте urlpath_regex. Пример для указания музыкальных файлов:
Указание номера порта назначения, то есть порта, к которому желает подключится клиент нашего прокси сервера. Как пример, запретим всем использование программы Mirc через наш прокси сервер:
Указание протокола передачи. Как пример, запретим вышеупомянутому Васе использование протокола FTP через наш прокси сервер:
What »cache_dir» size should I use?
This chapter assumes that you are dedicating an entire disk partition to a squid cache_dir, as is often the case.
Generally speaking, setting the cache_dir to be the same size as the disk partition is not a wise choice, for two reasons. The first is that squid is not very tolerant to running out of disk space. On top of the cache_dir size, squid will use some extra space for swap.state and then some more temporary storage as work-areas, for instance when rebuilding swap.state. So in any case make sure to leave some extra room for this, or your cache will enter an endless crash-restart cycle.
The second reason is fragmentation (note, this won’t apply to the COSS object storage engine — when it will be ready): filesystems can only do so much to avoid fragmentation, and in order to be effective they need to have the space to try and optimize file placement. If the disk is full, optimization is very hard, and when the disk is 100% full optimizing is plain impossible. Get your disk fragmented, and it will most likely be your worst bottleneck, by far offsetting the modest gain you got by having more storage.
Let’s see an example: you have a 9Gb disk (these times they’re even hard to find..). First thing, manifacturers often lie about disk capacity (the whole Megabyte vs Mebibyte issue), and then the OS needs some space for its accounting structures, so you’ll reasonably end up with 8Gib of useable space. You then have to account for another 10% in overhead for Squid, and then the space needed for keeping fragmentation at bay. So in the end the recommended cache_dir setting is 6000 to 7000 Mebibyte.
cache_dir ... 7000 16 256
Its better to start out with a conservative setting and then, after the cache has been filled, look at the disk usage. If you think there is plenty of unused space, then increase the cache_dir setting a little.
If you’re getting «disk full» write errors, then you definitely need to decrease your cache size.
Исходящий сетевой интерфейс
На нашем сервере может быть несколько внешний IP-адресов. По умолчанию, все исходящие запросы будут работать через интерфейс со шлюзом по умолчанию. Чтобы иметь возможность работы со squid через разные интерфейсы в настройку вносим:
vi /etc/squid/squid.conf
acl 217_66_157_33 localip 217.66.157.33
tcp_outgoing_address 217.66.157.33 217_66_157_33
acl 217_66_157_34 localip 217.66.157.34
tcp_outgoing_address 217.66.157.34 217_66_157_34
* в данном примере, при подключении к прокси через IP 217.66.157.33, исходящие пакеты будут от IP 217.66.157.33; аналогично для IP 217.66.157.34.
Problems with IP ACL’s that have complicated netmasks
The following ACL entry gives inconsistent or unexpected results:
acl restricted src 10.0.0.128/255.0.0.128 10.85.0.0/16
The reason is that IP access lists are stored in «splay» tree data structures. These trees require the keys to be sortable. When you use a complicated, or non-standard, netmask (255.0.0.128), it confuses the function that compares two address/mask pairs.
The best way to fix this problem is to use separate ACL names for each ACL value. For example, change the above to:
acl restricted1 src 10.0.0.128/255.0.0.128
acl restricted2 src 10.85.0.0/16
Then, of course, you’ll have to rewrite your http_access lines as well.
Managing the Cache Storage
How can I make Squid NOT cache some servers or URLs?
From Squid-2.6, you use the cache option to specify uncachable requests and any exceptions to your cachable rules.
For example, this makes all responses from origin servers in the 10.0.1.0/24 network uncachable:
acl localnet dst 10.0.1.0/24
cache deny localnet
This example makes all URL’s with ‘.html’ uncachable:
acl HTML url_regex .html$
cache deny HTML
This example makes a specific URL uncachable:
acl XYZZY url_regex ^http://www.i.suck.com/foo.html$
cache deny XYZZY
This example caches nothing between the hours of 8AM to 11AM:
acl Morning time 08:00-11:00
cache deny Morning
How can I purge an object from my cache?
Squid does not allow you to purge objects unless it is configured with access controls in squid.conf. First you must add something like
acl PURGE method PURGE
acl localhost src 127.0.0.1
http_access allow PURGE localhost
http_access deny PURGE
The above only allows purge requests which come from the local host and denies all other purge requests.
To purge an object, you can use the squidclient program:
squidclient -m PURGE http://www.miscreant.com/
If the purge was successful, you will see a «200 OK» response:
HTTP/1.0 200 OK
Date: Thu, 17 Jul 1997 16:03:32 GMT
...
Sometimes if the object was not found in the cache, you will see a «404 Not Found» response:
HTTP/1.0 404 Not Found
Date: Thu, 17 Jul 1997 16:03:22 GMT
...
Such 404 are not failures. It simply means the object has already been purged by other means or never existed. So the final result you wanted (object no longer exists in cache) has happened.
How can I purge multiple objects from my cache?
It’s not possible; you have to purge the objects one by one by URL. This is because squid doesn’t keep in memory the URL of every object it stores, but only a compact representation of it (a hash). Finding the hash given the URL is easy, the other way around is not possible.
Purging by wildcard, by domain, by time period, etc. are unfortunately not possible at this time.
How can I find the biggest objects in my cache?
sort -r -n +4 -5 access.log | awk '{print $5, $7}' | head -25
If your cache processes several hundred hits per second, good luck.
How can I add a cache directory?
-
Edit squid.conf and add a new cache_dir line.
-
Shutdown Squid squid -k shutdown
-
Initialize the new directory by running
squid -z
- Start Squid again
How can I delete a cache directory?
If you don’t have any cache_dir lines in your squid.conf, then Squid was using the default. From Squid-3.1 the default has been changed to memory-only cache and does not involve cache_dir.
For Squid older than 3.1 using the default you’ll need to add a new cache_dir line because Squid will continue to use the default otherwise. You can add a small, temporary directory, for example:
/usr/local/squid/cachetmp ….
see above about creating a new cache directory. do not use /tmp !! That will cause Squid to periodically encounter fatal errors.
The removal:
-
Edit your squid.conf file and comment out, or delete the cache_dir line for the cache directory that you want to remove.
- You can not delete a cache directory from a running Squid process; you can not simply reconfigure squid.
-
You must shutdown Squid:
squid -k shutdown
- Once Squid exits, you may immediately start it up again.
Since you deleted the old cache_dir from squid.conf, Squid won’t try to access that directory. If you use the RunCache script, Squid should start up again automatically.
Now Squid is no longer using the cache directory that you removed from the config file. You can verify this by checking «Store Directory» information with the cache manager. From the command line, type:
squidclient mgr:storedir
I want to restart Squid with a clean cache
Squid-2.6 and later contain mechanisms which will automatically detect dirty information in both the cache directories and swap.state file. When squid starts up it runs these validation and security checks. The objects which fail for any reason are automatically purged from the cache.
The above mechanisms can be triggered manually to force squid into a full cache_dir scan and re-load all objects from disk by simply shuttign down Squid and deleting the swap.state journal from each cache_dir before restarting.
NP: Deleting the swap.state before shutting down will cause Squid to generate new ones and fail to do the re-scan you wanted.
I want to restart Squid with an empty cache
To erase the entire contents of the cache and make Squid start fresh the following commands provide the fastest recovery time:
 squid -k shutdown
 mv /dir/cache /dir/cache.old
repeat for each cache_dir location you wish to empty.
 squid -z
 squid
 rm -rf /dir/cache.old
The rm command may take some time, but since Squid is already back up and running the service downtime is reduced.
Установка веб-сервера
SAMS является веб-приложением и для своей работы требует сам веб-сервер, интерпретатор PHP и СУБД. Мы установим связку Apache + PHP + MariaDB.
Apache
По умолчанию, в CentOS уже установлен данный веб-сервер. Если нет, то вводим команду:
yum install httpd
* необходимо убедиться, что в системе не запущены другие веб-серверы. Проверить это можно командой ss -tunlp, которая покажет, заняты ли порты 80 и 443.
После установки веб-сервера, разрешаем порты в брандмауэре:
firewall-cmd —permanent —add-port={80/tcp,443/tcp}
firewall-cmd —reload
И запускаем веб-сервер:
systemctl enable httpd
systemctl start httpd
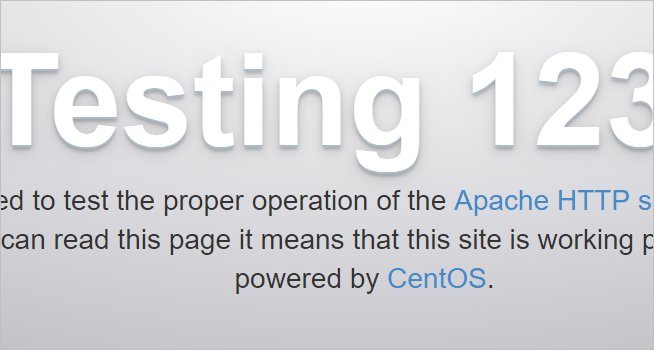
Открываем веб-браузер и переходим по адресу http://<IP-адрес сервера>/ — должна открыться тестовая страница Apache:
PHP
Устанавливаем php и необходимые для работы sams компоненты:
yum install php php-mysql php-mbstring php-devel php-xml php-gd php—mcrypt
Открываем конфигурационный файл apache:
vi /etc/httpd/conf/httpd.conf
Находим модуль dir_module и приводим его к виду:
<IfModule dir_module>
DirectoryIndex index.php index.html
</IfModule>
* мы добавляем index.php перед index.html
Создаем php-скрипт:
vi /var/www/html/index.php
<?php phpinfo(); ?>
И перезагружаем apache:
systemctl restart httpd
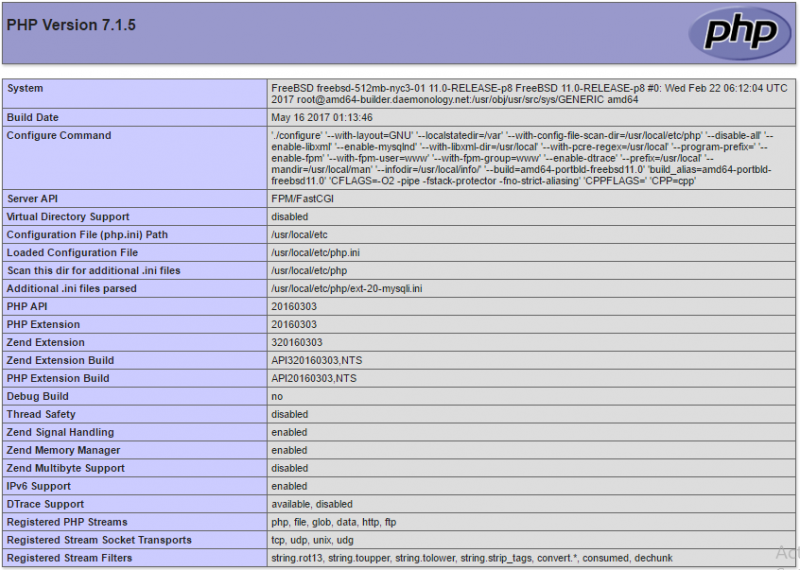
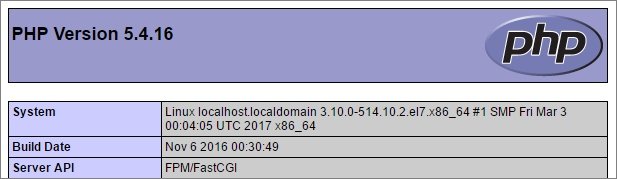
Открываем веб-браузер и переходим по адресу http://<IP-адрес сервера>/ — должна открыться страница с подробной информацией о PHP:
MariaDB
Установку сервера mariadb выполняем командой:
yum install mariadb-server
Запускаем СУБД:
systemctl enable mariadb
systemctl start mariadb
Задаем пароль пользователя root mysql:
mysqladmin -u root password
Can I prevent users from downloading large files?
You can set the global reply_body_max_size parameter. This option controls the largest HTTP message body that will be sent to a cache client for one request.
If the HTTP response coming from the server has a Content-length header, then Squid compares the content-length value to the reply_body_max_size value. If the content-length is larger,the server connection is closed and the user receives an error message from Squid.
Some responses don’t have Content-length headers. In this case, Squid counts how many bytes are written to the client. Once the limit is reached, the client’s connection is simply closed.
Note that «creative» user-agents will still be able to download really large files through the cache using HTTP/1.1 range requests.
Back to the SquidFaq
Настройки файервола для прозрачного проксирования
PF
ext_if_a="tun0"
int_if_a="rl0"
int_if_b="rl1"
LanAll =  "{10.90.90.0/24, 192.168.35.0/24, 192.168.1.0/24}"
Lanint_if_b = "{10.90.90.0/24, 192.168.35.0/24}"

# RDR transparent proxy
rdr on $int_if_b inet proto tcp from $Lanint_if_b to any port 80 -> 127.0.0.1 port 3128
rdr on $int_if_a inet proto tcp from 192.168.1.0/24 to any port 80 -> 127.0.0.1 port 3128
# NAT
nat on $ext_if_a inet from $LanAll to any -> ($ext_if_a)
Ошибка: IpIntercept.cc(316) PfInterception: PF open failed: (13) Permission denied. Для ее устранения нужно дать доступ (чтение) Squid к PF.
chown root:squid /dev/pf
chmod 660 /dev/pf
Оптимизируем кеширование объектов в squid
Существует множество типов файлов, которые обновляются не достаточно часто, чтобы позволить прокси серверу реагировать на заголовки от вебсерверов о том, что данный объект не подлежит кешированию либо он был на удивление только что изменён. Это довольно частая ситуация. Для разрешения таких ситуаций призван параметр refresh_pattern в файле
настроек прокси-сервера Squid, но полностью с формулами и т.п. мы его рассматривать не будем.
Формат:
Данный параметр используется для того, чтобы определить возраст объекта (считайте файла) в кеше, следует ли его обновлять или нет.
МИНВ (минимальное время) — время в минутах, когда объект, имеющийся в кеше считается свежим.
МАКСВ (максимальное время) — максимальное время в минутах, когда объект считается свежим.
Параметры — это один или несколько следующих параметров:
И так, мы подошли к самом главному. Ну, так какие же типы файлов реже всех обновляются? Как правило, это разнообразные музыкальные файлы и картинки. Установим свежесть объектов, для этого для картинок и музыкальных файлов укажем, скажем так для примера, целых 30 дней (43200 минут):
Показанные Выше настройки лишь пример, для того, чтобы была понятна суть. Теперь можете проверить эффективность своего прокси сервера, она уж точно возрастет.
How do I make Windows Updates cache?
Windows Update generally (but not always) uses HTTP Range-Offsets’ (AKA file partial ranges) to grab pieces of the Microsoft Update archive in parallel or using a random-access algorithm trying to reduce the web traffic. Some versions of Squid do not handle or store Ranges very well yet.
A mix of configuration options are required to force caching of range requests. Particularly when large objects are involved.
-
maximum_object_size. Default value is a bit small. It needs to be somewhere 100MB or higher to cope with the IE updates.
UPDATE: Windows 8.1 upgrade pack requires up to 5GB objects to be cached. It will however, cache nicely provided the size limit is set high enough.
-
range_offset_limit. Does the main work of converting range requests into cacheable requests. Use the same size limit as maximum_object_size to prevent conversion of requests for objects which will not cache anyway. With Squid-3.2 or later use the windowsupdate ACL list defined below to apply this offset limit only to windows updates.
-
quick_abort_min. May need to be altered to allow the full object to download when the client software disconnects. Some Squid releases let range_offset_limit override properly, some have weird behavior when combined.
range_offset_limit 200 MB windowsupdate
maximum_object_size 200 MB
quick_abort_min -1
-
Due to the slow-down problem below we recommend service packs be handled specially:
Extend the maximum cached object size to the required size, then run a full download on a single machine, then run on a second machine to verify the cache is being used. Only after this verification succeeds open updating to all other machines through the proxy.
What is the Reverse Proxy (httpd-accelerator) mode?
Occasionally people have trouble understanding accelerators and proxy caches, usually resulting from mixed up interpretations of «incoming» and «outgoing» data. I think in terms of requests (i.e., an outgoing request is from the local site out to the big bad Internet). The data received in reply is incoming, of course. Others think in the opposite sense of «a request for incoming data».
An accelerator caches incoming requests for outgoing data (i.e., that which you publish to the world). It takes load away from your HTTP server and internal network. You move the server away from port 80 (or whatever your published port is), and substitute the accelerator, which then pulls the HTTP data from the «real» HTTP server (only the accelerator needs to know where the real server is). The outside world sees no difference (apart from an increase in speed, with luck).
Quite apart from taking the load of a site’s normal web server, accelerators can also sit outside firewalls or other network bottlenecks and talk to HTTP servers inside, reducing traffic across the bottleneck and simplifying the configuration. Two or more accelerators communicating via ICP can increase the speed and resilience of a web service to any single failure.
The Squid redirector can make one accelerator act as a single front-end for multiple servers. If you need to move parts of your filesystem from one server to another, or if separately administered HTTP servers should logically appear under a single URL hierarchy, the accelerator makes the right thing happen.
If you wish only to cache the «rest of the world» to improve local users browsing performance, then accelerator mode is irrelevant. Sites which own and publish a URL hierarchy use an accelerator to improve access to it from the Internet. Sites wishing to improve their local users’ access to other sites’ URLs use proxy caches. Many sites, like us, do both and hence run both.
Measurement of the Squid cache and its Harvest counterpart suggest an order of magnitude performance improvement over CERN or other widely available caching software. This order of magnitude performance improvement on hits suggests that the cache can serve as an httpd accelerator, a cache configured to act as a site’s primary httpd server (on port 80), forwarding references that miss to the site’s real httpd (on port 81).
In such a configuration, the web administrator renames all non-cachable URLs to the httpd’s port (81). The cache serves references to cachable objects, such as HTML pages and GIFs, and the true httpd (on port 81) serves references to non-cachable objects, such as queries and cgi-bin programs. If a site’s usage characteristics tend toward cachable objects, this configuration can dramatically reduce the site’s web workload.