Motd
Содержание:
MOTD Banner Command:
UpaaeRouter1(config)# banner motd E
In the above command E is the delimiting character, it is up to you what ever you type but do remember to write the same delimiting character at the end of your message. banner motd command will only be completed when you start writing the message with a delimiting character and end your message by writing that same character at the end. Cisco os checks the first and last character of motd banner for confirming that message is complete.
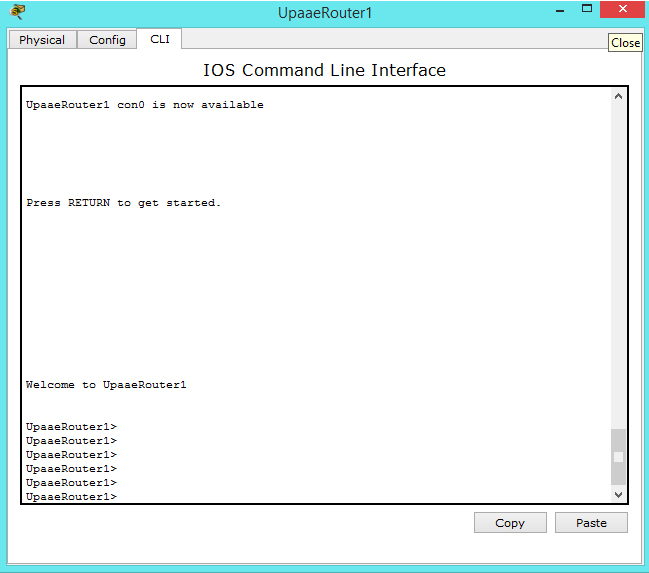
This image shows the steps for configuring MOTD banner.

For confirming if banner MOTD is set, type exit and exit for quitting from global config mode and privileged exec mode to the start. The image below confirms that banner motd is all set and greeting users.
| CCNA Portable Command Guide | Cisco CCNA in 60 Days |
| CCNA Official Cert Guide Library | CCNA Certification All-in-One |
Recommended Resources for CCNA Exam:
Following resources are my personal recommendation for CCNA exam preparation, i know that i should recommend one best and most trusted resource but these are all my favorite, choosing only one among these great resources would be a biased decision according to my point of view. You can choose anyone from the following resources and i am 98% sure it will get you CCNA Routing and Switching certificate.
- CCNA Routing and Switching Complete Study Guide: Exam 100-105, Exam 200-105, Exam 200-125
- CCNA Routing and Switching 200-125 Official Cert Guide Library
- CCNA Routing and Switching Portable Command Guide (ICND1 100-105, ICND2 200-105, and CCNA 200-125)
- Cisco CCNA Simplified: Your Complete Guide to Passing the Cisco CCNA Routing and Switching Exam (Kindle Edition).
If you liked this, do us a favor and share it on social media with your friends.
- How to Set Clock Rate on Router’s Serial Interface–(Cisco CCNA…
- How to Enable and Administratively Shutdown a Cisco Router Interface–(Cisco…
- Checking And Assigning IP Address’s To Cisco Router Interfaces-(Fast Ethernet…
- Connecting Network Computers through Cisco Switch — Cisco CCNA Lab…
- How To Save Configuration in Cisco Router And Erase Cisco…
- How to set and remove Auxiliary line password on Cisco…
- How to Configure Cisco Enable Secret password (Cisco CCNA Labs…
- Setting Line Console Password for Cisco router in Packet Tracer
- Changing the host name of a router in Cisco Packet…
- Cisco Router Modes-(Cisco exe Mode, Cisco Enable Mode, Global Configuration…
Lab Instruction
Step 1. For objective one you’re required to configure a Login banner to inform incoming sessions legal information and privacy information. When configuring a banner you’ll need to use a delimiting character; which is a character that only appears at the beginning and end of the banner. The ^ is commonly used. To set a banner you’ll use the banner command followed by the type of banner rather it be login, exec, motd and the delimiting character. As shown below you can see a basic Login banner is configured and configuration is verified by ending and reestablishing an exec session with the device.
Router(config)#banner login ^
Enter TEXT message.  End with the character '^'
##########################################
#  This is a Login banner used to show   #
#    legal and privacy information.      #
#                                        #
#     Unauthorized users prohibited      #
##########################################
^
Router(config)#end
Router#exit
As shown below is the login banner configuration verfication;
Router con0 is now available


Press RETURN to get started.


##########################################
#  This is a Login banner used to show   #
#    legal and privacy information.      #
#                                        #
#     Unauthorized users prohibited      #
##########################################


User Access Verification

Password:

Router>
Objective 2 requests that you to configure an exec banner so that any authenticated exec sessions will be shown what the device hostname is and the line the session is established on. In order to configure this type of banner you’ll need to know what Banner Tokens are. Banner tokens are basically a variable you can set in a banner that calls particular information from the device and dispatches it into the banner. The banner tokens that will be used in this objective are $(hostname) and $(line) which display the hostname and line number.
To configure the exec banner as required by objective 3, use the following text Session established to $(hostname) on line $(line)
Like the previous Login banner you’ve configured you execute the same command in global configuration mode but rather executing banner login ^ you’ll execute banner exec ^ as shown below;
Router>enable
Password:
Router#
Router#configure terminal
Enter configuration commands, one per line.  End with CNTL/Z.
Router(config)#banner exec ^
Enter TEXT message.  End with the character '^'
Session established to $(hostname) on line $(line)
^
Router(config)#
After the exec banner is configured, verify your configuration by terminating your exec session and reestablishing an exec session to the device as shown below;
Router(config)#end
Router#exit


Router con0 is now available


Press RETURN to get started.


##########################################
#  This is a Login banner used to show   #
#    legal and privacy information.      #
#                                        #
#     Unauthorized users prohibited      #
##########################################


User Access Verification

Password:
Session established to Router on line 0

Router>
To read more about Banner Tokens click Here!
Objective 3 is the last objective of the lab which is to configure a Message of the Day banner, which is commonly used to display maintenance information on the Cisco device such as “This router will undergo routine maintenance on 01/01/10 from 12:00AM to 2:00AM”
The MOTD banner is displayed prior to the login banner on a Cisco Router or Switch and is configured the same was as any other banner which is to execute the banner command followed by the type of banner and the delimiting character in global configuration mode. As shown below is an example MOTD banner configuration and verification;
Router>enable
Password:
Router#configure terminal
Enter configuration commands, one per line.  End with CNTL/Z.
Router(config)#banner motd ^
Enter TEXT message.  End with the character '^'
This router will undergo routine maintenance on 01/01/10 from 12:00AM to 2:00AM
^
Router(config)#
To verify the MOTD banner configuration, exit and reestablish an exec session to the device as shown below;
Router(config)#end
Router#exit


Router con0 is now available


Press RETURN to get started.


This router will undergo routine maintenance on 01/01/10 from 12:00AM to 2:00AM

##########################################
#  This is a Login banner used to show   #
#    legal and privacy information.      #
#                                        #
#     Unauthorized users prohibited      #
##########################################


User Access Verification

Password:
Session established to Router on line 0

Router>
Настраиваем динамический motd в Debian GNU/Linux 8
После регистрации пользователя в Linux-системе, как правило, отображается так называемое «сообщение дня» — message of the day или сокращённо motd.
В Debian GNU/Linux 8 (Jessie) это сообщение имеет «грустный» вид.
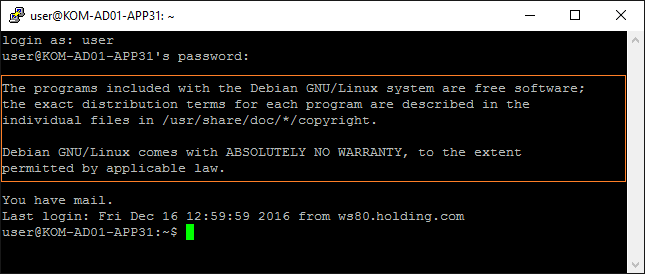
Попробуем сделать это сообщение информативней и полезней для администратора.
Создадим специальный каталог, который будет содержать наши скрипты, которые будут использоваться для генерации динамического motd.
# mkdir /etc/update-motd.d
Создадим в этом каталоге файл скрипта и сделаем его исполняемым:
# touch /etc/update-motd.d/99-mymotd-generator
# chmod a+x /etc/update-motd.d/99-mymotd-generator
Отредактируем наш скрипт:
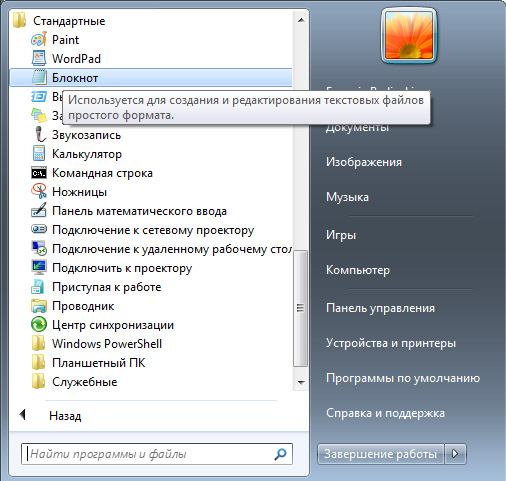
# nano /etc/update-motd.d/99-mymotd-generator
Наполним файл скрипта содержимым «по вкусу». Например я взял вариант из проекта riespandi — Dynamic SSH Banner и немного его подправил под свои нужды. В итоге получилось примерно следующее:
- 99-mymotd-generator
-
#!/bin/sh
#
# Text Color Variables http://misc.flogisoft.com/bash/tip_colors_and_formatting
tcLtG="\033[00;37m"    # LIGHT GRAY
tcDkG="\033[01;30m"    # DARK GRAY
tcLtR="\033[01;31m"    # LIGHT RED
tcLtGRN="\033[01;32m"  # LIGHT GREEN
tcLtBL="\033[01;34m"   # LIGHT BLUE
tcLtP="\033[01;35m"    # LIGHT PURPLE
tcLtC="\033[01;36m"    # LIGHT CYAN
tcW="\033[01;37m"      # WHITE
tcRESET="\033[0m"
tcORANGE="\033[38;5;209m"
#
# Time of day
HOUR=$(date +"%H")
if  $HOUR -lt 12  -a $HOUR -ge  ; then TIME="morning"
elif  $HOUR -lt 17 -a $HOUR -ge 12 ; then TIME="afternoon"
else TIME="evening"
fi
#
# System uptime
uptime=`cat procuptime | cut -f1 -d.`
upDays=$((uptime606024))
upHours=$((uptime6060%24))
upMins=$((uptime60%60))
MEMORY1=`free -t -m | grep "buffers/cache" | awk '{print $3" MB";}'`
MEMORY2=`free -t -m | grep "Mem" | awk '{print $2" MB";}'`
#
# System + Memory
SYS_LOADS=`cat procloadavg | awk '{print $1}'`
SWAP_USED=`free -m | tail -n 1 | awk '{print $3}'`
NUM_PROCS=`ps aux | wc -l`
IPADDRESS=`hostname --all-ip-addresses`
#
echo $tcDkG "==================================================================="
echo $tcLtG " Good $TIME !                                       $tcORANGE IT Dept Ltd."
echo $tcDkG "==================================================================="
echo $tcLtG " - Hostname............:$tcW `hostname -f`"
echo $tcLtG " - IP Address..........:$tcW $IPADDRESS"
echo $tcLtG " - Release.............:$tcW $(lsb_release -s -d)"
echo $tcLtG " - Kernel..............: `uname -a | awk '{print $1" "$3" "$12}'`"
echo $tcLtG " - Users...............: Currently `users | wc -w` user(s) logged on"
echo $tcLtG " - Server Time.........: `date`"
echo $tcLtG " - System load.........: $SYS_LOADS / $NUM_PROCS processes running"
echo $tcLtG " - Memory used.........: $MEMORY1 / $MEMORY2"
echo $tcLtG " - Swap in use.........: $SWAP_USED MB"
echo $tcLtG " - System uptime.......: $upDays days $upHours hours $upMins minutes"
echo $tcDkG "==================================================================="
echo $tcRESET ""
Сохраним скрипт, удалим статический motd-файл и вместо него создадим символическую ссылку на файл /var/run/motd, который будет обновляться при каждом входе в систему нами скриптом.
# rm -f /etc/motd
# ln -sf /var/run/motd /etc/motd
После проделанных изменений войдём в систему локально или через SSH и проверим результат:
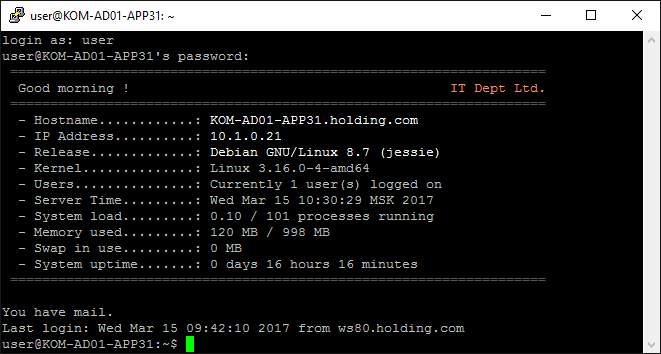
Если всё сделано, а результата нет, то возможно стоит проверить настройки PAM.
За вызов механизма обновления motd при входе в систему отвечают настройки в файлах политик PAM.
Например в файле nano /etc/pam.d/sshd за это отвечают 2 строчки вызова библиотеки pam_motd.so
- sshd
-
...
session    optional     pam_motd.so  motd=runmotd.dynamic
session    optional     pam_motd.so noupdate
...
Дополнительные источники информации:
Debian Wiki — motd
Автор первичной редакции:Алексей Максимов
Время публикации: 15.03.2017 10:00
Подготовка к работе
Загрузка необходимого ПО
Для работы сервера требуется установить на Ваш ПК пакет Java. Его можно скачать на этой странице. Но если клиент Minecraft запускается, то это индикатор того, что данный пакет уже установлен на компьютер. (Теперь minecraft можно установить через установщик, который сам скачивает для себя java. В этом случае вам все равно нужно установить java.)
Для того, чтобы скачать сервер, требуется перейти на страницу загрузки официального сайта, в раздел «Multiplayer Server». Вы можете выбрать версию сервера — .exe (Только для пользователей ОС Windows, без консольного режима) или .jar (универсальна). Нажмите на соответствующую ссылку и сохраните файл в отдельной директории, которая будет основной для Вашего сервера. При создании сервера на Linux или OS X основной директорией сервера является рабочая директория — используйте .