Как подключить cloudflare?
Содержание:
- Введение
- Overview
- Overview
- Understand Cloudflare cache responses
- Overview
- Вкладка Speed
- Вкладка Crypto
- Шаг 10. Настроить правила для страниц
- Ограничения и недостатки CDN
- Task 2 — Provision Cloudflare Universal SSL for CNAME setup
- Как изменить записи MX, чтобы начать использовать G Suite
- Шаг 1. Войдите в аккаунт на сайте регистратора домена
- Шаг 3. Удалите существующие записи MX
- Шаг 4. Добавьте записи MX для G Suite
- Шаг 5. Инициируйте проверку записей MX на стороне Google
- Task 3 — Adding DNS records to a CNAME setup
- Guidelines for contacting Cloudflare support
- Purge using Cache-Tags (Cloudflare Enterprise only)
- Вкладка Overview
- SSL / Тип шифрования связи
- Providing adequate ticket details
- Overview
- Understand Cloudflare’s default cache behavior
Введение
Почему именно Cloudflare?
- сервис бесплатный;
- он поставляется с готовой поддержкой SSL (HTTPS);
- очень просто управлять DNS;
- есть возможность установки расширения для контроля за кэшем браузера;
- автоматически сокращает трафик;
- всегда можно настроить переадресацию;
- есть HTTP2/SPDY для поддерживаемых браузеров;
- позволяет настроить HSTS (HTTP Strict Transport Security).
Что потребуется перед началом работы
- аккаунт в Github;
- аккаунт в Cloudflare;
- доступ к пользовательскому домену — его вы можете приобрести в таких регистраторах, как Namecheap, GoDaddy, BigRock и т. д.
Если всё готово, давайте приступим!
Overview
IP Access Rules are commonly used to block or challenge suspected malicious traffic. Another common use of IP Access Rules is to allow services that regularly access your site (APIs, crawlers, payment providers, etc). IP Access Rules allow allowlist, block, and challenge actions for traffic based on the visitor’s IP address, country, or AS number.
There are four configurable actions for an IP Access Rule:
Allowlist: Excludes visitors from all security checks (Browser Integrity Check, I’m Under Attack Mode, the WAF, etc). This is useful if a trusted visitor is blocked by Cloudflare’s default security features. Allowlist takes precedence over block.
Allowing a country code does not bypass Cloudflare’s WAF.
Requests containing certain attack patterns in the User-Agent field are checked before being processed by the general firewall pipeline. Therefore, such requests are blocked before any allowlist logic takes place. Firewall events downloaded from the API show rule_id as security_level and action as drop when this behavior occurs.
- JavaScript Challenge: Presents the I’m Under Attack Mode interstitial page to visitors. Requires a visitor’s browser or client to support JavaScript. Useful for blocking DDoS attacks with minimal impact to legitimate visitors.
- Challenge: Requires the visitor to complete a CAPTCHA before visiting your site. Prevents bots from accessing the site.
- Block: Prevents a visitor from visiting your site.
Overview
In this tutorial, you’ll build and publish a Cloudflare Workers function that serves assets from a storage platform (in this example, Google Cloud StorageExternal link iconOpen external link) to your users. This approach, called “white-labelling”, often takes the form of complex DNS configuration – thanks to Cloudflare Workers, and Cloudflare’s CDN, we can build a powerful (and fast) solution to this problem in just a few lines of code.
If you’re interested in building and publishing a Cloudflare Workers function to configure your CDN, this is the guide for you! No prior experience with serverless functions or Cloudflare Workers is assumed.
One more thing before you start the tutorial: if you just want to jump straight to the code, we’ve made the final version of the codebase available on GitHubExternal link iconOpen external link. You can take that code, customize it, and deploy it for use in your own projects. Happy coding!
Understand Cloudflare cache responses
The output of the CF-Cache-Status header shows whether a resource is cached:
|
HIT |
The resource was found in Cloudflare’s cache. |
|
MISS |
The resource was not found in Cloudflare’s cache and was served |
|
EXPIRED |
The resource was found in cache but has since expired and was |
|
STALE |
The resource was served from cache but is expired. Cloudflare |
|
BYPASS |
The origin server instructed Cloudflare to bypass cache via a Cache-Control |
|
REVALIDATED |
The resource is served from cache but is stale. The resource |
|
UPDATING |
The resource was served from cache but is expired. The resource |
|
DYNAMIC |
The resource was not cached by default and your |
Use a service like Redbot or webpagetest.org to investigate cache responses returned by the** CF-Cache-Status** header. Alternatively, investigate via a visual tool such as Chrome’s Dr. Flare plugin.
Overview
Cloudflare’s Content Delivery Network (CDN) is a geographically distributed group of servers that ensure fast delivery of Internet content including HTML pages, JavaScript files, stylesheets, and images. Caching static resources at Cloudflare reduces your server load and bandwidth, with no extra charges for bandwidth spikes.
Cloudflare does not require an extra CDN subdomain or hostname and you do not need to change your URLs.
There are many reasons to use Cloudflare’s CDN for your site:
User Experience: Without Cloudflare’s CDN, visitors geographically distant from your origin web server experience slow page loads. Cloudflare’s Anycast network brings content geographically closer to your visitors to reduce page load and latency.
Traffic surges: Due to a major news release or online event, sudden influxes of traffic to your site can overload your origin web server. Cloudflare’s CDN serves your cached content to remove load from your origin web server.
DDoS Protection: Distributed Denial of Service (DDoS) attacks disrupt websites by flooding their infrastructure with traffic. Cloudflare’s CDN has a network capacity 15 times bigger than the largest DDoS attack ever recorded and handles modern DDoS to ensure your website stays online.
Вкладка Speed
– управление параметрами производительности.
Auto Minify – объединяет JavaScript, CSS, HTML-файлы для уменьшения времени загрузки сайта.
Polish – уменьшает время загрузки изображений за счет оптимизации. Дополнительно подключается кодек WEBP.
Примечание: для вступления изменений в силу нужно очистить кэш.
Railgun – ускорение загрузки динамического контента.
Примечание: услуга платная, также требуется установка программного обеспечения на хостинге.
Mobile Redirect – перенаправление посетителей, использующих мобильные устройства, на сайт оптимизированный для мобильных устройств.
Вкладка Caching – управление кэшированием сайта.
Purge Cache – очистка кэша, возможна как полная очистка, так и очистка определенных файлов.
Caching Level – уровень кэширования.
Browser Cache Expiration – указывает браузеру, какое время сохранять кэш-файлы. В течение этого периода браузер загружает файлы из локального кэша, ускоряя загрузку страниц. Можно выбрать диапазон от двух часов до одного года.
Вкладка Crypto
– управление настройками криптографии.
SSL – статус текущего сертификата, а также настройка уровня шифрования.
Edge Certificates – управление сертификатами, есть как бесплатный, так и платные варианты, также можно загрузить собственный сертификат.
Always use HTTPS – перенаправляет все запросы “http” на “https”. Это касается всех http-запросов в зоне.
HTTP Strict Transport Security (HSTS) – включение дополнительной защиты https-соединений, также HSTS помогает защитить посетителей сайта от части пассивных и активных атак.
Authenticated Origin Pulls – дополнительная проверка TLS-сертификата на подлинность.
Require Modern TLS – при включении будут использоватся современные версии протокола TLS (1.2 и 1.3). Эти версии используют более безопасное шифрование, но посетители, использующие старые браузеры, не смогут зайти на сайт.
Opportunistic Encryption – позволяет повысить производительность сайта с помощью технологий HTTP/2 и SPDY.
Automatic HTTPS Rewrites – автоматическая перезапись HTTPS, помогает исправить смешанный контент, изменив “http” на “https” для всех ресурсов или ссылок на вашем ресурсе.
Disable Universal SSL – полное отключение протокола SSL.
Шаг 10. Настроить правила для страниц
На этом шаге вы сделаете две важные вещи:
- переадресацию всех запросов с www.вашличныйдомен.com на вашличныйдомен.com;
- переадресацию всех запросов с http://вашличныйдомен.com на https://вашличныйдомен.com.
Зайдите во вкладку «Page Rules» и нажмите на «Create Page Rule»:
Для обработки переадресации с www.вашличныйдомен.com на вашличныйдомен.com замените tweetify.io на картинке ниже на вашличныйдомен.com. Нажмите «Save and Deploy»:
Для обработки переадресации с http:/www.вашличныйдомен.com на https:/вашличныйдомен.com, замените tweetify.io на вашличныйдомен.com. Нажмите «Save and Deploy»:
Напомним, что в марте этого года популярность протокола HTTPS достигла переломного момента: доля HTTPS-запросов превысила отметку в 50%, а число сайтов, использующих этот протокол, за последний год удвоилось. Использование HTTPS — это норма, а не исключение, поэтому советуем не пренебрегать необходимыми настройками.
Ограничения и недостатки CDN
Стоит отметить, что наряду с вышеперечисленными достоинствами, использование CDN может быть сопряжено с ограничениями и со сложностями.
Ориентация на HTTP, HTTPS. CDN ориентированы на использование протоколов HTTP и HTTPS. Это означает, что их возможности по защите и ускорению могут быть использованы только там, где применяются эти протоколы. К примеру, вы не сможете защитить CDN сервер телефонии или сервер удаленного доступа.
Ориентация на стандартные порты. CDN требует, чтобы трафик отдавался вашим web-сервером с определенных портов. Например, CF говорит, что кэшируемый трафик должен отдаваться только с портов 80 и 443. А весь список разрешенных портов приведен на специальной странице.
Таким образом, например, вы не можете направить трафик с порта CF 443 на произвольный порт вашего сервера, только на 443. Впрочем есть такая штука как CF Spectrum — новый сервис CF, который работает как файрвол для серверов, которые находятся под управлением. Однако, Spectrum еще не распространен широко, поэтому мы его не обсуждаем.
Блокировка CF Роскомнадзором. Такие случаи в истории были. Сейчас РКН уже наученный и многократно битый палками за то, что он блокировал критически важные сервисы интернета, поэтому без разбора ведомство старается критическую инфраструктуру не блокировать, работая в режиме уведомления владельцев. Однако, такое может случиться. В этом случае вы должны оперативно снять ресурс с защиты CF и уже менее чем через 1 минут трафик пойдет напрямую на IP вашего сервера.
Именно для решения этой проблемы, помимо сертификата SSL, выдаваемый бесплатно CF, вам нужен свой сертификат SSL, который вы будете использовать, если вам придется выключить защиту в случае блокировки CF РКН.
Делегирование DNS на серверы CF. Это обязательное требование работы с CF. Вы должны делегировать обслуживание доменного имени, которое использоваться совместно с CF на DNS-серверы компании. Впрочем, этот фактор может быть как преимуществом, поскольку DNS-серверы CF являются одними из лучших в своем классе, так и недостатком, если требуется «хитрое» управление зоной.
Перенастройка HTTP-сервера и самого движка сайта. Когда сайт размещается за CDN, IP-адреса клиентов сайта уже не доступны непосредственно, поскольку источником запросов становится CDN. При этом CDN передает информацию о реальных источниках запросов посредством HTTP-заголовков X-Forwarded-For и CF-Connecting-IP. Если сайту требуется обрабатывать IP-адреса клиентов, он должен уметь извлекать информацию как в режиме без CDN, так и в режиме с CDN. К примеру, как делает приведенный ниже фрагмент кода на Python:
x_real_ip = request.headers.get("X-Real-IP")
x_forwarded_for = request.headers.get("X-Forwarded-For", "")
x_forwarded_for = x_forwarded_for.split(',')

self.remote_ip = x_forwarded_for or x_real_ip or request.remote_ip
Task 2 — Provision Cloudflare Universal SSL for CNAME setup
Cloudflare’s Universal SSL certificate will be deployed once a domain is and proper Domain Control Validation (DCV) records have been added to authoritative DNS:
If a custom SSL certificate has been uploaded, the following steps can be skipped.
- Fetch DCV records from the or via the Cloudflare dashboard:
-
Log in to your Cloudflare account and select the appropriate domain.
-
Click the SSL/TLS app.
-
Click the Edge Certificates tab.
-
Under Edge Certificates, click on the certificate where the Type is Universal and Status is Pending Validation to view the Certificate validation request and Certificate validation response information.
-
- Add the DCV records as CNAME records within the domain’s authoritative DNS (not the Cloudflare DNS app).
- .
Как изменить записи MX, чтобы начать использовать G Suite
Шаг 1. Войдите в аккаунт на сайте регистратора домена
- Не закрывайте мастер настройки G Suite.
- Откройте новое окно браузера и перейдите на сайт Cloudflare.
- На сайте Cloudflare нажмите Log In (Войти) в правом верхнем углу.
- В окне Log in to Cloudflare (Вход в аккаунт Cloudflare) введите адрес электронной почты и пароль, созданные при покупке домена у компании Cloudflare.
- Нажмите Log In (Войти).
Если вы не помните учетные данные, восстановите пароль аккаунта или обратитесь в службу поддержки Cloudflare.
Шаг 3. Удалите существующие записи MX
Сначала удалите существующие записи MX, которые указывают на прежнего поставщика услуг электронной почты. После этого добавьте новые записи MX для G Suite.
-
Рядом с существующей записью MX нажмите Remove (Удалить) .
- Нажмите Delete (Удалить) в открывшемся окне, чтобы подтвердить удаление записи MX.
Вы добавите новые записи на следующем шаге.
- Удалите все остальные записи MX, повторяя описанные выше два шага.
Шаг 4. Добавьте записи MX для G Suite
Чтобы настроить доставку почты в аккаунт G Suite, добавьте следующие записи MX в свой домен:
| Адрес сервера MX | Приоритет |
| ASPMX.L.GOOGLE.COM | 1 |
| ALT1.ASPMX.L.GOOGLE.COM | 5 |
| ALT2.ASPMX.L.GOOGLE.COM | 5 |
| ALT3.ASPMX.L.GOOGLE.COM | 10 |
| ALT4.ASPMX.L.GOOGLE.COM | 10 |
Важно! У некоторых регистраторов после .COM в адресе сервера MX нужно добавлять точку.
-
Нажмите +Add Record (Добавить запись).
Откроются поля с записями DNS.
- В поле Type (Тип) выберите MX.
- В поле Name (Имя) введите @.
- В поле Mail Server (Почтовый сервер) введите ASPMX.L.GOOGLE.COM.
- В поле Priority (Приоритет) задайте значение 1.
- В поле TTL (Время жизни) оставьте значение по умолчанию – Auto (Автоматически).
- Нажмите Save (Сохранить).
-
Повторяя шаги 1–7, добавьте остальные записи MX из таблицы выше и установите для них соответствующие приоритеты.
- Чтобы подтвердить право собственности на домен:
- В поле Type (Тип) выберите MX.
- В поле Name (Имя) введите @.
- В поле Mail Server (Почтовый сервер) вставьте проверочную запись MX, скопированную ранее в мастере настройки G Suite.
- В поле Priority (Приоритет) введите значение 15.
- В поле TTL (Время жизни) оставьте значение по умолчанию – Auto (Автоматически).
- Нажмите Save (Сохранить).
Шаг 5. Инициируйте проверку записей MX на стороне Google
-
Откройте инструмент настройки в консоли администратора.
-
В разделе Gmail нажмите Активировать.
-
Убедитесь, что все адреса электронной почты были удалены и сервис Gmail готов к получению всех писем, отправляемых в ваш домен. Нажмите Продолжить.
-
На следующей странице внизу нажмите Активировать Gmail.
Примечания
- Изменения вступят в силу в течение нескольких часов. До этого момента сообщения могут приходить на серверы предыдущего поставщика услуг электронной почты.
- Если в консоли администратора долгое время отображается сообщение Проверка настройки записей MX, убедитесь, что на сайте регистратора домена в настройках DNS правильно указаны значения и приоритет записей MX.
- Если вам все ещё нужна помощь, обратитесь в .
Task 3 — Adding DNS records to a CNAME setup
Once a CNAME setup is enabled, DNS records must be updated in both Cloudflare’s DNS app and your authoritative DNS:
-
-
- Add an A or CNAME record in the Cloudflare DNS app for the subdomain.An orange-cloud icon beside the DNS record will proxy traffic to Cloudflare.
- Edit the corresponding CNAME record in your authoritative DNS to append .cdn.cloudflare.net to the hostname.
-
For example, when configuring www.example.com on a CNAME setup with Cloudflare, the CNAME record in authoritative DNS would need to point to www.example.com.cdn.cloudflare.net.
www.example.com CNAME www.example.com.cdn.cloudflare.net
If www.example.com is currently an A record in your authoritative DNS, it must be changed to a CNAME.
CNAME records can be added to your authoritative DNS for each subdomain to be proxied to Cloudflare.
Guidelines for contacting Cloudflare support
Cloudflare support responds to every ticket received, in priority order:
- Enterprise
- Business
- Pro
- Free
Cloudflare Support cannot perform the following actions:
- Make configuration or account changes on a customer’s behalf,
- Provide sensitive account info over the phone, or
- Troubleshoot or answer questions about domains not associated with the Cloudflare account email address used to contact support.
Do not share any sensitive information, such as passwords, credit card numbers, private keys, or API keys with Cloudflare.
Before notifying Cloudflare of an issue with your site, refer to the Cloudflare Status Page. If reporting issues with your site, ensure to .
Purge using Cache-Tags (Cloudflare Enterprise only)
Cache-tag purging makes multi-file purging easier. You can perform bulk purging by adding cache-tags to your assets (web pages, image files, and so on).
Hostname and Tag purges are only available in Cloudflare Enterprise.
How Cache-Tags work
This is the general workflow for using cache-tags:
- Add tags to the Cache-Tag HTTP response header from your origin web server for your web content (pages, static assets, and so on).
- through Cloudflare.
- Cloudflare associates the tags in the Cache-Tag HTTP header with the content being cached.
- Use specific cache-tags to purge your Cloudflare CDN cache of all content containing that cache-tag, through your dashboard or .
- Cloudflare forces a cache miss on content with the purged cache-tag.
Be careful what you purge! A cache miss can cause execution delays by requiring a fetch from your origin server.
Add Cache-Tag HTTP response headers
You add cache-tags to your web content in Cache-Tag HTTP response headers. You use HTTP headers to allow the client and the server to pass additional information in requests or responses. HTTP headers consist of a specific case-insensitive name followed by a colon ( : ) and the valid value, for example, Cache-Tag:tag1,tag2,tag3. As shown, you use commas to separate the tags when you want to use multiple cache-tags.
When your content reaches our edge network, Cloudflare:
Removes the Cache-Tag HTTP header before sending the response to your website visitor.
Your end users never see Cache-Tag HTTP headers on your Cloudflare-enabled website.
Removes whitespaces from the header and any before and after cache-tag names:
tag1, tag2 and tag1,tag2 are considered the same.
Removes all repeated and trailing commas before applying cache-tags:
tag1,,,tag2 and tag1,tag2 are considered the same.
A few things to remember:
- A single HTTP response can have more than one Cache-Tag HTTP header field.
- The minimum length of a cache-tag is 1 byte.
Individual tags don’t have a maximum length, but the aggregate Cache-Tag HTTP header cannot exceed 16 KB after the header field name, which is approximately 1000 unique tags. Length includes whitespace and commas, but not the header field name.
- For cache purges, the maximum length of cache-tags in an API call is 120 characters.
- The Cache-Tag HTTP header must accept all valid characters allowable in HTTP headers, as specified in RFC-5987.
- Spaces are not allowed in cache-tags.
- Case does not matter:
Tag1 and tag1 are considered the same.
1. Login to Cloudflare and select the site with the resources to purge.
2. Click the Caching app.
3. In the Purge Cache pane, click Custom Purge.
The Custom Purge dialog box appears.
4. Select Tag in the Purge by section.
5. In the text box, enter your tags to use to purge the cached resources.
To purge multiple cache-tagged resources, separate each tag with a comma or have one tag per line.
6. Click Purge.
Read our documentation on removing cached assets from your CDN using the APIs. You can use up to 30 cache-tags in one API call and make up to 30,000 purge API calls in a 24-hour period.
Вкладка Overview
– можно перевести как «общие настройки», где показываются общие настройки, уровень шифрования, кэширования и так далее.
Слева от статуса сайта есть выпадающий список с выбором быстрых действий.
Under attack mode – режим «под атакой», в этом режиме сайт открывается с задержкой, основное назначение – защита от DDoS-атак. После включения опции будет доступно несколько уровней защиты от low до high.
Developing mode – режим «разработки», отключает кэширование на сайте. Обычно опция востребована при отладке сайта, когда изменения сразу же отображаются на ресурсе, иначе все вносимые обновления будут отображаться с задержкой.
Security Level – режим «уровень безопасности» – по умолчанию выключен «Essentially Off», при включении будут доступны следующие опции:
Rate Limiting – режим «ограничение скорости», используется для блокировки IP-адресов с вредоносными запросами, как сканирование, или если тарифный план имеет ограничение по трафику.
Внимание, функция платная. Первые 10 000 запросов являются бесплатными
Далее $ 0,05 за 10 000 запросов.
Примечание: за заблокированные запросы плата не взимается.
Caching Level – «уровень кеширования», по умолчанию установлен уровень стандарт, при изменении доступны опции уровня кэширования, особо выделим:
Always Online – «всегда онлайн», на мой взгляд, супер функция. Если ваш сайт упал и не дышит, вы решили переделать сайт, но не хотите его выключать, сгорел дата-центр и так далее… CloudFlare будет показывать статические страницы сайта из кэша. Конечно, ни о какой динамике не может быть и речи, даже функция отправки почты будет недоступна, но это все же лучше, чем посетитель будет лицезреть «дырку от бублика».
Практически в самом конце страницы ссылка на API, но об этом поговорим позже, поскольку тут открывается множество возможностей, таких как собственный, динамический DNS.
Вкладка Analytics – как нетрудно догадаться, это страница аналитики.
Requests – «запросы», можно посмотреть количество запросов, уровень кэширования, географию и многое другое, качество предоставляемой статистики не хуже, чем предоставляют специализированые сервисы.
Bandwidth – «пропускная способность», показывается количество трафика с сайта.
Unique Visitors – «уникальные посетители».
Threats – «угрозы», будут показаны вредоносные запросы, с разделением по типу угроз, страны-источники угроз и так далее.
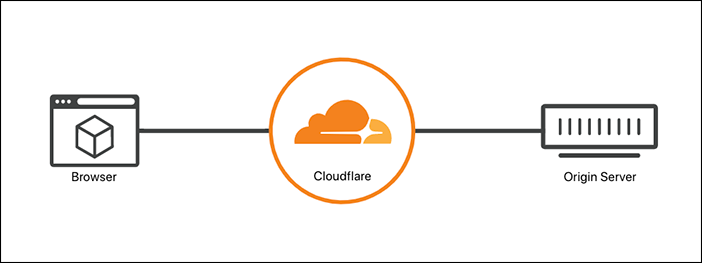
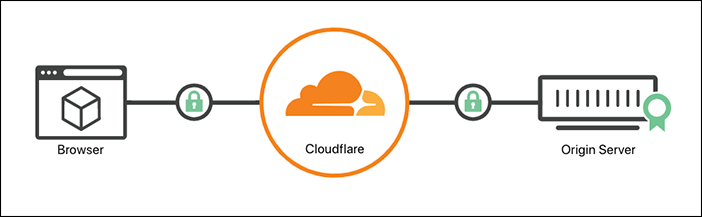
SSL / Тип шифрования связи
Этот параметр позволяет Вам контролировать:
- Могут ли посетители просматривать Ваш сайт через безопасное соединение;
- Если да, то как именно Cloudflare будет подключаться к Вашему серверу.
Эти параметры перечислены от минимального (Отключено) до наиболее безопасного (Полный (строго)).
• Отключено
Нет безопасного соединения между Вашим посетителем и Cloudflare, а также нет безопасного соединения между Cloudflare и сервером. Это означает, что посетители могут просматривать ваш сайт только по протоколу HTTP, а любой посетитель, пытающийся подключиться через HTTPS, получит перенаправление на обычную HTTP версию Вашего сайта.
• Гибкий
Безопасное соединение между Вашим посетителем и Cloudflare, но не защищенное соединение между Cloudflare и Вашим сервером. SSL сертификат не обязательно должен быть установлен, но ваши посетители по-прежнему видят сайт как включенный HTTPS. Его следует использовать только в качестве крайней меры, если вы не можете настроить SSL на своем веб-сервере.
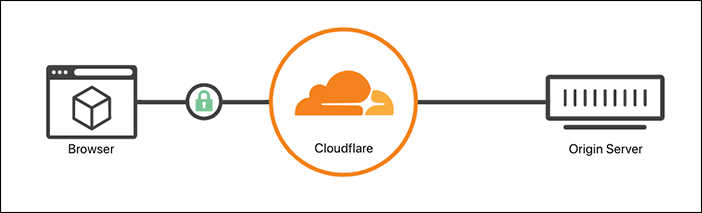
Режим Гибкий не рекомендуется использовать, если на Вашем сайте может быть размещена конфиденциальная информация (например, пользователи могут оставить контактные данные для заказа или обратной связи). Пожалуйста, используйте этот режим только как временную меру, если у Вас не получается настроить SSL сертификат.
• Полный
Безопасное соединение между Вашим посетителем и Cloudflare, плюс защищенное соединение (но не прошедшее проверку подлинности) между Cloudflare и Вашим сервером. Этот режим является идеальным вариантом, если у Вас есть SSL сертификат, приобретённый в Hostinger.
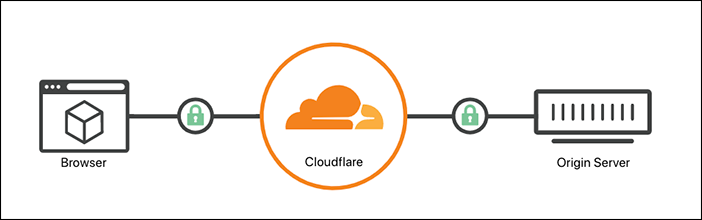
Режим Полный не проверяет оригинальность Вашего сертификата. Потому Вы можете использовать этот режим, если установили самоподписанный сертификат.
• Полный (строго)
Безопасное соединение между Вашим посетителем и Cloudflare, а также безопасное и аутентифицированное соединение между Cloudflare и Вашим сервером. Сертификат должен быть подписан органом, которому доверяет Cloudflare, иметь срок окончания действия в будущем и сайт должен открываться по HTTPS.
Ещё сомневаетесь? Тогда небольшая шпаргалка:
- Выбирайте Гибкий только в том случае, если Ваш сайт не может работать по HTTPS.
- Выбирайте Полный, если Ваш сайт работает по HTTPS и у Вас самоподписанный SSL сертификат либо пожизненный SSL сертификат от Hostinger.
- Выбирайте Полный (строго), если у Вас есть действительный SSL сертификат, выданный центром сертификации (например, Comodo), и срок его действия не истек.
Providing adequate ticket details
If you are filing a support ticket about errors or are requesting troubleshooting assistance, provide details to avoid delayed response:
Problem description:
Timestamp (UTC):
ZoneName/ZoneID:
Problem frequency: always, intermittent, not reproducible
Steps to reproduce problem:
(If the issue occurs behind a login page, also provide temporary test credentials)
Actual results:
Expected results:
Additional info:
- Site URLs that demonstrate the issue
- Specific error messages observed
- A screenshot of the errors
- Relevant logs from your origin web server
- A HAR file captured while demonstrating the issue
If the issue is difficult to explain or is very specific, provide the output of a screen capture session that demonstrates the issue and, if possible, another screen capture that demonstrates successful operation.
Overview
Cloudflare passes all HTTP headers as-is from the client to the origin and adds additional headers as specified below.
Cloudflare strips any header that contains dots (.) from origin web server responses. For example, the origin web server header test.header:data is removed by Cloudflare’s proxy.
CF-IPCountry
Contains a two character country code of the originating visitor’s country. XX is used for unknown country information. This header is added to requests by enabling Cloudflare IP Geolocation in the dashboard.
Example:
Cf-Ipcountry: US
CF-Connecting-IP
Provides the client (visitor) IP address (connecting to Cloudflare) to the origin web server. cf-connecting-ip contains a special Cloudflare IP 2a06:98c0:3600:0:0:0:0:103 when the request originates from a Cloudflare Workers subrequest instead of the visitor’s true IP.
Example:
CF-Connecting-IP: 203.0.113.1
X-Forwarded-For
Maintains proxy server and original visitor IP addresses. If there was no existing X-Forwarded-For header in the request sent to Cloudflare, X-Forwarded-For has an identical value to the CF-Connecting-IP header:
Example:
X-Forwarded-For: 203.0.113.1
If an X-Forwarded-For header was already present in the request to Cloudflare, Cloudflare appends the IP address of the HTTP proxy to the header:
Example:
X-Forwarded-For: 203.0.113.1,198.51.100.101,198.51.100.102
In the examples above, 203.0.113.1 is the original visitor IP address and 198.51.100.101 and 198.51.100.102 are proxy server IP addresses provided to Cloudflare via the X-Forwarded-For header.
To restore original visitor IP addresses at your origin web server, Cloudflare recommends your logs or applications look at CF-Connecting-IP or True-Client-IP instead of X-Forwarded-For since CF-Connecting-IP and True-Client-IP have a consistent format containing only one IP.
X-Forwarded-Proto
Since instructs Cloudflare to connect to your origin web server over HTTP, the X-Forwarded-Proto informs your origin web server whether the visitor was actually using HTTPS or HTTP in the connection to Cloudflare:
Example:
X-Forwarded-Proto: https
CF-RAY
The cf-ray header is a hashed value encoding information about the data center and the visitor’s request:
Example:
Cf-Ray: 230b030023ae2822-SJC
Add the to match requests proxied to Cloudflare to requests in your server logs. Enterprise customers can also see all requests via Cloudflare Logs.
CF-Visitor
A JSON object containing only one key called scheme. The value is identical to that of X-Forwarded-Proto (either HTTP or HTTPS). CF-Visitor is only relevant if using .
Example:
Cf-Visitor: { \"scheme\":\"https\"}
True-Client-IP (Enterprise plan only)
Provides the original client (visitor) IP address to the origin web server. True-Client-IP is only available on our Enterprise plan. In the example below, 203.0.113.1 is the original visitor IP address.
Example:
True-Client-IP: 203.0.113.1
There’s absolutely no difference between True-Client-IP and Cf-Connecting-IP besides the name of the header. Some Enterprise customers with legacy devices need True-Client-IP to avoid updating firewalls or load-balancers to read a custom header name.
CDN-Loop
Allows Cloudflare to specify how many times a request can enter Cloudflare’s network before it is blocked as a looping request.
Example:
CDN-Loop: cloudflare
Understand Cloudflare’s default cache behavior
Cloudflare caches static content depending on:
- where your visitors come from,
- which Cloudflare data center your visitors reach, and
- how often visitors request a resource at the specific data center.
Cloudflare only caches a resource within the Cloudflare data center that serves the request and doesn’t cache:
- off-site or third-party resources (Facebook, Flickr, etc), or
- content hosted on unproxied (grey-clouded) DNS records.
By default, Cloudflare respects the origin web server’s cache headers in the following manner unless overridden via an Page Rule:
- If the Cache-Control header is set to private, no-store, no-cache, or max-age=0, or if there is a cookie in the response, then Cloudflare does not cache the resource.
- Otherwise, if Cache-Control is set to public and the max-age is greater than , or if the Expires header is a date in the future, Cloudflare caches the resource.
- If both max-age and an Expires header are set, max-age is used.
By default, Cloudflare caches certain HTTP response codes with the following Edge Cache TTL when no `cache-control` directive or `expires` response header are present:
|
200, 206, 301 |
120m; |
|
302, 303 |
20m; |
|
404, 410 |
3m; |
|
403 |
1m; |
Cloudflare’s CDN provides several cache customization options:
- Specify caching behavior for individual URLs via Cloudflare Page Rules
- Customize caching with Cloudflare Workers
- Adjust caching level, cache TTL, and more via the Cloudflare Caching app
The maximum file size Cloudflare’s CDN caches is 512MB for Free, Pro, and Business customers and 5GB for Enterprise customers. Enterprise customers can contact their Cloudflare Account Team to request caching of larger files.
Cloudflare limits upload size (HTTP POST request size) per plan type:
- 100MB Free and Pro
- 200MB Business
- 500MB Enterprise by default ( to request a limit increase)
If you require larger uploads, either:
- chunk requests smaller than the upload thresholds, or
- upload the full resource through a grey-clouded DNS record.