Dmesg command in linux
Содержание:
7 dmesg command[edit]
As reference, please see man page.
The Kernel ring buffer can be displayed using dmesg command.
It will display on the console all the content of the ring buffer.
It is possible to filter messages following the loglevels:
Board $> dmesg -n <loglevel>
In that case, only messages with a value lower (not lower equal) than the console_loglevel will be printed.
Here, <loglevel> can be a numeric value, but also a string:
Supported log levels (priorities):
  emerg (0)
  alert (1)
   crit (2)
    err (3)
   warn (4)
 notice (5)
   info (6)
  debug (7)
- As example:
Board $> dmesg -n 8         # Temporary change loglevel to display messages up to debug level
or
Board $> dmesg -n debug
- In that case, every kernel messages will appear on your console, as all priority higher than 8 (lower loglevel values) will be displayed.
It is possible to clear the dmesg buffer
Board $> dmesg -c        # Display the full content of dmesg ring buffer, and then clear it
Board $> dmesg -C        # Clear the dmesg ring buffer
Learn dmesg with examples
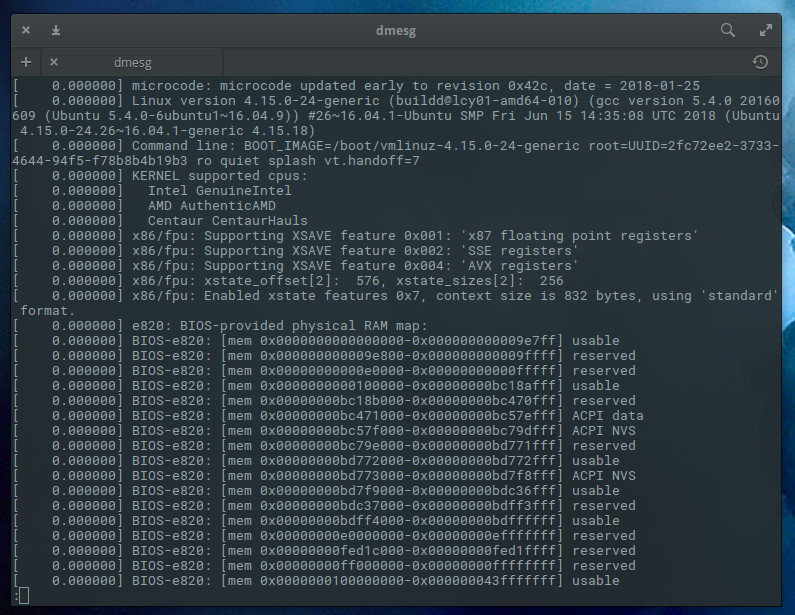
Example 1: Display all the devices drivers loaded in to kernel.
dmesg
The above command will give as all the hardware drivers loaded in to kernel, their status success or failed and even error message why they are failed.
Example2: Display hardware information related to Ethernet port eth0

dmesg | grep -i eth0
Clipped Output:
	 Initializing cgroup subsys cpuset  Initializing cgroup subsys cpu
	 Linux version 3.5.0-25-generic (buildd@komainu) (gcc version 4.7.2 (Ubuntu/Linaro 4.7.2-2ubuntu1) ) #39-Ubuntu SMP Mon Feb 25 18:26:58 UTC 2013 (Ubuntu 3.5.0-25.39-generic 3.5.7.4)
	 Command line: BOOT_IMAGE=/boot/vmlinuz-3.5.0-25-generic root=UUID=9b1dca12-2bf6-47d3-ab45-929f85bec913 ro quiet splash vt.handoff=7
	 KERNEL supported cpus:
	 Intel GenuineIntel
	 AMD AuthenticAMD
	 Centaur CentaurHauls
	 e820: BIOS-provided physical RAM map:
We can use grep command to filter any kind of information from dmesg command. Know more about grep command here.
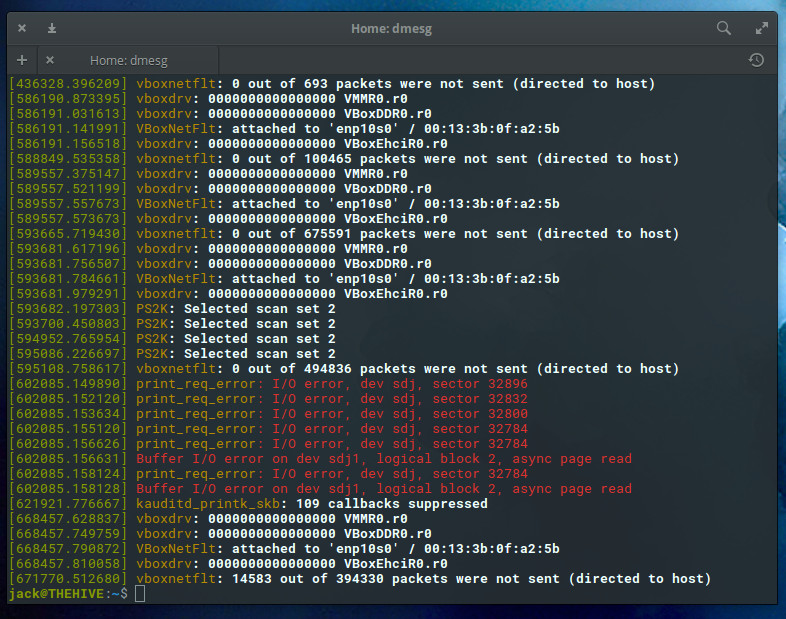
To display USB stuff
Command
On many Unix-like systems, the boot process generates a particularly dense stream of kernel messages. Many administrative issues pertain to whether a desired hardware device is successfully during the boot process, so the diagnostic process for a failed device often begins by inspecting the dmesg output from the kernel identification message to the point where the boot process concludes. Since this buffer can be overwritten by a flood of messages in subsequent operation, many Unix-like distributions store a post-boot copy of the message buffer at /var/log/dmesg or similar secure system location.
It is also common to manually consult the current dmesg buffer after hot-plugging devices, particularly USB devices (especially thumb drives), to determine whether the device has been recognized, the data rate of the port involved (USB 2 and USB 3.0 plugs sit side by side and are hard to distinguish on many systems), what driver has been assigned, and where the device is made visible in the file system. Many distributions attempt to display device-recognition messages on the desktop, often through a taskbar pop-up, but this is not always reliable or the information presented is incomplete. (Furthermore, to be notified on the desktop, the hot-plugged device must be permitted by the system’s security policy.)
Many dmesg lines in a traditional system begin with a device name followed by a colon, followed by some detailed text. Often these come in clusters, with the same device showing up on multiple lines in succession. Each cluster is usually associated with a single device enumeration, by one particular device driver (or device facility) associated with the device name.
Each such driver or facility emits diagnostic information in its own chosen format, and generally includes all of the most important technical details, in a dense and arcane notation. The manual page associated with the device driver will sometimes document the message format. For example, device name da0 (SCSI direct access ) is a commonly seen device name associated with USB thumb drives. man da at the command line—without the trailing number—will bring up documentation for this driver class on many systems. Even if the precise format of the lines written to the system buffer are not described here, the parameters of interest are usually defined, though you might need to further peruse related manual pages (listed at the bottom of a traditional man page) for a complete overview spanning various hardware abstraction layers.
More interaction with dmesg:
We can clear dmesg logs from dmesg command output if required by using clear switch -c as shown below.
dmesg -c
Note: This command will clear dmesg logs from boot time to till that time. If you connect any hardware after this command execution, you can see these new messages in dmesg output.
accidentally deleted dmesg messages by running dmesg -c? Dont worry these messages are stored in /var/log/kern.log or /var/log/dmesg files.
Check latest dmesg logs by viewing content of these two files.
cat /var/log/kern.log
Output:
	May 19 06:59:46 linuxnix kernel:  atkbd serio0: Unknown key released (translated set 2, code 0xab on isa0060/serio0).
	May 19 06:59:46 linuxnix kernel:  atkbd serio0: Use 'setkeycodes e02b <keycode>' to make it known.
	May 19 06:59:46 linuxnix kernel:  atkbd serio0: Unknown key pressed (translated set 2, code 0xab on isa0060/serio0).
	May 19 06:59:46 linuxnix kernel:  atkbd serio0: Use 'setkeycodes e02b <keycode>' to make it known.
or
cat /var/log/dmesg
Output:
	 RPC: Registered named UNIX socket transport module.
	 RPC: Registered udp transport module.
	 RPC: Registered tcp transport module.
	 RPC: Registered tcp NFSv4.1 backchannel transport module.
	 FS-Cache: Loaded
	 init: munin-node main process (1082) terminated with status 127
	 init: munin-node main process ended, respawning
	 NFS: Registering the id_resolver key type
	 Key type id_resolver registered
	 Key type id_legacy registered
	 FS-Cache: Netfs 'nfs' registered for caching
One advantage about kern.log file is it will give you system time for each log it created instead of boot time. In our next posts we will see how to use other hardware related commands in detail.
Post Views:
34,038
The following two tabs change content below.
Mr Surendra Anne is from Vijayawada, Andhra Pradesh, India. He is a Linux/Open source supporter who believes in Hard work, A down to earth person, Likes to share knowledge with others, Loves dogs, Likes photography. He works as Devops Engineer with Taggle systems, an IOT automatic water metering company, Sydney . You can contact him at surendra (@) linuxnix dot com.
Latest posts by Surendra Anne
- Docker: How to copy files to/from docker container — June 30, 2020
- Anisble: ERROR! unexpected parameter type in action: Fix — June 29, 2020
- FREE: JOIN OUR DEVOPS TELEGRAM GROUPS — August 2, 2019
- Review: Whizlabs Practice Tests for AWS Certified Solutions Architect Professional (CSAP) — August 27, 2018
- How to use ohai/chef-shell to get node attributes — July 19, 2018
COLOPHON top
       This page is part of the util-linux (a random collection of Linux
       utilities) project.  Information about the project can be found at
       ⟨https://www.kernel.org/pub/linux/utils/util-linux/⟩.  If you have a
       bug report for this manual page, send it to
       util-linux@vger.kernel.org.  This page was obtained from the
       project's upstream Git repository
       ⟨git://git.kernel.org/pub/scm/utils/util-linux/util-linux.git⟩ on
       2020-08-13.  (At that time, the date of the most recent commit that
       was found in the repository was 2020-08-12.)  If you discover any
       rendering problems in this HTML version of the page, or you believe
       there is a better or more up-to-date source for the page, or you have
       corrections or improvements to the information in this COLOPHON
       (which is not part of the original manual page), send a mail to
       man-pages@man7.org

util-linux                        July 2012                         DMESG(1)
Pages that refer to this page:
babeltrace2-log(1),
dmesg(1),
syslog(2),
klogctl(3),
proc(5),
procfs(5),
systemd.exec(5),
terminal-colors.d(5),
babeltrace2-plugin-text(7),
babeltrace2-source.text.dmesg(7),
BPF(8),
iptables-extensions(8),
tc-bpf(8),
wg(8)
Hardware detection
The kernel output is also a great way to discover how Linux is interacting with the hardware in your PC. For example, to discover which hard disks the kernel recognizes, you can search through the messages for the keyword “sda”. To do this, use “” like this:
“sda” is the name given to the first SATA hard disk, “sdb” is the second SATA hard disk and so on. If you don’t find your disks under “sda”, “sdb” etc., try “hda”, “hdb” and so on.
To get information on the network card, search for “eth0”, for example:
On my test machine, one of the lines of “eth0” related output shows:
This tells me that my Ethernet card is an Intel PRO/1000 (known as an e1000).
If you insert a USB flash drive and you want to check if it has been recognized by the kernel and what device name it has been assigned to, you can see the last few kernel messages using :
The tells to show the last 20 lines of output from dmesg. The example output shows that a flash drive make by ADATA was inserted into the USB port, it has a capacity of 8GB and that it has been assigned the device name of .
can be a very useful tool for system admins. Give it a try and see what you can learn about your system. If you have any questions, please ask them in the comments section, and we will see if we can help.
Gary Sims
Gary has been a technical writer, author and blogger since 2003. He is an expert in open source systems (including Linux), system administration, system security and networking protocols. He also knows several programming languages, as he was previously a software engineer for 10 years. He has a Bachelor of Science in business information systems from a UK University.
Некоторые аргументы (опции) утилиты dmesg
—decode, преобразует числовое значение уровней загрузки и параметры операции в понятные текстовые примечания
Фильтрация сообщений в соответствии с опциями—facility и —level. Например:
-u, —userspace для вывода сообщений пользовательского уровня
-k, —kernel для вывода сообщений уровня ядра
-t, —notime для удаления из вывода временных отметок
-T, —ctime для вывода времени в формате, подобном ctime(). Однако этот ключ бесполезен после использования ждущего режима и выхода из него. (Для printk() после окончания ждущего режима ядро не использует обычное системное время и поэтому временные значения не изменяются.)
—show-delta для вывода длительности промежутка между сообщениями
-c — Очистить содержимое буфера сообщений ядра после вывода.
-s — Использовать для буфера сообщений ядра, буфер размером . По умолчанию его размер 16392 байт.
-n — Установить уровень, на котором сообщения системного журнала будут выводиться на консоль.
Например, -n 1 предотвращает вывод на консоль всех сообщений, за исключением явно тревожных.
-w, —follow — Ожидание новых сообщений. (наподобие tailf/tail -f)
Некоторые аргументы (опции) утилиты dmesg
—decode, преобразует числовое значение уровней загрузки и параметры операции в понятные текстовые примечания
Фильтрация сообщений в соответствии с опциями —facility и —level. Например:
-u, —userspace для вывода сообщений пользовательского уровня
-k, —kernel для вывода сообщений уровня ядра
-t, —notime для удаления из вывода временных отметок
-T, —ctime для вывода времени в формате, подобном ctime(). Однако этот ключ бесполезен после использования ждущего режима и выхода из него. (Для printk() после окончания ждущего режима ядро не использует обычное системное время и поэтому временные значения не изменяются.)
—show-delta для вывода длительности промежутка между сообщениями
-c — Очистить содержимое буфера сообщений ядра после вывода.
-s — Использовать для буфера сообщений ядра, буфер размером . По умолчанию его размер 16392 байт.
-n — Установить уровень, на котором сообщения системного журнала будут выводиться на консоль.
Например, -n 1 предотвращает вывод на консоль всех сообщений, за исключением явно тревожных.
-w, —follow — Ожидание новых сообщений. (наподобие tailf/tail -f)
Шпаргалка по journalctl
Вывод journalctl представляет из себя цельный список всех сохраненных сообщений. Если вы запустите команду journalctl без параметров, то получите самые первые сообщения, которые были сохранены. В моем случае это данные за 13 января:

Чтобы найти именно то, что вам нужно, необходимо научится перемещаться по этому списку. Формат вывода лога довольно простой:
янв 13 20:55:55 sergiy-pc kernel: Linux version 4.15.0-43-generic
- янв 13 20:55:55 — дата и время события;
- sergiy-pc — хост, на котором произошло событие;
- kernel — источник события, обычно это программа или сервис. В данном случае ядро;
- Linux version 4.15.0-43-generic — само сообщение.
Давайте перейдем к примерам фильтрации и перемещения.
1. Просмотр логов сервисов
Самый частый случай использования journalctl — это когда вы пытаетесь запустить какой-либо сервис с помощью systemd, он не запускается и systemd выдает вам такое сообщение подобного содержания: Failed to start service use journalctl -xe for details. Система сама предлагает вам какую команду надо выполнить:

Как вы помните из опций, эта команда отображает последние сообщения в журнале и добавляет к ним дополнительную информацию, если она есть. Учитывая, что последнее, что мы делали — был наш сервис, то здесь будут сообщения от него и вы быстро сможете понять почему он не запускается.
Чтобы отфильтровать сообщения только от определенного сервиса можно использовать опцию -u. Например:

2. Просмотр логов в режиме tail
С помощью опции -f можно указать утилите, что необходимо выводить новые сообщения в реальном времени:
В этом режиме less не поддерживается, поэтому для выхода нажмите сочетание клавиш Ctrl+C.
3. Просмотр логов загрузки
В логе journalctl содержатся все логи, в том числе и логи загрузки. Для того чтобы открыть лог последней загрузки используйте опцию -b:

Посмотреть список всех сохраненных загрузок можно командой:

Теперь, чтобы посмотреть сообщения для нужной загрузки используйте её идентификатор:

4. Фильтрация по дате
С помощью опции —since вы можете указать дату и время, начиная с которой нужно отображать логи:
Опция —until помогает указать по какую дату вы хотите получить информацию:
Или сразу скомбинируем две эти опции чтобы получить логи за нужный период:

Кроме даты в формате YYYY-MM-DD в этих опциях можно использовать такие слова, как yesterday, today, и tomorrow. Также допустимы конструкции 1 day ago (один день назад) или 3 hours ago (три часа назад). Ещё можно использовать знаки + и -. Например -1h30min будет означать полтора часа назад.
Если вы хотите посмотреть только сообщения ядра используйте опцию -k:

6. Настройка формата вывода
По умолчанию journalctl выводит информацию с помощью утилиты less, в которой вы можете её удобно листать и просматривать. Но формат вывода можно изменить:
- short — используется по умолчанию;
- verbose — также, как и short, только выводится намного больше информации;
- json — вывод в формате json, одна строка лога в одной строке вывода;
- json-pretty — форматированный вывод json для более удобного восприятия;
- cat — отображать только сообщения, без метаданных.
Чтобы указать нужный формат используйте опцию -o. Например:

Или:
7. Очистка логов
Сначала нужно посмотреть сколько ваши логи занимают на диске. Для этого используйте такую команду:

Чтобы уменьшить размер лога можно использовать опцию —vacuum-size. Например, если вы хотите, чтобы ваши файлы журналов занимали на диске не более 2 Гб, выполните команду:

Теперь старые логи будут удалены, пока общий объем хранилища не будет составлять 2 гигабайта. Также можно удалять логи по времени. Для этого используется опция —vacuum-time. Например, оставим только логи за последний год:
Usage
From the bash prompt, issue the command dmesg. You should see a metaphorical ton of information zipping past your eyes. In fact, there is so much information whizzing by so quickly that using the command in this fashion won’t do. With that in mind, how do you work with dmesg? There are a couple of ways. The first way is to pipe the output of dmesg to either less or more, like so:
dmesg | less
Running dmesg this way allows you to scroll through the output (Figure A).
Figure A
The dmesg command, as viewed through the lens of less.
However, even using dmesg this way isn’t optimal because there’s still that metaphorical ton of information to sift through. Fortunately, dmesg has a few options that allow you to scale back that information. You can limit output to only errors and warnings so you don’t have to sift through everything that’s going right in your system. How do you do this? With the help of the —level flag. There are eight levels that can be viewed, each of which can be combined to make a specific iteration of the dmesg output. The levels are:
- emerg — system is unusable
- alert — action must be taken immediately
- crit — critical conditions
- err — error conditions
- warn — warning conditions
- notice — normal but significant condition
- info — informational
- debug — debug-level messages
Let’s say you want to view only the alert and critical warnings. The command for this would be:
dmesg --level=alert,crit
Hopefully, after running the above command, you’ll see no output. If you see nothing, and you know there’s an issue, drop the level down a notch to, say, errors and warnings:
dmesg --level=err,warn
Now we’re talking usable information (Figure B).
Figure B
Using the —level flag we can get more specific on what dmesg shows us.