Обзор wcs 5.2
Содержание:
- Введение
- Find out more
- Test TURN/STUN
- Using your TURN/STUN Server with Red5 Pro
- Troubleshooting
- STUN-сервер
- STUN
- Backup and create configuration file
- Step-by-step Install on an Ubuntu Linux Server
- SSL-сертификат
- Публичные STUN-серверы
- Beyond one-to-one: multi-party WebRTC
- Beyond browsers: VoIP, telephones and messaging
- Подключение демо-клиента sipML5
Введение
TURN (Traversal Using Relay NAT) — это протокол, который позволяет узлу за NAT или брандмауэром получать входящие данные через TCP или UDP соединения. Такая возможность особенно актуальна для узлов позади симметричных NAT, или брандмауэров, которые собираются стать принимающей стороной в соединении с одним конкретным узлом (peer-ом).
TURN сервер – это улучшенный STUN сервер, поэтому любой TURN сервер может работать и как STUN сервер. (Session Traversal Utilities for NAT) — это сетевой протокол, который позволяет клиенту, находящемуся за сервером трансляции адресов (или за несколькими такими серверами), определить свой внешний IP-адрес, способ трансляции адреса и порты во внешней сети, связанный с определённым внутренним номером порта. Эта информация используется для установления соединения UDP между двумя хостами в случае, если они оба находятся за маршрутизатором NAT.
TURN сервер используется в крайнем случае, как посредник (relay), превращая p2p в клиент-сервер-клиентную связь, там где прямая связь невозможна. WebRTC успешно справляется с такими проблемами, используя протокол ICE, который, правда, требует использования дополнительных серверов (STUN, TURN). – технология, ориентированная на браузеры, которая позволяет соединить два клиента для видео-передачи данных. Основные особенности – внутренняя поддержка браузерами и способность соединять клиентов без использования дополнительных серверов – соединение peer-to-peer (p2p).
Установка соединения p2p – довольно трудная задача, так как компьютеры не всегда обладают публичными IP адресами. Из-за небольшого количества IPv4 адресов (а также в некоторых целях безопасности) был разработан механизм (Network Address Translation), который позволяет создавать приватные сети, например, для частного использования. Многие домашние роутеры сейчас поддерживают NAT и благодаря этому все домашние устройства имеют выход в интернет, хотя провайдеры интернета обычно предоставляют один IP адрес. Публичные IP адреса — уникальны в интернете, а приватные нет. Именно поэтому установка соединения p2p явяется не простой задачаей.
Find out more
WebRTC codelab: step-by-step instructions how to build a video and text chat application, using a Socket.io signaling service running on Node.
2013 Google I/O WebRTC presentation with WebRTC tech lead, Justin Uberti.
Chris Wilson’s SFHTML5 presentation: Introduction to WebRTC Apps.
The WebRTC Book gives a lot of detail about data and signaling pathways, and includes a number of detailed network topology diagrams.
WebRTC and Signaling: What Two Years Has Taught Us: TokBox blog post about why leaving signaling out of the spec was a good idea.
Ben Strong’s presentation A Practical Guide to Building WebRTC Apps provides a lot of information about WebRTC topologies and infrastructure.
The WebRTC chapter in Ilya Grigorik’s High Performance Browser Networking goes deep into WebRTC architecture, use cases and performance.
Test TURN/STUN
Open a browser to Trickle ICE and add the server in the box, remove the entry and then click ; if everything is working you’ll see output like this:
Copy
Time    Component    Type    Foundation    Protocol    Address        Port    Priority
0.001 1          host    89435858      udp         10.0.0.5       35948   126 | 32542 | 255
0.037 1            srflx   976374523     udp         71.222.38.190  35948   100 | 32542 | 255
0.101 1            host    1272402466    tcp         10.0.0.5 9   9         0 | 32542 | 255
0.101 Done
Using your TURN/STUN Server with Red5 Pro
No modifications are required in Red5 Pro server since it has an internal harvester for ICE connectivity. Utilization of your TURN/STUN server, will require modification of the html-sdk or your own javascript to include the URI for your TURN/STUN server. The URI will be .
If you are using the default, , webapp, you will want to modify the following:
In and , change the line to
If you are using the webrtcexamples, you can set the server address on the index.html page.
For further details about configuring the html-sdk see the Configure & Publish section at the link.
Troubleshooting
If you want to try testing with a specific TURN/STUN server that is not the default Google, you can find a list of STUN servers here: STUN + TURN servers list. For example, allows you to create a free account and use their TURN server.
STUN-сервер
Даже если между клиентом и сервером не будет NAT, для нормальной работы WebRTC требуется наличие механизма ICE, как минимум, для того, чтобы клиент и сервер могли определить, какой из своих IP-адресов указывать в SDP. Совсем без ICE, WebRTC работать не будет, т.к. в заголовки c= в SDP будут вписываться либо все IP-адреса хоста, либо ни одного. Для реализации ICE мы поднимем простой STUN-сервер, он не поможет нам обойти большую часть современных NAT, но от него это и не требуется. NAT будем обходить с помощью привычного механизма SIP Comedia, а STUN здесь нужен для того, чтобы клиент и сервер WebRTC могли определить правильный IP-адрес для подстановки в SDP.
STUN-сервер желательно установить на другом хосте (не на сервере Asterisk), на CentOS 6 можно поставить из EPEL пакет stun-server. Для работы STUN-сервера необходимо наличие двух IP-адресов, в нашем случае это будут адреса 192.168.100.55/24 и 192.168.100.56/24, оба настроены на сетевом интерфейсе eth0.
Также нам понадобится init-скрипт для STUN-сервера (в пакет stun-server он почему-то не входит), приведённый init-скрипт был позаимствован здесь
#!/bin/sh # # Startup/shutdown script for the STUN-Server # # Linux chkconfig stuff: # # chkconfig: 35 90 10 # description: Startup/shutdown script for the STUN-Server #
# Source function library. if [ -f /etc/init.d/functions ] ; then . /etc/init.d/functions elif [ -f /etc/rc.d/init.d/functions ] ; then . /etc/rc.d/init.d/functions else exit 0 fi
DAEMON=/usr/sbin/stun-server IP1=192.168.100.55 IP2=192.168.100.56
start () echo -n $»Starting $prog: «
# start daemon daemon $DAEMON -b -h $IP1 -a $IP2 2>/dev/null RETVAL=$? echo && touch /var/lock/subsys/stun-server return $RETVAL >
stop () # stop daemon echo -n $»Stopping $prog: « killproc $DAEMON RETVAL=$? echo && rm -f /var/lock/subsys/stun-server >
case $1 in start) start ;; stop) stop ;; restart) restart ;; condrestart) [ -f /var/lock/subsys/stun-server ] && restart || : ;; status) status $DAEMON ;; *)
exit $RETVALСкрипт нужно сохранить в файл /etc/init.d/stun-server
Что делать дальше, должно быть очевидно
chkconfig —add stun-server service stun-server start
Если stun-server не работает можете запустить его вручную и посмотреть, на что он ругается
stun-server -v -h 192.168.100.55 -a 192.168.100.56
Важное замечание насчёт STUN — STUN-сервер должен вернуть WebRTC-серверу IP-адрес, на который WebRTC-клиент сможет отправить RTP-трафик, и RTP-трафик дойдёт до WebRTC-сервера. Т.е
STUN-сервер, описанный здесь, подойдёт для подключения клиентов из локальной сети и из удалённых подразделений по VPN. Если в данном сценарии использовать, к примеру, публичный STUN-сервер, WebRTC-сервер подставит в SDP внешний IP-адрес и WebRTC-клиент будет пытаться отправлять RTP-трафик на внешний IP-адрес со всеми вытекающими последствиями.
Это ещё не всё, Asterisk тоже должен использовать настроенный STUN-сервер. Для этого добавьте в раздел файла /etc/asterisk/rtp.conf следующие параметры:
icesupport=yes stunaddr=192.168.100.55:3478Если используете FreePBX, дополнительные параметры нужно указать в файле rtp_custom.conf следующим образом (+) icesupport=yes stunaddr=192.168.100.55:3478
STUN
A C++ STUN client for getting NAT type and external IP
This is the cmake version of (https://github.com/jselbie/stunserver) originally created by jselbie.
Compliant with the latest RFCs including 5389, 5769, and 5780. Also includes
backwards compatibility for RFC 3489.
Supports both UDP and TCP on both IPv4 and IPv6.
Client test app provided.
Stun server can operate in «full» mode as well as «basic» mode. Basic mode
configures the server to listen on one port and respond to STUN binding
requests. Full mode configures the service to listen on two different IP
address interfaces (if available) and provide NAT behavior and filtering
detection support for clients.
Open source Apache license. See LICENSE file fore more details.
Known issues:
TLS mode has yet to be implemented.
Server does not honor the stun padding attribute. If someone really wants
this support, let me know and I will consider adding it.
By default, the stun server operates in an open mode without performing
authentication. All the code for authentication, challenge-response, message
hashing, and message integrity attributes are fully coded. HMAC/SHA1/MD5
hashing code for generating and validating the message integrity attribute
has been implemented and tested. However, the code for validating a username
or looking up a password is outside the scope of this release. Instead,
hooks are provided for implementors to write their own code to validate a
username, fetch a password, and allow/deny a request. Details of writing
your own authentication provider code are described in the file
«server/sampleauthprovider.h».
Testing:
Fedora 15 with gcc/g++ 4.6.0
Fedora 17 with gcc/g++ 4.72
Ubuntu 11 with gcc/g++ 4.5.2
Ubuntu 12 with gcc/g++ 4.6.3
Ubuntu 12 with clang/clang++ 3.0
Amazon AWS with gcc/g++ 4.4
MacOS with XCode 7 and command line tools
FreeBSD 9.0 with gcc/g++ 4.2.1
Solaris 11 with gcc/g++ 4.5.2
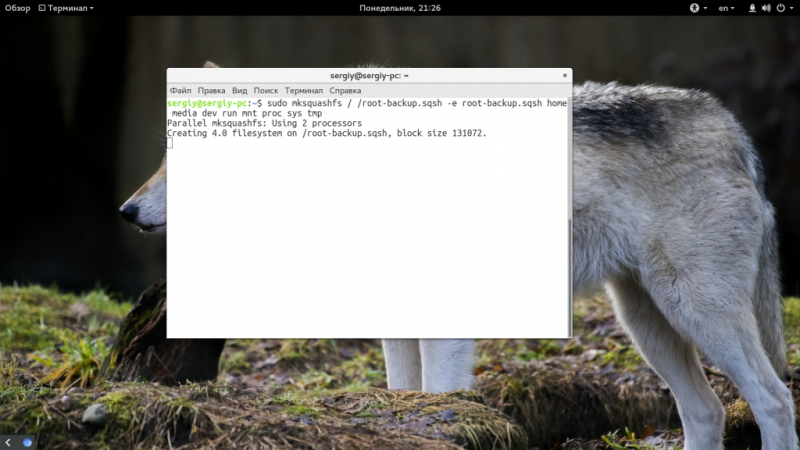
Backup and create configuration file
Now that the turn server is enabled, you need to modify the configuration file according to your needs. Be sure to backup the original configuration file that lists all the possible options of coturn, in case you need to restore in other ocassion. You can use the following command to do that:
This will basically rename the file. Then, proceed to create the configuration file in the same directory:
And paste the following content on it:
This basic configuration usually works for most of the needs, however in case that you need to configure something else, be sure to visit the official docs of the configuration properties here. Don’t forget that in this case, we included a test user in the file to test the TURN server later, however you are free to remove it and create it later with .
Till this point, everything that we need to configure on our server should be done.
Step-by-step Install on an Ubuntu Linux Server
Pre-build steps
1 — Update the install via apt
Copy
2 — Ensure that build tools are installed
Copy
All coturn downloads may be found here; the latest at the time of writing this guide is turnserver-4.5.0.8 download the tarball.
1 — Install the support libraries
Copy
2 — Download the source
Copy
3 — Un-tar the source
Copy
4 — Run from source directory
Copy
5 — Run
Copy
6 — Run as sudo
Copy
If all goes well, you’ll see this at the end when finishes:
Copy
1) If your system supports automatic start-up system daemon services,
    then, to enable the turnserver as an automatically started system
    service, you have to:

    a) Create and edit /etc/turnserver.conf or
    /usr/local/etc/turnserver.conf .
    Use /usr/local/etc/turnserver.conf.default as an example.

    b) For user accounts settings: set up SQLite or PostgreSQL or
    MySQL or MongoDB or Redis database for user accounts.
    Use /usr/local/share/turnserver/schema.sql as SQL database schema,
    or use /usr/local/share/turnserver/schema.userdb.redis as Redis
    database schema description and/or
    /usr/local/share/turnserver/schema.stats.redis
    as Redis status & statistics database schema description.

    If you are using SQLite, the default database location is in
    /var/db/turndb or in /usr/local/var/db/turndb or in /var/lib/turn/turndb.

    c) add whatever is necessary to enable start-up daemon for the
    /usr/local/bin/turnserver.

2) If you do not want the turnserver to be a system service,
   then you can start/stop it "manually", using the "turnserver"
   executable with appropriate options (see the documentation).

3) To create database schema, use schema in file
/usr/local/share/turnserver/schema.sql.

4) For additional information, run:
   $ man turnserver
   $ man turnadmin
   $ man turnutils
7 — Configure the database
We’re using the fastest available . The db file is located at . By default, coturn uses SQLite database for users and settings. That database is automatically created (empty) when the process turnserver starts the first time. This step is only here for reference and flow.
8 — Add Admin User
Add the long-term TURN users with the turnadmin utility. For example, this command adds user with password , realm , to the default sqlite database:
Copy
Add the admin user(s) to the database, with utility. If you added those users, they will be able to connect to the TURN server ports over HTTPS from your browser and perform admin tasks with the web interface.
9 — Configure the server
Copy to () then edit the file. Add or modify the following lines:
-
set this to the IP of your server instance.
note: if your VM/server has a private IP and a public IP, then you will need to set the listening-ip to your private IP, and also configure external-ip= to its public IP
- set to your domain (eg, realm=company.com)
- uncomment
- uncomment
10 — Start the server
Options used for WebRTC with CoTURN:
- Run server process as daemon
- Use long-term credentials mechanism
- Fingerprinting Use fingerprints in the TURN messages. If an incoming request contains fingerprint, then TURN server will always add fingerprints to the messages in this session, regardless of the per-server setting.
- Authentication realm The default realm to be used for the users when no explicit origin/realm relationship was found in the database. Must be used with long-term credentials mechanism or with TURN REST API.
- If running CoTURN behind a NAT, you’ll also need
- To limit relay endpoint port ranges, use and
- For verbose output, use
Special note for AWS:
The -L option is not needed and may cause a failure to resolve server reflexive addresses
Command formats:
Provide only STUN over UDP without TURN / relay:
Copy
Provide STUN and TURN functionality over UDP and TCP (options: a, f, and r are needed):
Copy
Click links for additional details on the turnserver and its configuration options.
SSL-сертификат
SSL-сертификат для работы WebRTC нужен обязательно. Соединение по websocket может быть нешифрованным, но голос может передаваться только по SRTP с использованием DTLS, наличие сертификата для этого обязательно. Для нормальной работы WebRTC, сертификат должен быть доверенным для всех браузеров, в которых будет запускаться WebRTC-клиент, поэтому сертификат придётся купить или воспользоваться корпоративным центром сертификации. Для тестирования сгодится и сертификат, сгенерированный с помощью EasyRSA, открытый ключ полученного центра сертификации даже можно будет сделать доверенным для клиентов и использовать полученный сертификат в продашн. Естественно, в поле сертификата CN должно быть указано DNS-имя (или IP-адрес, если Вы всё-таки решили использовать IP-адрес). Ниже приведены команды, с помощью которых можно создать сертификат, используя актуальную версию EasyRSA (скачивание, распаковка и переход в директорию с EasyRSA — упражнение для читателя).
sed -ri ‘s|^#set_var EASYRSA_KEY_SIZE]+.*|set_var EASYRSA_KEY_SIZE 2048|; s|^#set_var EASYRSA_ALGO]+.*|set_var EASYRSA_ALGO rsa|; s|^#set_var EASYRSA_CA_EXPIRE]+.*|set_var EASYRSA_CA_EXPIRE 3650|; s|^#set_var EASYRSA_CERT_EXPIRE]+.*|set_var EASYRSA_CERT_EXPIRE 3650|; s|^#set_var EASYRSA_DIGEST]+.*|set_var EASYRSA_DIGEST «sha256″|’ ./vars
# Создаём ключ и сертификат центра сертификации ./easyrsa —batch init-pki ./easyrsa —batch —req-cn=»$(uuid)» build-ca nopass
# Создаём и подписываем сертификат для сервера ./easyrsa —batch —req-cn=fubar-pbx.local gen-req FubarPBX nopass ./easyrsa —batch sign server FubarPBX
# Конвертируем полученный сертификат в формат PEM openssl x509 -in pki/issued/FubarPBX.crt -out pki/issued/FubarPBX.pem -outform PEM
Нужные нам файлы: ./pki/ca.crt — сертификат центра сертификации ./pki/issued/FubarPBX.pem — сертификат сервера ./pki/private/FubarPBX.key — закрытый ключ сервера
Все эти файлы нужно загрузить через модуль FreePBX «Certificate Management» (выберите пункт «New Certificate» → «Upload Certificate» при добавлении сертификата)
В поле Private Key вставьте закрытый ключ, в поле Certificate — сертификат, в поле Trusted Chain — сертификат центра сертификации, затем нажмите «Generate Certificate» (FreePBX сохранит данные сертификата в файлы в директории /etc/asterisk/keys).
Публичные STUN-серверы
- stun.ekiga.net
- stun.sipnet.ru
- stun.ideasip.com (без поддержки XOR_MAPPED_ADDRESS)
- stun.softjoys.com (нет записи DNS SRV) (без поддержки XOR_MAPPED_ADDRESS)
- stun.voipbuster.com (нет записи DNS SRV) (без поддержки XOR_MAPPED_ADDRESS)
- stun.voxgratia.org (нет записи DNS SRV) (без поддержки XOR_MAPPED_ADDRESS)
- stun.sipgate.net:10000
- stun.phonepower.com
- stun.1und1.de
- stun.bluesip.net
- stun.callwithus.com
- stun.counterpath.net
- stun.e-fon.ch
- stun.endigovoip.com
- stun.gmx.net
- stun.ideasip.com
- stun.noc.ams-ix.net
- stun.phoneserve.com
- stun.sipgate.net
- stun.voip.aebc.com
- stun.voipgate.com
- stun.voxgratia.org
- stun1.voiceeclipse.net
- provserver.televolution.net
- stun.internetcalls.com
- stun.sipdiscount.com
- stun.softjoys.com
- stun.t-online.de
- stun.voipbuster.com
- stun.voipcheap.com
- stun.voipplanet.nl
- stun.voipraider.com
Beyond one-to-one: multi-party WebRTC
You may also want to take a look at Justin Uberti’s proposed IETF standard for a REST API for access to TURN Services.
It’s easy to imagine use cases for media streaming that go beyond a simple one-to-one call: for example, video conferencing between a group of colleagues, or a public event with one speaker and hundreds (or millions) of viewers.
A WebRTC app can use multiple RTCPeerConnections so to that every endpoint connects to every other endpoint in a mesh configuration. This is the approach taken by apps such as talky.io, and works remarkably well for a small handful of peers. Beyond that, processing and bandwidth consumption becomes excessive, especially for mobile clients.
 Full mesh topology: everyone connected to everyone
Alternatively, a WebRTC app could choose one endpoint to distribute streams to all others, in a star configuration. It would also be possible to run a WebRTC endpoint on a server and construct your own redistribution mechanism (a is provided by webrtc.org).
Since Chrome 31 and Opera 18, a MediaStream from one RTCPeerConnection can be used as the input for another: there’s a demo at simpl.info/multi. This can enable more flexible architectures, since it enables a web app to handle call routing by choosing which other peer to connect to.
Multipoint Control Unit
A better option for a large number of endpoints is to use a Multipoint Control Unit (MCU). This is a server that works as a bridge to distribute media between a large numbers of participants. MCUs can cope with different resolutions, codecs and frame rates within a video conference, handle transcoding, do selective stream forwarding, and mix or record audio and video. For multi-party calls, there are a number of issues to consider: in particular, how to display multiple video inputs and mix audio from multiple sources. Cloud platforms such as vLine also attempt to optimize traffic routing.
It’s possible to buy a complete MCU hardware package, or build your own.

The back of a Cisco MCU
Several open source MCU software options are available. For example, Licode (previously know as Lynckia) produces an open source MCU for WebRTC; OpenTok has Mantis.
Beyond browsers: VoIP, telephones and messaging
The standardized nature of WebRTC makes it possible to establish communication between a WebRTC app running in a browser and a device or platform running on another communication platform, such as a telephone or a video conferencing systems.
SIP is a signaling protocol used by VoIP and video conferencing systems. To enable communication between a WebRTC web app and a SIP client such as a video conferencing system, WebRTC needs a proxy server to mediate signaling. Signaling must flow via the gateway but, once communication has been established, SRTP traffic (video and audio) can flow directly peer to peer.
PSTN, the Public Switched Telephone Network, is the circuit switched network of all ‘plain old’ analogue telephones. For calls between WebRTC web apps and telephones, traffic must go through a PSTN gateway. Likewise, WebRTC web apps need an intermediary XMPP server to communicate with Jingle endpoints such as IM clients. Jingle was developed by Google as an extension to XMPP to enable voice and video for messaging services: current WebRTC implementations are based on the C++ libjingle library, an implementation of Jingle initially developed for Google Talk.
A number of apps, libraries and platforms make use of WebRTC’s ability to communicate with the outside world:
- sipML5: an open source JavaScript SIP client
- jsSIP: JavaScript SIP library
- Phono: open source JavaScript phone API, built as a plugin
- Zingaya: an embeddable phone widget
- Twilio: voice and messaging
- Uberconference: conferencing
The sipML5 developers have also built the webrtc2sip gateway. Tethr and Tropo have demonstrated a framework for disaster communications ‘in a briefcase’, using an OpenBTS cell to enable communications between feature phones and computers via WebRTC. Telephone communication without a carrier!
Подключение демо-клиента sipML5
Включите опцию «Disable Video», укажите URL для подключения к websocket (значение текстом wss://fubar-pbx.local:8089/ws) и укажите свой STUN-сервер (значение текстом — []) Сохраните расширенные настройки и вернитесь на основную страничку демо-клиента
Внесите базовые параметры для подключения и нажмите «Login», если все настройки внесены верно, сверху должна появиться надпись Connected (также команда «sip show peers» в CLI Asterisk должна отобразить подключение клиента с учётной записью 100). Также, если настройки, связанные со STUN, выполнены верно, звук должен проходить в обе стороны без какой-либо заметной задержки в начале разговора.