How to use masscan to enumerate large number of hosts quickly
Содержание:
- Comparison with Nmap
- Getting output
- Сбор банеров и их анализ в графическом интерфейсе
- How to scan the entire Internet
- Getting output
- Randomization
- C10 Scalability
- How to scan the entire Internet
- Randomization
- C10 Scalability
- C10 Scalability
- How to scan the entire Internet
- Comparison with Nmap
- Randomization
- Banner checking
- Comparison with Nmap
- Status
Comparison with Nmap
Where reasonable, every effort has been taken to make the program familiar
to users, even though it’s fundamentally different. Two important
differences are:
- no default ports to scan, you must specify
- target hosts are IP addresses or simple ranges, not DNS names, nor
the funky subnet ranges can use (like ).
You can think of as having the following settings permanently
enabled:
- : this does SYN scan only (currently, will change in the future)
- : doesn’t ping hosts first, which is fundamental to the async operation
- : no DNS resolution happens
- : scan completely randomized
- : sends using raw
If you want a list of additional compatible settings, use the following
command:
Getting output
By default, masscan produces fairly large text files, but it’s easy
to convert them into any other format. There are five supported output formats:
-
xml: Just use the parameter .
Or, use the parameters and . -
binary: This is the masscan builtin format. It produces much smaller files, so that
when I scan the Internet my disk doesn’t fill up. They need to be parsed,
though. The command line option will read binary scan files.
Using with the option will produce a XML version of the
results file. -
grepable: This is an implementation of the Nmap -oG
output that can be easily parsed by command-line tools. Just use the
parameter . Or, use the parameters and
. -
json: This saves the results in JSON format. Just use the
parameter . Or, use the parameters and
. -
list: This is a simple list with one host and port pair
per line. Just use the parameter . Or, use the parameters
and . The format is:
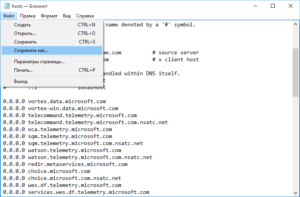
Сбор банеров и их анализ в графическом интерфейсе
Для сбора банеров используется опция —banners. Для меня интересны порты 80,21,53,8080. Чтобы воспользоваться графическим интерфейсом для анализа полученных данных, сохраните результаты в формате XML:
sudo masscan 10.0.0.0/8 -p80,21,53,8080 --banners --max-rate 500 -oX scan-01.xml
Пока происходит сканирование, установите и настройте ваш веб-сервер, скопируйте файлы MASSCAN web-ui:
apt-get install apache2 php5 php5-mysql mysql-server
git clone https://github.com/offensive-security/masscan-web-ui
sudo mkdir /var/www/html/masscan/
sudo mv masscan-web-ui/* /var/www/html/masscan
cd /var/www/html/masscan
Чуть подправим файлы:
sudo find ./ -type f -exec sed -i 's/\/assets/\/masscan\/assets/g' {} \;
sed -i "s/url:'\//url:'\/masscan\//g" /var/www/html/masscan/assets/scripts.js
sed -i "s/url='\/export.php/url='\/masscan\/export.php/g" /var/www/html/masscan/assets/scripts.js
Запускаем службу MySQL:
sudo service mysql start
Если вы не знаете пароль от MySQL, то посмотрите статью «Какой пароль рута MySQL в Kali Linux / Как сменить пароль рута MySQL в Kali Linux».
Создайте базу данных, пользователя, импортируйте базу данных.
mysql -u root -p
create database masscan;
CREATE USER 'masscan'@'localhost' IDENTIFIED BY 'changem3';
GRANT ALL PRIVILEGES ON masscan.* TO 'masscan'@'localhost';
exit
mysql -u root -p masscan < db-structure.sql
sudo rm db-structure.sql README.md
Обновите файл веб конфигурации, подправив данные о пользователе и пароле (если нужно):
gedit config.php
define('DB_HOST',       'localhost');
define('DB_USERNAME',   'masscan');
define('DB_PASSWORD',   'changem3');
define('DB_DATABASE',   'masscan');
Теперь давайте импортируем результаты сканирования. Мы начали сканирование, будучи в домашней директории. Поэтому и файл с результатами сканирования там. Для успешного импорта нам нужно, чтобы файл с результатами (scan-01.xml) находился в каталоге /var/www/html/masscan
Проверим, действительно ли результаты в домашней директории::
ls -l ~/scan*
-rw-r--r-- 1 root root 111771 фев 18 06:13 /home/mial/scan-01.xml
Копируем результаты:
sudo cp ~/scan-01.xml .
Импортируем:
sudo php import.php scan-01.xml
Запускаем сервер:
sudo service apache2 start
Переходим по адресу http://localhost/masscan
Теперь нам доступен веб-интерфейс с удобным просмотром и возможностью поиска.
Вот мои результаты:

Поиск прекрасно работает:


Я нашёл сеть из любопытных устройств Spectrum Analyzer:


How to scan the entire Internet
While useful for smaller, internal networks, the program is really designed
with the entire Internet in mind. It might look something like this:
Scanning the entire Internet is bad. For one thing, parts of the Internet react
badly to being scanned. For another thing, some sites track scans and add you
to a ban list, which will get you firewalled from useful parts of the Internet.
Therefore, you want to exclude a lot of ranges. To blacklist or exclude ranges,
you want to use the following syntax:
This just prints the results to the command-line. You probably want them
saved to a file instead. Therefore, you want something like:
This saves the results in an XML file, allowing you to easily dump the
results in a database or something.
But, this only goes at the default rate of 100 packets/second, which will
take forever to scan the Internet. You need to speed it up as so:
This increases the rate to 100,000 packets/second, which will scan the
entire Internet (minus excludes) in about 10 hours per port (or 655,360 hours
if scanning all ports).
The thing to notice about this command-line is that these are all
compatible options. In addition, «invisible» options compatible with
are also set for you: . Likewise,
the format of the XML file is inspired by . There are, of course, a
lot of differences, because the asynchronous nature of the program
leads to a fundamentally different approach to the problem.
The above command-line is a bit cumbersome. Instead of putting everything
on the command-line, it can be stored in a file instead. The above settings
would look like this:
To use this configuration file, use the :
This also makes things easier when you repeat a scan.
By default, masscan first loads the configuration file
. Any later configuration parameters override what’s
in this default configuration file. That’s where I put my «excludefile»
parameter, so that I don’t ever forget it. It just works automatically.
Getting output
The are five primary formats for output.
-
xml: The default option also prodces fairly large files, but is easy
to import into anything. Just use the parameter .
Or, use the parameters and . -
binary: This is the masscan builtin format. This produces much smaller files, so that
when I scan the Internet my disk doesn’t fill up. They need to be parsed,
though. The command line option will read binary scan files.
Using with the option will produce a XML version of the
results file. -
grepable: This is an implementation of the Nmap -oG
output and can be easily parsed by command-line tools. Just use the
parameter . Or, use the parameters and
. -
json: This saves the results in a json format. Just use the
parameter . Or, use the parameters and
. -
list: This is a simple list with one host and port pair
per line. Just use the parameter . Or, use the parameters
and . The format is:
Randomization
A key difference between Masscan and other scanners is the way it randomizes
targets.
The fundamental principle is to have a single index variable that starts at
zero and is incremented by one for every probe. In C code, this is expressed
as:
We have to translate the index into an IP address. Let’s say that you want to
scan all «private» IP addresses. That would be the table of ranges like:
In this example, the first 64k indexes are appended to 192.168.x.x to form
the target address. Then, the next 16-million are appended to 10.x.x.x.
The remaining indexes in the range are applied to 172.16.x.x.
In this example, we only have three ranges. When scanning the entire Internet,
we have in practice more than 100 ranges. That’s because you have to blacklist
or exclude a lot of sub-ranges. This chops up the desired range into hundreds
of smaller ranges.
This leads to one of the slowest parts of the code. We transmit 10 million
packets per second, and have to convert an index variable to an IP address
for each and every probe. We solve this by doing a «binary search» in a small
amount of memory. At this packet rate, cache efficiencies start to dominate
over algorithm efficiencies. There are a lot of more efficient techniques in
theory, but they all require so much memory as to be slower in practice.
We call the function that translates from an index into an IP address
the function. In use, it looks like:
Masscan supports not only IP address ranges, but also port ranges. This means
we need to pick from the index variable both an IP address and a port. This
is fairly straightforward:
This leads to another expensive part of the code. The division/modulus
instructions are around 90 clock cycles, or 30 nanoseconds, on x86 CPUs. When
transmitting at a rate of 10 million packets/second, we have only
100 nanoseconds per packet. I see no way to optimize this any better. Luckily,
though, two such operations can be executed simultaneously, so doing two
of these as shown above is no more expensive than doing one.
There are actually some easy optimizations for the above performance problems,
but they all rely upon , the fact that the index variable increases one
by one through the scan. Actually, we need to randomize this variable. We
need to randomize the order of IP addresses that we scan or we’ll blast the
heck out of target networks that aren’t built for this level of speed. We
need to spread our traffic evenly over the target.
The way we randomize is simply by encrypting the index variable. By definition,
encryption is random, and creates a 1-to-1 mapping between the original index
variable and the output. This means that while we linearly go through the
range, the output IP addresses are completely random. In code, this looks like:
This also has a major cost. Since the range is an unpredictable size instead
of a nice even power of 2, we can’t use cheap binary techniques like
AND (&) and XOR (^). Instead, we have to use expensive operations like
MODULUS (%). In my current benchmarks, it’s taking 40 nanoseconds to
encrypt the variable.
This architecture allows for lots of cool features. For example, it supports
«shards». You can setup 5 machines each doing a fifth of the scan, or
. Shards can be multiple machines, or simply multiple
network adapters on the same machine, or even (if you want) multiple IP
source addresses on the same network adapter.
Or, you can use a ‘seed’ or ‘key’ to the encryption function, so that you get
a different order each time you scan, like .
We can also pause the scan by exiting out of the program, and simply
remembering the current value of , and restart it later. I do that a lot
during development. I see something going wrong with my Internet scan, so
I hit to stop the scan, then restart it after I’ve fixed the bug.
Another feature is retransmits/retries. Packets sometimes get dropped on the
Internet, so you can send two packets back-to-back. However, something that
drops one packet may drop the immediately following packet. Therefore, you
want to send the copy about 1 second apart. This is simple. We already have
a ‘rate’ variable, which is the number of packets-per-second rate we are
transmitting at, so the retransmit function is simply to use
as the index. One of these days I’m going to do a study of the Internet,
and differentiate «back-to-back», «1 second», «10 second», and «1 minute»
retransmits this way in order to see if there is any difference in what
gets dropped.
C10 Scalability
The asynchronous technique is known as a solution to the «c10k problem».
Masscan is designed for the next level of scalability, the «C10M problem».
The C10M solution is to bypass the kernel. There are three primary kernel
bypasses in Masscan:
- custom network driver
- user-mode TCP stack
- user-mode synchronization
Masscan can use the PF_RING DNA driver. This driver DMAs packets directly
from user-mode memory to the network driver with zero kernel involvement.
That allows software, even with a slow CPU, to transmit packets at the maximum
rate the hardware allows. If you put 8 10-gbps network cards in a computer,
this means it could transmit at 100-million packets/second.
Masscan has its own built-in TCP stack for grabbing banners from TCP
connections. This means it can easily support 10 million concurrent TCP
connections, assuming of course that the computer has enough memory.
Masscan has no «mutex». Modern mutexes (aka. futexes) are mostly user-mode,
but they have two problems. The first problem is that they cause cache-lines
to bounce quickly back-and-forth between CPUs. The second is that when there
is contention, they’ll do a system call into the kernel, which kills
performance. Mutexes on the fast path of a program severely limits scalability.
Instead, Masscan uses «rings» to synchronize things, such as when the
user-mode TCP stack in the receive thread needs to transmit a packet without
interfering with the transmit thread.
How to scan the entire Internet
While useful for smaller, internal networks, the program is really designed
with the entire Internet in mind. It might look something like this:
Scanning the entire Internet is bad. For one thing, parts of the Internet react
badly to being scanned. For another thing, some sites track scans and add you
to a ban list, which will get you firewalled from useful parts of the Internet.
Therefore, you want to exclude a lot of ranges. To blacklist or exclude ranges,
you want to use the following syntax:
This just prints the results to the command-line. You probably want them
saved to a file instead. Therefore, you want something like:
This saves the results in an XML file, allowing you to easily dump the
results in a database or something.
But, this only goes at the default rate of 100 packets/second, which will
take forever to scan the Internet. You need to speed it up as so:
This increases the rate to 100,000 packets/second, which will scan the
entire Internet (minus excludes) in about 10 hours per port (or 655,360 hours
if scanning all ports).
The thing to notice about this command-line is that these are all
compatible options. In addition, «invisible» options compatible with
are also set for you: . Likewise,
the format of the XML file is inspired by . There are, of course, a
lot of differences, because the asynchronous nature of the program
leads to a fundamentally different approach to the problem.
The above command-line is a bit cumbersome. Instead of putting everything
on the command-line, it can be stored in a file instead. The above settings
would look like this:
To use this configuration file, use the :
This also makes things easier when you repeat a scan.
By default, masscan first loads the configuration file
. Any later configuration parameters override what’s
in this default configuration file. That’s where I put my «excludefile»
parameter, so that I don’t ever forget it. It just works automatically.
Randomization
A key difference between Masscan and other scanners is the way it randomizes
targets.
The fundamental principle is to have a single index variable that starts at
zero and is incremented by one for every probe. In C code, this is expressed
as:
We have to translate the index into an IP address. Let’s say that you want to
scan all «private» IP addresses. That would be the table of ranges like:
In this example, the first 64k indexes are appended to 192.168.x.x to form
the target address. Then, the next 16-million are appended to 10.x.x.x.
The remaining indexes in the range are applied to 172.16.x.x.
In this example, we only have three ranges. When scanning the entire Internet,
we have in practice more than 100 ranges. That’s because you have to blacklist
or exclude a lot of sub-ranges. This chops up the desired range into hundreds
of smaller ranges.
This leads to one of the slowest parts of the code. We transmit 10 million
packets per second, and have to convert an index variable to an IP address
for each and every probe. We solve this by doing a «binary search» in a small
amount of memory. At this packet rate, cache efficiencies start to dominate
over algorithm efficiencies. There are a lot of more efficient techniques in
theory, but they all require so much memory as to be slower in practice.
We call the function that translates from an index into an IP address
the function. In use, it looks like:
Masscan supports not only IP address ranges, but also port ranges. This means
we need to pick from the index variable both an IP address and a port. This
is fairly straightforward:
This leads to another expensive part of the code. The division/modulus
instructions are around 90 clock cycles, or 30 nanoseconds, on x86 CPUs. When
transmitting at a rate of 10 million packets/second, we have only
100 nanoseconds per packet. I see no way to optimize this any better. Luckily,
though, two such operations can be executed simultaneously, so doing two
of these as shown above is no more expensive than doing one.
There are actually some easy optimizations for the above performance problems,
but they all rely upon , the fact that the index variable increases one
by one through the scan. Actually, we need to randomize this variable. We
need to randomize the order of IP addresses that we scan or we’ll blast the
heck out of target networks that aren’t built for this level of speed. We
need to spread our traffic evenly over the target.
The way we randomize is simply by encrypting the index variable. By definition,
encryption is random, and creates a 1-to-1 mapping between the original index
variable and the output. This means that while we linearly go through the
range, the output IP addresses are completely random. In code, this looks like:
This also has a major cost. Since the range is an unpredictable size instead
of a nice even power of 2, we can’t use cheap binary techniques like
AND (&) and XOR (^). Instead, we have to use expensive operations like
MODULUS (%). In my current benchmarks, it’s taking 40 nanoseconds to
encrypt the variable.
This architecture allows for lots of cool features. For example, it supports
«shards». You can setup 5 machines each doing a fifth of the scan, or
. Shards can be multiple machines, or simply multiple
network adapters on the same machine, or even (if you want) multiple IP
source addresses on the same network adapter.
Or, you can use a ‘seed’ or ‘key’ to the encryption function, so that you get
a different order each time you scan, like .
We can also pause the scan by exiting out of the program, and simply
remembering the current value of , and restart it later. I do that a lot
during development. I see something going wrong with my Internet scan, so
I hit to stop the scan, then restart it after I’ve fixed the bug.
Another feature is retransmits/retries. Packets sometimes get dropped on the
Internet, so you can send two packets back-to-back. However, something that
drops one packet may drop the immediately following packet. Therefore, you
want to send the copy about 1 second apart. This is simple. We already have
a ‘rate’ variable, which is the number of packets-per-second rate we are
transmitting at, so the retransmit function is simply to use
as the index. One of these days I’m going to do a study of the Internet,
and differentiate «back-to-back», «1 second», «10 second», and «1 minute»
retransmits this way in order to see if there is any difference in what
gets dropped.
C10 Scalability
The asynchronous technique is known as a solution to the «c10k problem».
Masscan is designed for the next level of scalability, the «C10M problem».
The C10M solution is to bypass the kernel. There are three primary kernel
bypasses in Masscan:
- custom network driver
- user-mode TCP stack
- user-mode synchronization
Masscan can use the PF_RING DNA driver. This driver DMAs packets directly
from user-mode memory to the network driver with zero kernel involvement.
That allows software, even with a slow CPU, to transmit packets at the maximum
rate the hardware allows. If you put 8 10-gbps network cards in a computer,
this means it could transmit at 100-million packets/second.
Masscan has its own built-in TCP stack for grabbing banners from TCP
connections. This means it can easily support 10 million concurrent TCP
connections, assuming of course that the computer has enough memory.
Masscan has no «mutex». Modern mutexes (aka. futexes) are mostly user-mode,
but they have two problems. The first problem is that they cause cache-lines
to bounce quickly back-and-forth between CPUs. The second is that when there
is contention, they’ll do a system call into the kernel, which kills
performance. Mutexes on the fast path of a program severely limits scalability.
Instead, Masscan uses «rings» to synchronize things, such as when the
user-mode TCP stack in the receive thread needs to transmit a packet without
interfering with the transmit thread.
How to scan the entire Internet
While useful for smaller, internal networks, the program is designed really
with the entire Internet in mind. It might look something like this:
Scanning the entire Internet is bad. For one thing, parts of the Internet react
badly to being scanned. For another thing, some sites track scans and add you
to a ban list, which will get you firewalled from useful parts of the Internet.
Therefore, you want to exclude a lot of ranges. To blacklist or exclude ranges,
you want to use the following syntax:
This just prints the results to the command-line. You probably want them
saved to a file instead. Therefore, you want something like:
This saves the results in an XML file, allowing you to easily dump the
results in a database or something.
But, this only goes at the default rate of 100 packets/second, which will
take forever to scan the Internet. You need to speed it up as so:
This increases the rate to 100,000 packets/second, which will scan the
entire Internet (minus excludes) in about 10 hours per port (or 655,360 hours
if scanning all ports).
The thing to notice about this command-line is that these are all
compatible options. In addition, «invisible» options compatible with
are also set for you: . Likewise,
the format of the XML file is inspired by . There are, of course, a
lot of differences, because the asynchronous nature of the program
leads to a fundamentally different approach to the problem.
The above command-line is a bit cumbersome. Instead of putting everything
on the command-line, it can be stored in a file instead. The above settings
would look like this:
To use this configuration file, use the :
This also makes things easier when you repeat a scan.
By default, masscan first loads the configuration file
. Any later configuration parameters override what’s
in this default configuration file. That’s where I put my «excludefile»
parameter, so that I don’t ever forget it. It just works automatically.
Comparison with Nmap
Where reasonable, every effort has been taken to make the program familiar
to users, even though it’s fundamentally different. Two important
differences are:
- no default ports to scan, you must specify
- target hosts are IP addresses or simple ranges, not DNS names, nor
the funky subnet ranges can use (like ).
You can think of as having the following settings permanently
enabled:
- : this does SYN scan only (currently, will change in the future)
- : doesn’t ping hosts first, which is fundamental to the async operation
- : no DNS resolution happens
- : scan completely randomized
- : sends using raw
If you want a list of additional compatible settings, use the following
command:
Randomization
A key difference between Masscan and other scanners is the way it randomizes
targets.
The fundamental principle is to have a single index variable that starts at
zero and is incremented by one for every probe. In C code, this is expressed
as:
We have to translate the index into an IP address. Let’s say that you want to
scan all «private» IP addresses. That would be the table of ranges like:
In this example, the first 64k indexes are appended to 192.168.x.x to form
the target address. Then, the next 16-million are appended to 10.x.x.x.
The remaining indexes in the range are applied to 172.16.x.x.
In this example, we only have three ranges. When scanning the entire Internet,
we have in practice more than 100 ranges. That’s because you have to blacklist
or exclude a lot of sub-ranges. This chops up the desired range into hundreds
of smaller ranges.
This leads to one of the slowest parts of the code. We transmit 10 million
packets per second, and have to convert an index variable to an IP address
for each and every probe. We solve this by doing a «binary search» in a small
amount of memory. At this packet rate, cache efficiencies start to dominate
over algorithm efficiencies. There are a lot of more efficient techniques in
theory, but they all require so much memory as to be slower in practice.
We call the function that translates from an index into an IP address
the function. In use, it looks like:
Masscan supports not only IP address ranges, but also port ranges. This means
we need to pick from the index variable both an IP address and a port. This
is fairly straightforward:
This leads to another expensive part of the code. The division/modulus
instructions are around 90 clock cycles, or 30 nanoseconds, on x86 CPUs. When
transmitting at a rate of 10 million packets/second, we have only
100 nanoseconds per packet. I see no way to optimize this any better. Luckily,
though, two such operations can be executed simultaneously, so doing two
of these as shown above is no more expensive than doing one.
There are actually some easy optimizations for the above performance problems,
but they all rely upon , the fact that the index variable increases one
by one through the scan. Actually, we need to randomize this variable. We
need to randomize the order of IP addresses that we scan or we’ll blast the
heck out of target networks that aren’t built for this level of speed. We
need to spread our traffic evenly over the target.
The way we randomize is simply by encrypting the index variable. By definition,
encryption is random, and creates a 1-to-1 mapping between the original index
variable and the output. This means that while we linearly go through the
range, the output IP addresses are completely random. In code, this looks like:
This also has a major cost. Since the range is an unpredictable size instead
of a nice even power of 2, we can’t use cheap binary techniques like
AND (&) and XOR (^). Instead, we have to use expensive operations like
MODULUS (%). In my current benchmarks, it’s taking 40 nanoseconds to
encrypt the variable.
This architecture allows for lots of cool features. For example, it supports
«shards». You can setup 5 machines each doing a fifth of the scan, or
. Shards can be multiple machines, or simply multiple
network adapters on the same machine, or even (if you want) multiple IP
source addresses on the same network adapter.
Or, you can use a ‘seed’ or ‘key’ to the encryption function, so that you get
a different order each time you scan, like .
We can also pause the scan by exiting out of the program, and simply
remembering the current value of , and restart it later. I do that a lot
during development. I see something going wrong with my Internet scan, so
I hit to stop the scan, then restart it after I’ve fixed the bug.
Another feature is retransmits/retries. Packets sometimes get dropped on the
Internet, so you can send two packets back-to-back. However, something that
drops one packet may drop the immediately following packet. Therefore, you
want to send the copy about 1 second apart. This is simple. We already have
a ‘rate’ variable, which is the number of packets-per-second rate we are
transmitting at, so the retransmit function is simply to use
as the index. One of these days I’m going to do a study of the Internet,
and differentiate «back-to-back», «1 second», «10 second», and «1 minute»
retransmits this way in order to see if there is any difference in what
gets dropped.
Banner checking
Masscan can do more than just detect whether ports are open. It can also
complete the TCP connection and interaction with the application at that
port in order to grab simple «banner» information.
The problem with this is that masscan contains its own TCP/IP stack
separate from the system you run it on. When the local system receives
a SYN-ACK from the probed target, it responds with a RST packet that kills
the connection before masscan can grab the banner.
The easiest way to prevent this is to assign masscan a separate IP
address. This would look like the following:
The address you choose has to be on the local subnet and not otherwise
be used by another system.
In some cases, such as WiFi, this isn’t possible. In those cases, you can
firewall the port that masscan uses. This prevents the local TCP/IP stack
from seeing the packet, but masscan still sees it since it bypasses the
local stack. For Linux, this would look like:
On Mac OS X and BSD, it might look like this:
Windows doesn’t respond with RST packets, so neither of these techniques
are necessary. However, masscan is still designed to work best using its
own IP address, so you should run that way when possible, even when its
not strictly necessary.
The same thing is needed for other checks, such as the check,
which is just a form of banner checking.
Comparison with Nmap
Where reasonable, every effort has been taken to make the program familiar
to users, even though it’s fundamentally different. Two important
differences are:
- no default ports to scan, you must specify
- target hosts are IP addresses or simple ranges, not DNS names, nor
the funky subnet ranges can use (like ).
You can think of as having the following settings permanently
enabled:
- : this does SYN scan only (currently, will change in the future)
- : doesn’t ping hosts first, which is fundamental to the async operation
- : no DNS resolution happens
- : scan completely randomized
- : sends using raw
If you want a list of additional compatible settings, use the following
command:
Status
This is only a few days old and experimental. However, I am testing it by scanning
the entire Internet (with the help of , so I’m working through a lot of problems
pretty quickly. You can try contacting me on twttier(@erratarob) for help/comments.
- 2019-05-38 — Better output result descriptions, as well as documentation what they mean (see below).
- 2019-05-27 — Windows and macOS binaries released (click on badges above).
- 2019-05-26 — fixing the Windows networking issues
- 2019-05-25 — Linux and macOS working well, Windows has a few network errors
- 2019-05-24 — works on Linux and macOS, Windows has a few compilation bugs
- 2019-05-23 — currently working on macOS within XCode