How to use django filter
Содержание:
- DjangoFilterBackend
- Raising a 404 error
- Наследование шаблонов
- Complex Operations
- Вызов методов
- Development
- Loading templates
- Usage Example
- Structure
- Accessing method calls
- Дать django возможность работать с уже существующей БД
- Шаблоны
- Write views that actually do something
- A dynamic admin interface: it’s not just scaffolding – it’s the whole house
- Теги
- Так что в итоге?
DjangoFilterBackend
The library includes a class which
supports highly customizable field filtering for REST framework.
To use , first install . Then add to Django’s
You should now either add the filter backend to your settings:
Or add the filter backend to an individual View or ViewSet.
If all you need is simple equality-based filtering, you can set a attribute on the view, or viewset, listing the set of fields you wish to filter against.
This will automatically create a class for the given fields, and will allow you to make requests such as:
For more advanced filtering requirements you can specify a class that should be used by the view.
You can read more about s in the django-filter documentation.
It’s also recommended that you read the section on DRF integration.
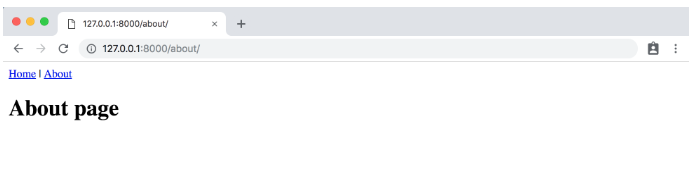
Raising a 404 error
Now, let’s tackle the question detail view – the page that displays the question text
for a given poll. Here’s the view:
polls/views.py
from django.http import Http404
from django.shortcuts import render

from .models import Question
# ...
def detail(request, question_id):
    try
        question = Question.objects.get(pk=question_id)
    except Question.DoesNotExist
        raise Http404("Question does not exist")
    return render(request, 'polls/detail.html', {'question' question})
The new concept here: The view raises the exception
if a question with the requested ID doesn’t exist.
We’ll discuss what you could put in that template a bit
later, but if you’d like to quickly get the above example working, a file
containing just:
polls/templates/polls/detail.html
{{ question }}
will get you started for now.
Наследование шаблонов
Самая могущественная – и, следовательно, самая сложная – часть механизма шаблонов Django – это наследование шаблонов. Наследование шаблонов позволяет создать вам шаблон-«скелет», который содержит базовые элементы вашего сайта и определяет блоки, которые могут быть переопределены дочерними шаблонами.
Let’s look at template inheritance by starting with an example:
<!DOCTYPE html>
<html lang="en">
<head>
    <link rel="stylesheet" href="style.css">
    <title>{% block title %}My amazing site{% endblock %}</title>
</head>

<body>
    <div id="sidebar">
        {% block sidebar %}
        <ul>
            <li><a href="/">Home</a></li>
            <li><a href="/blog/">Blog</a></li>
        </ul>
        {% endblock %}
    </div>

    <div id="content">
        {% block content %}{% endblock %}
    </div>
</body>
</html>
This template, which we’ll call , defines an HTML skeleton
document that you might use for a two-column page. It’s the job of «child»
templates to fill the empty blocks with content.
В этом примере, тег определяет три блока, которые может переопределить дочерний шаблон. Все что делает тег – указывает механизму шаблонов, какая часть шаблона может быть переопределена в дочернем шаблоне.
Дочерний шаблон может выглядеть таким образом:
{% extends "base.html" %}

{% block title %}My amazing blog{% endblock %}

{% block content %}
{% for entry in blog_entries %}
    <h2>{{ entry.title }}</h2>
    <p>{{ entry.body }}</p>
{% endfor %}
{% endblock %}
Ключевым здесь есть тег . Он говорит механизму шаблонов, что этот шаблон «наследует» другой шаблон. Когда механизм шаблонов выполняет этот шаблон, первым делом находится родительский шаблон – в этом примере «base.html».
Далее механизм шаблонов находит три тега в и заменяет их содержимым дочернего шаблона. В зависимости от значения , результат может выглядеть таким образом:
<!DOCTYPE html>
<html lang="en">
<head>
    <link rel="stylesheet" href="style.css">
    <title>My amazing blog</title>
</head>

<body>
    <div id="sidebar">
        <ul>
            <li><a href="/">Home</a></li>
            <li><a href="/blog/">Blog</a></li>
        </ul>
    </div>

    <div id="content">
        <h2>Entry one</h2>
        <p>This is my first entry.</p>

        <h2>Entry two</h2>
        <p>This is my second entry.</p>
    </div>
</body>
</html>
Так как дочерний шаблон не определяет блок , будет использовано значение из родительского шаблона. Содержимое тега родительского шаблона всегда используется как значение по умолчанию.
Вы можете использовать столько уровней наследование, сколько вам нужно. Один из распространенных способов использовать наследование – это трехуровневый подход:
- Создать шаблон , который отображает основной вид вашего сайта.
- Создать шаблон для каждого «раздела» вашего сайта. Например, , . Все эти шаблоны наследуют и включают стили и дизайн специфические для конкретного раздела.
- Создание шаблона для каждого типа страницы, такие как новость или запись в блоге. Эти шаблоны наследуют соответствующий шаблон раздела.
This approach maximizes code reuse and helps to add items to shared content
areas, such as section-wide navigation.
Вот несколько советов по работе с наследованием:
-
Если вы используете , он должен быть первым тегом в шаблоне. Иначе наследование не будет работать.
-
Чем больше тегов в вашем шаблоне, тем лучше. Помните, дочерний шаблон не обязан определять все блоки родительского, вы можете указать значение по умолчанию для всех блоков, а затем определить в дочернем шаблоне только те, которые необходимы. Лучше иметь больше «hooks», чем меньше «hooks».
-
Если вы дублируете содержимое в нескольких шаблонах, возможно вы должны перенести его в тег родительского шаблона.
-
Если вам необходимо содержимое блока родительского шаблона, используйте переменную . Эта полезно, если вам необходимо дополнить содержимое родительского блока, а не полностью переопределить его. Содержимое не будет автоматически экранировано (смотрите ), так как оно уже было экранировано, при необходимости, в родительском шаблоне.
-
Переменные, созданные вне блока , с использованием , не могут использоваться внутри блока. Например, этот шаблон ничего не выведет:
{% trans "Title" as title %} {% block content %}{{ title }}{% endblock %} -
Для ясности, вы можете добавить название вашему тегу . Например:
{% block content %}
...
{% endblock content %}
В больших шаблонах такой подход поможет вам увидеть какой тег был закрыт.
Complex Operations
! Note that this feature is experimental. Bugs may be encountered, and the backend is subject to change.
To understand the backend more fully, consider a query to find all articles that contain titles starting with either
«Who» or «What». The underlying query could be represented with the following:
q1 = Article.objects.filter(title__startswith='Who')
q2 = Article.objects.filter(title__startswith='What')
return q1 | q2
Now consider the query, but modified with upper and lower date bounds:
q1 = Article.objects.filter(title__startswith='Who').filter(publish_date__lte='2005-01-01')
q2 = Article.objects.filter(title__startswith='What').filter(publish_date__gte='2010-01-01')
return q1 | q2
Using just a , it is certainly feasible to represent the former query by writing a custom filter class.
However, it is less feasible with the latter query, where multiple sets of varying data types and lookups need to be
validated. In contrast, the can create this complex query through the arbitrary combination
of a simple filter. To support the above, the querystring needs to be created with minimal changes. Unencoded example:
(title__startswith=Who&publish_date__lte=2005-01-01) | (title__startswith=What&publish_date__gte=2010-01-01)
By default, the backend combines queries with both (AND) and (OR), and supports unary negation . E.g.,
(param1=value1) & (param2=value2) | ~(param3=value3)
The backend supports both standard and complex queries. To perform complex queries, the query must be encoded and set
as the value of the (defaults to ). To perform standard queries, use the backend
in the same manner as the .
Configuring
Similar to other backends, must be added to a view’s atribute. Either add
it to the setting, or set it as a backend on the view class.
REST_FRAMEWORK = {
    'DEFAULT_FILTER_BACKENDS': (
        'rest_framework_filters.backends.ComplexFilterBackend',
    ),
}

# or

class MyViewSet(generics.ListAPIView):
    filter_backends = (rest_framework_filters.backends.ComplexFilterBackend, )
    ...
You may customize how queries are combined by subclassing and overriding the
attribute. is a map of operator symbols to functions that combine two querysets. For example, the map
can be overridden to use the and instead of and .
class CustomizedBackend(ComplexFilterBackend):
    operators = {
        '&': QuerySet.intersection,
        '|': QuerySet.union,
        '-': QuerySet.difference,
    }
Unary relies on ORM internals and may be buggy in certain circumstances. If there are issues with this
feature, it can be disabled by setting the attribute to on the backend class. If you do
experience bugs, please open an issue on the bug tracker.
Complex querystring encoding
Below is the procedure for encoding a complex query:
- Convert the query paramaters into individual querystrings.
- URL-encode the individual querystrings.
- Wrap the encoded strings in parentheses, and join with operators.
- URL-encode the entire querystring.
- Set as the value to the complex filter param (e.g., ).
Note that is the default parameter name and can be overridden in the backend class.
Using the first example, these steps can be visualized as so:
- ,
- ,
Error handling
will raise any decoding errors under the complex filtering parameter name. For example,
{
    "filters":
}
When filtering the querysets, filterset validation errors will be collected and raised under the complex filtering
parameter name, then under the filterset’s decoded querystring. For a complex query like ,
errors would be raised like so:
{
    "filters": {
        "a=1&b=2": {
            "a":
        },
        "c=3&d=4": {
            "c":
        }
    }
{
Вызов методов
Вызов большинства методов объектов также доступен в шаблоне. Это означает, что шаблон имеет доступ не только к атрибутам классов (например, название поля) и переменных переданных из представлениях. Например, Django ORM предоставляет атрибут для получения связанных через внешний ключ объектов. Следовательно, для модели комментариев(«comment») с внешним ключом на модель задач(«task») вы можете обратиться в цикле ко всем связанным комментариям переданного объекта задачи:
{% for comment in task.comment_set.all %}
    {{ comment }}
{% endfor %}
Также, QuerySets предоставляет метод для получения количества объектов. Следовательно, вы можете получить количество комментариев связанных с конкретной задачей:
{{ task.comment_set.all.count }}
И конечно вы можете использовать методы вашей модели:
models.py
class Task(models.Model):
    def foo(self):
        return "bar"
template.html
{{ task.foo }}
Development
Getting started (with virtualenvwrapper):
# get a copy of the code
git clone git@github.com:crccheck/django-object-actions.git
cd django-object-actions
# set up your virtualenv (with virtualenvwrapper)
mkvirtualenv django-object-actions
# Install requirements
make install
# Hack your path so that we can reference packages starting from the root
add2virtualenv .
make test  # run test suite
make quickstart  # runs 'make resetdb' and some extra steps
This will install whatever the latest stable version of Django is. You
can also install a specific version of Django and
.
Various helpers are available as make commands. Type and
view the to see what other things you can do.
Loading templates
Generally, you’ll store templates in files on your filesystem rather than
using the low-level API yourself. Save
templates in a directory specified as a template directory.
Django searches for template directories in a number of places, depending on
your template loading settings (see “Loader types” below), but the most basic
way of specifying template directories is by using the option.
The option
Tell Django what your template directories are by using the option in the setting in your settings
file — or the argument of . This
should be set to a list of strings that contain full paths to your template
directories:
TEMPLATES =
    {
        'BACKEND' 'django.template.backends.django.DjangoTemplates',
        'DIRS'
            '/home/html/templates/lawrence.com',
            '/home/html/templates/default',
        ],
    },
Your templates can go anywhere you want, as long as the directories and
templates are readable by the Web server. They can have any extension you want,
such as or , or they can have no extension at all.
Note that these paths should use Unix-style forward slashes, even on Windows.
Usage Example
To make example short, it demonstrates Django URL Filter integration
with Django REST Framework but it can be used without DRF (see below).
from url_filter.integrations.drf import DjangoFilterBackend


class UserViewSet(ModelViewSet):
    queryset = User.objects.all()
    serializer_class = UserSerializer
    filter_backends =
    filter_fields =
Alternatively filterset can be manually created and used directly
to filter querysets:
from django.http import QueryDict
from url_filter.filtersets import ModelFilterSet


class UserFilterSet(ModelFilterSet):
    class Meta(object):
        model = User

query = QueryDict('email__contains=gmail&joined__gt=2015-01-01')
fs = UserFilterSet(data=query, queryset=User.objects.all())
filtered_users = fs.filter()
Above will automatically allow the use of all of the Django URL Filter features.
Some possibilities:
# get user with id 5
example.com/users/?id=5

# get user with id either 5, 10 or 15
example.com/users/?id__in=5,10,15

# get user with id between 5 and 10
example.com/users/?id__range=5,10

# get user with username "foo"
example.com/users/?username=foo

# get user with username containing case insensitive "foo"
example.com/users/?username__icontains=foo

# get user where username does NOT contain "foo"
example.com/users/?username__icontains!=foo

# get user who joined in 2015 as per user profile
example.com/users/?profile__joined__year=2015

# get user who joined in between 2010 and 2015 as per user profile
example.com/users/?profile__joined__range=2010-01-01,2015-12-31

# get user who joined in after 2010 as per user profile
example.com/users/?profile__joined__gt=2010-01-01
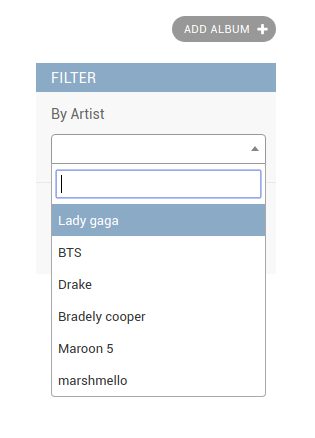
Structure
Each advanced filter has only a couple of required fields when
constructed with the form; namely the title and a formset (consisting of
a form for each sub-query or rule of the filter query).
Each form in the formset requires the following fields: ,
,
And allows the optional and fields.
Let us go over each of the fields in a rule fieldset.
Field
The list of all available fields for this specific instance of the
ModelAdmin as specific by the
property. <#integration-example>`__
The OR field
is an additional field that is added to every rule’s available
fields.
Operator
Query field suffixes which specify how the query will be
constructed.
The currently supported are as follows: , ,
, , , and
Value
The value which the specific sub-query will be looking for, i.e the
value of the field specified above, or in django query syntax:
Negate
A boolean (check-box) field to specify whether this rule is to be
negated, effectively making it a «exclude» sub-query.
Accessing method calls
Most method calls attached to objects are also available from within templates.
This means that templates have access to much more than just class attributes
(like field names) and variables passed in from views. For example, the Django
ORM provides the syntax for
finding a collection of objects related on a foreign key. Therefore, given
a model called “comment” with a foreign key relationship to a model called
“task” you can loop through all comments attached to a given task like this:
{% for comment in task.comment_set.all %}
    {{ comment }}
{% endfor %}
Similarly, QuerySets provide a method
to count the number of objects they contain. Therefore, you can obtain a count
of all comments related to the current task with:
{{ task.comment_set.all.count }}
You can also access methods you’ve explicitly defined on your own models:
models.py
class Task(models.Model):
    def foo(self):
        return "bar"
template.html
{{ task.foo }}
Дать django возможность работать с уже существующей БД
Вторая проблема — разрешить django только чтение данных из нашей демонстрационной БД. Покопавшись ещё в документации django я нашёл каким же образом, можно составить модельки по существующей БД, чтобы не перепечатывать ручками всё:
При этом, разумеется, сама БД должна быть обозначена в settings.py. Всего пару ошибочек мне пришлось поправить и всё заработало как следует. Сразу после этого я решил написать простенькую вьюшку, которая сможет нам эти данные вернуть. Браузер, разумеется очень напрягся (что и не мудрено), когда я пытался открыть адрес, по которому должно было вернуться 300к+ записей, поэтому я ограничил их число для 10, чтобы удостовериться, что они там хотя бы есть. А вообще, совершенно точно понятно, что запрос лучше отправлять через curl. Это явно скушает в разы меньше оперативной памяти.
Шаблоны
Шаблон это просто текстовый файл. Он позволяет создать любой текстовый формат (HTML, XML, CSV, и др.).
Шаблон содержит переменные, которые будут заменены значениями при выполнении шаблона, и теги, которые управляют логикой шаблона.
Ниже приводится простой шаблон, который иллюстрирует некоторые основы. Каждый элемент будет объяснен далее в этом разделе.
{% extends "base_generic.html" %}

{% block title %}{{ section.title }}{% endblock %}

{% block content %}
<h1>{{ section.title }}</h1>

{% for story in story_list %}
<h2>
  <a href="{{ story.get_absolute_url }}">
    {{ story.headline|upper }}
  </a>
</h2>
<p>{{ story.tease|truncatewords:"100" }}</p>
{% endfor %}
{% endblock %}
Write views that actually do something
Each view is responsible for doing one of two things: returning an
object containing the content for the
requested page, or raising an exception such as . The
rest is up to you.
Your view can read records from a database, or not. It can use a template
system such as Django’s – or a third-party Python template system – or not.
It can generate a PDF file, output XML, create a ZIP file on the fly, anything
you want, using whatever Python libraries you want.
All Django wants is that . Or an exception.
Because it’s convenient, let’s use Django’s own database API, which we covered
in Tutorial 2. Here’s one stab at a new
view, which displays the latest 5 poll questions in the system, separated by
commas, according to publication date:
polls/views.py
from django.http import HttpResponse

from .models import Question


def index(request):
    latest_question_list = Question.objects.order_by('-pub_date'))
    return HttpResponse(output)

# Leave the rest of the views (detail, results, vote) unchanged
There’s a problem here, though: the page’s design is hard-coded in the view. If
you want to change the way the page looks, you’ll have to edit this Python code.
So let’s use Django’s template system to separate the design from Python by
creating a template that the view can use.
First, create a directory called in your directory.
Django will look for templates in there.
Your project’s setting describes how Django will load and
render templates. The default settings file configures a
backend whose option is set to
. By convention looks for a “templates”
subdirectory in each of the .
Within the directory you have just created, create another
directory called , and within that create a file called
. In other words, your template should be at
. Because of how the
template loader works as described above, you can refer to this template within
Django as .
Template namespacing
Now we might be able to get away with putting our templates directly in
(rather than creating another subdirectory),
but it would actually be a bad idea. Django will choose the first template
it finds whose name matches, and if you had a template with the same name
in a different application, Django would be unable to distinguish between
them. We need to be able to point Django at the right one, and the best
way to ensure this is by namespacing them. That is, by putting those
templates inside another directory named for the application itself.
Put the following code in that template:
polls/templates/polls/index.html
{% if latest_question_list %}
    <ul>
    {% for question in latest_question_list %}
        <li><a href="/polls/{{ question.id }}/">{{ question.question_text }}</a></li>
    {% endfor %}
    </ul>
{% else %}
    <p>No polls are available.</p>
{% endif %}
Note
To make the tutorial shorter, all template examples use incomplete HTML. In
your own projects you should use .
Now let’s update our view in to use the template:
polls/views.py
from django.http import HttpResponse
from django.template import loader

from .models import Question


def index(request):
    latest_question_list = Question.objects.order_by('-pub_date')[:5
    template = loader.get_template('polls/index.html')
    context = {
        'latest_question_list' latest_question_list,
    }
    return HttpResponse(template.render(context, request))
That code loads the template called and passes it a
context. The context is a dictionary mapping template variable names to Python
objects.
Load the page by pointing your browser at “/polls/”, and you should see a
bulleted-list containing the “What’s up” question from Tutorial 2. The link points to the question’s detail page.
A dynamic admin interface: it’s not just scaffolding – it’s the whole house
Once your models are defined, Django can automatically create a professional,
production ready administrative interface –
a website that lets authenticated users add, change and delete objects. The
only step required is to register your model in the admin site:
mysite/news/models.py
from django.db import models

class Article(models.Model):
    pub_date = models.DateField()
    headline = models.CharField(max_length=200)
    content = models.TextField()
    reporter = models.ForeignKey(Reporter, on_delete=models.CASCADE)
mysite/news/admin.py
from django.contrib import admin

from . import models

admin.site.register(models.Article)
The philosophy here is that your site is edited by a staff, or a client, or
maybe just you – and you don’t want to have to deal with creating backend
interfaces only to manage content.
Теги
Теги выглядят таким образом: . Теги сложнее чем переменные: одни создают текст для вывода, влияют на выполнение используя условия и циклы, другие загружают дополнительную информацию в шаблоны, чтобы использовать ее далее через переменные.
Некоторые теги требуют открывающий и закрывающий теги (например, ).
Django содержит около двадцати встроенных тегов. Вы можете прочитать все о них в . Чтобы дать вам представление о возможностях, вот некоторые из наиболее часто используемых тегов:
-
Цикл по каждому элементу массива. Например, выведем список спортсменов из :
<ul> {% for athlete in athlete_list %} <li>{{ athlete.name }}</li> {% endfor %} </ul> - , , and
-
Вычисляет переменную и если она равна «true», выводит содержимое блока:
{% if athlete_list %}
    Number of athletes: {{ athlete_list|length }}
{% elif athlete_in_locker_room_list %}
    Athletes should be out of the locker room soon!
{% else %}
    No athletes.
{% endif %}
В примере выше, если не пустой, будет отображено количество спортсменов . Иначе, если не пустой, будет показано сообщение «Athletes should be out…». Если оба списка пустые, будет показано сообщение «No athletes.».
Вы можете использовать фильтры и операторы в теге tag:
{% if athlete_list|length > 1 %}
   Team: {% for athlete in athlete_list %} ... {% endfor %}
{% else %}
   Athlete: {{ athlete_list.0.name }}
{% endif %}
Несмотря на работоспособность вышеупомянутого примера, помните, что большинство шаблонных фильтров возвращает строки, таким образом, математическое сравнение результатов фильтров в общем случае будет работать не так, как вы можете ожидать. Хотя : tfilter:length является исключением.
- and
- Определяет (смотрите ниже), эффективный способ использовать шаблоны.
Опять же, это только несколько тегов; полный список смотрите в .
Вы можете создать собственный тег; смотрите Собственные шаблонные теги и фильтры.
Так что в итоге?
Если у вас есть большой объём данных — нужно прописывать нормальные индексы и использовать полнотекстовый поиск (разумеется, только в том случае, когда соответствует вашим целям) с радостью и счастьем, потому что он решает довольно широкий круг проблем. Но вот всегда ли в нём есть необходимость — уже решать вам. Я усвоил для себя, что в некоторых случаях (когда не стоит задачи именно полнотекстового поиска, а есть поиск по подстроке, который реализуется с помощью contains/icontains) лучше вовсе не использовать полнотекстовый поиск, потому что индексы в определённый момент начинают кушать всё больше и больше памяти вашего сервера, что, скорее всего, негативно скажется на работе вашего сервера.
В целом, моё понимание некоторых внутренних механизмов работы django благодаря этому исследованию устаканилось. И пришло, наконец, осознание разницы между поиском по подстроке и полнотекстовым поиском. Разнице в их реализации через Django ORM.