Как создать и настроить вторичную (slave) зону в bind сервере
Содержание:
FreeBSD Issues
By default FreeBSD installs Bind 9 as the default (or base) version but with the following wrinkles:
-
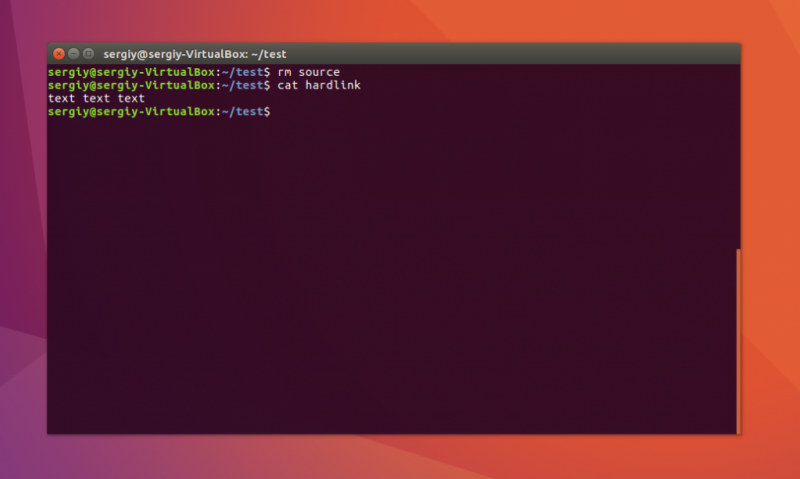
Bind9 defaults to run in a chroot jail or a sandbox (which nows seems the «in» term for a jail) in which all BIND9 files are maintained under /var/named — including named.conf, log files and pid files (hard links are provided so you can continue to find the files where you thought they would be). To disable the sandbox add to /etc/rc.conf the following line(s):
named_chrootdir=""	               # disables jail/sandbox
named_pidfile="/var/run/named/pid" # Must set this in named.conf as well
named_chroot_autoupdate="NO"       # Automatically install/update chrooted
                                   # components of named. See /etc/rc.d/named.
named_symlink_enable="NO"	         # Symlink the chrooted pid file
The default value of these parameters in /etc/defaults/rc.conf are:
named_enable="YES"                 # Run named, the DNS server (or NO).
named_program="/usr/sbin/named"	   # path to named, if you want a different one.
named_flags="-u bind"              # Flags for named
named_pidfile="/var/run/named/pid" # Must set this in named.conf as well
named_chrootdir="/var/named"       # Chroot directory (or "" not to auto-chroot it)
named_chroot_autoupdate="YES"      # Automatically install/update chrooted
                                   # components of named. See /etc/rc.d/named.
named_symlink_enable="YES"         # Symlink the chrooted pid file
As always you should not update the /etc/defaults/rc.conf file but rather edit /etc/rc.conf which will replace entries already defined in /etc/defaults/rc.conf.
- The system does not ship with localhost or localhost.ca (localhost.rev in our terminology) files instead there is a script /etc/namedb/named.sh which will help you define these files.
Ускоряем загрузку зон
Текстовый формат зон BIND стал фактическим стандартом, и его поддерживают многие другие реализации, прежде всего чтобы упростить перенос существующих зон. Некоторые регистраторы даже позволяют редактировать и вносить записи в этом формате через веб-интерфейс. Формат видели даже далекие от DNS люди.
INFO
Ключевое слово — это не предлог in, а сокращение от Internet. Протокол DNS и BIND появились до того, как исследовательские сети объединились в единый Интернет, поэтому в DNS до сих пор формально существуют IN (Internet) и CH (ChaosNet).
Однако этот формат не слишком прост для синтаксического разбора — и загрузка зон с большим числом записей может ощутимо замедлить запуск демона. Регистраторы доменов и хостеры нередко хранят записи в базе данных, что и быстрее, и проще в управлении из админки.
Но если проблема только в производительности, есть и более простой способ: использовать .
Конвертировать зону в двоичный формат можно командой . Формата два: map и raw. Формат map представляет собой простой дамп памяти. Он загружается быстрее всего, поскольку вообще не требует разбора, но не является переносимым — работает только в пределах одной архитектуры. Формат raw загружается чуть медленнее, но работает на любой машине.
Рассмотрим пример для формата map. Сначала нужно скомпилировать в него текстовый файл зоны.
Затем нужно соответствующим образом поправить описание зоны в . Формат файла с данными зоны не определяется автоматически, поэтому нам придется указать опцию .
Ощутимая разница заметна только на очень больших файлах. Но если ты окажешься в такой ситуации, теперь ты знаешь, как из нее выйти.
Продолжение доступно только участникам
Материалы из последних выпусков становятся доступны по отдельности только через два месяца после публикации. Чтобы продолжить чтение, необходимо стать участником сообщества «Xakep.ru».
Присоединяйся к сообществу «Xakep.ru»!
Членство в сообществе в течение указанного срока откроет тебе доступ ко ВСЕМ материалам «Хакера», увеличит личную накопительную скидку и позволит накапливать профессиональный рейтинг Xakep Score!
Подробнее
Я уже участник «Xakep.ru»
Configure Secondary DNS Server
In most environments, it is a good idea to set up a secondary DNS server that will respond to requests if the primary becomes unavailable. Luckily, the secondary DNS server is much easier to configure.
On ns2, edit the file:
At the top of the file, add the ACL with the private IP addresses of all of your trusted servers:
/etc/bind/named.conf.options — updated 1 of 2 (secondary)
Below the directive, add the following lines:
/etc/bind/named.conf.options — updated 2 of 2 (secondary)
Save and exit . This file should look exactly like ns1’s file except it should be configured to listen on ns2’s private IP address.
Now edit the file:
Define slave zones that correspond to the master zones on the primary DNS server. Note that the type is “slave”, the file does not contain a path, and there is a directive which should be set to the primary DNS server’s private IP. If you defined multiple reverse zones in the primary DNS server, make sure to add them all here:
/etc/bind/named.conf.local — updated (secondary)
Now save and exit .
Run the following command to check the validity of your configuration files:
Once that checks out, restart bind
Now you have primary and secondary DNS servers for private network name and IP address resolution. Now you must configure your servers to use your private DNS servers.
Options
-4
- Use IPv4 only even if the host machine is capable of IPv6. -4 and -6 are mutually exclusive.
- -6
- Use IPv6 only even if the host machine is capable of IPv4. -4 and -6 are mutually exclusive.
- -c config-file
- Use config-file as the configuration file instead of the default, /etc/named.conf. To ensure that reloading the configuration file continues
to work after the server has changed its working directory due to to a possible directory option in the configuration file, config-file should be
an absolute pathname. - -d debug-level
- Set the daemon’s debug level to debug-level. Debugging traces from named become more verbose as the debug level increases.
- -E engine-name
- Use a crypto hardware (OpenSSL engine) for the crypto operations it supports, for instance re-signing with private keys from a secure key store. When
compiled with PKCS#11 support engine-name defaults to pkcs11, the empty name resets it to no engine. - -f
- Run the server in the foreground (i.e. do not daemonize).
- -g
- Run the server in the foreground and force all logging to stderr.
- -m flag
- Turn on memory usage debugging flags. Possible flags are usage, trace, record, size, and mctx. These correspond to the
ISC_MEM_DEBUGXXXX flags described in <isc/mem.h>. - -n #cpus
- Create #cpus worker threads to take advantage of multiple CPUs. If not specified, named will try to determine the number of CPUs present and
create one thread per CPU. If it is unable to determine the number of CPUs, a single worker thread will be created. - -p port
- Listen for queries on port port. If not specified, the default is port 53.
- -s
- Write memory usage statistics to stdout on exit.
- Note: This option is mainly of interest to BIND 9 developers and may be removed or changed in a future release.
- -S #max-socks
- Allow named to use up to #max-socks sockets.
-
Warning: This option should be unnecessary for the vast majority of users. The use of this option could even be harmful because the specified value
may exceed the limitation of the underlying system API. It is therefore set only when the default configuration causes exhaustion of file descriptors and the
operational environment is known to support the specified number of sockets. Note also that the actual maximum number is normally a little fewer than the
specified value because named reserves some file descriptors for its internal use. - -t directory
- Chroot to directory after processing the command line arguments, but before reading the configuration file.
-
Warning: This option should be used in conjunction with the -u option, as chrooting a process running as root doesn’t enhance security on most
systems; the way chroot(2) is defined allows a process with root privileges to escape a chroot jail. - -u user
- Setuid to user after completing privileged operations, such as creating sockets that listen on privileged ports.
-
Note: On Linux, named uses the kernel’s capability mechanism to drop all root privileges except the ability to bind(2) to a privileged
port and set process resource limits. Unfortunately, this means that the -u option only works when named is run on kernel 2.2.18 or later, or
kernel 2.3.99-pre3 or later, since previous kernels did not allow privileges to be retained after setuid(2). - -v
- Report the version number and exit.
- -V
- Report the version number and build options, and exit.
- -x cache-file
- Load data from cache-file into the cache of the default view.
- Warning: This option must not be used. It is only of interest to BIND 9 developers and may be removed or changed in a future release.
Настройка дополнительного DNS-сервера
В большинстве сред правильным решением будет создание дополнительного DNS-сервера, который будет отвечать на запросы, если основной сервер окажется недоступным. К счастью, настройка дополнительного DNS-сервера выполняется намного проще.
На сервере ns2 отредактируйте файл :
В верхней части файла добавьте ACL с частными IP-адресами всех ваших доверенных серверов:
/etc/bind/named.conf.options — updated 1 of 2 (secondary)
Под директивой добавьте следующие строки:
/etc/bind/named.conf.options — updated 2 of 2 (secondary)
Сохраните и закройте файл . Этот файл должен выглядеть так же, как файл сервера ns1, за исключением того, что его необходимо настроить на прослушивание частного IP-адреса ns2.
Теперь необходимо отредактировать файл :
Определите slave-зоны, соответствующие master-зонам основного DNS-сервера
Обратите внимание, что в качестве типа используется slave, в файле отсутствует путь, и существует директива , которая должна быть настроена на частный IP-адрес основного DNS-сервера. Если вы определили несколько зон для обратного просмотра на основном DNS-сервере, обязательно проверьте, что все они были добавлены на этом этапе:
/etc/bind/named.conf.local — updated (secondary)
Сохраните и закройте файл .
Запустите следующую команду для проверки валидности ваших файлов конфигурации:
После выполнения проверки перезапустите BIND:
Разрешите подключение DNS к серверу, внеся изменения в правила брандмауэра UFW:
Теперь у вас есть основной и дополнительный DNS-серверы для имени частной сети и преобразования IP-адреса. Теперь вам нужно настроить ваши клиентские серверы, чтобы они могли использовать ваши частные DNS-серверы.
Install BIND on DNS Servers
Note: Text that is highlighted in red is important! It will often be used to denote something that needs to be replaced with your own settings or that it should be modified or added to a configuration file. For example, if you see something like host1.nyc3.example.com, replace it with the FQDN of your own server. Likewise, if you see host1_private_IP, replace it with the private IP address of your own server.
On both DNS servers, ns1 and ns2, update apt:
Now install BIND:
IPv4 Mode
Before continuing, let’s set BIND to IPv4 mode. On both servers, edit the service parameters file:
Add “-4” to the variable. It should look like the following:
/etc/default/bind9
Save and exit.
Now that BIND is installed, let’s configure the primary DNS server.
Service Control
This service is handled by init.d script /etc/init.d/named. Its usage is as follows:
# /sbin/service named
Usage: /etc/init.d/named {start|stop|status|restart|condrestart|reload|probe}
Start the service as follows:
# /sbin/service named start
Starting named:
Stop the service as follows:
# /sbin/service named stop
Stopping named:
Check if the serivce is started or stopped:
# /sbin/service named status
Restart the service like this:
# /sbin/service named restart
Stopping named:
Starting named:
If the service is started, then restart it; otherwise do nothing.
# /sbin/service named condrestart
Stopping named:
Starting named:
Reload the service:
# /sbin/service named reload
Reloading named:
Probe the service status using /usr/sbin/rndc command
# service named probe
start
Query runlevel information for the service:
# /sbin/chkconfig --list named
named           0:off   1:off   2:off   3:off   4:off   5:off   6:off
Автоматическое подписывание зоны
Каждый раз после редактирования зоны не очень удобно ее переподписывать командой dnssec-signzone.
Для автоматизации процесса в конфигурационном файле bind редактируем:
options {
…
key-directory «/var/named/keys»;
sig-validity-interval 20 10;
};
* где key-directory — каталог для хранения сгенерированных ключей, необходимо прописать тот, в котором мы формировали последние командой dnssec-keygen; sig-validity-interval — период действия ключей: дней / период обновления.
Для зоны редактируем:
zone «dmosk.ru» {
…
file «master/dmosk.ru»;
inline-signing yes;
auto-dnssec maintain;
};
* где inline-signing — включение или отключение прозрачного формирования подписей (без необходимости менять файл зоны); auto-dnssec — уровень автоматической настройки DNSSEC для зоны
Также обращаем внимание, что мы убрали в пути .signed
Проверяем, что у пользователя named/bind есть права на запись в каталог хранения зоны. При необходимости, меняем владельца, например:
chown -R named:named /var/named/master
Удаляем старый файл подписанной зоны:
rm -f /var/named/master/dmosk.ru.signed
Открываем на редактирование файл зоны и меняем серийный номер.
Перезапускаем bind.
На CentOS / Red Hat:
systemctl restart named
На Ubuntu / Debian:
systemctl restart bind
В каталоге зоны должны появиться дополнительные 3 файла: dmosk.ru.jbk, dmosk.ru.signed, dmosk.ru.signed.jnl
Готово. Проверяем настройку командой dig.