Установка ioncube loader
Содержание:
- Loader Installation
- Encoder Licensing
- Как установить ionCube loader
- Encoder License Recovery
- How to Install ionCube Loader in Debian and Ubuntu
- Choosing the right version
- Manual «ionCube» installation
- Shared Hosting Support
- ionCube Encoder CI Edition
- Как установить ioncube?
- Установка ioncube loaders ubuntu
- Установка ioncube loader
- Как установить ionCube и для чего нужен этот модуль
- Рекомендуемые действия по окончании установки
Loader Installation
ionCube Loader 10 works straight out of the box against Docker 1.12.6+ on Centos 7 within the image with no additional tuning or configuration to the Docker environment apart from our usual updating of the php.ini file that includes reference to the loader via the line.
Using A Container Based On Alpine?
While we have resolved all known issues with using the Loader within an Alpine Linux container (tested and confirmed working ionCube Loader 10.3.6 and Alpine 3.9), the Encoder is still experiencing issues due to Alpine not using glibc.
Due to Alpine’s regular update cycle, we continue to investigate any bug reports that suddenly surface; should you encounter a problem either report it to us or switch to a container based on glibc such as a Debian one.
Encoder Licensing
The most common issue for our Encoder within a Docker environment is the enforcement of our product licensing which by nature of Docker containers are generally volatile entities. Because of this our Encoder CI Edition provides a more forgiving licensing solution as opposed to the standard edition, and as such, the CI Edition we strongly encourage the use of for any container based scenarios.
Using A Dockerfile?
We DON’T advise the use of the Dockerfile instruction to activate the license at the building stage e.g.
Instead perform the licensing process via shell script with the instruction (or better still pass as the command line option when starting the container) making use of the advice below.
Getting: No license could be found corresponding to the revoke request
This error generally happens when the Encoder can’t find any license information for the installed Encoder. This may appear odd in that the Docker container does in fact initially contain these license files but for some reason they are not visible to the Encoder. All is not lost however if you make use of consistent container identification such as including both the host name () and MAC address () options for your container as simply acquiring a new license with the option will give the Encoder something to pass to the licensing system to confirm it is the same machine. The license will apply and encoding can resume. You can check for this situation in your encoding shell script if the Encoder exits with code 16. If it does run the Encoder with the option and then you can resubmit your original encoding process.
The source of the problem may or may not be related to this issue: https://stackoverflow.com/questions/41867734/docker-1-13-0-volume-mapping-file-corruption
Getting: An error occurred in communicating with the ionCube licensing server
This is known to happen with Ubuntu images (not Debian images) and appears to be related to the lack of a base networking package. To resolve this and to successfully license the Encoder use this command within the container (or update your Dockerfile as appropriate):
Here is a short video demonstrating the issue and above solution:
Normal Licensing Solution
To use our Encoder as it would function normally outside of a container, the Encoder can be mounted as part of a data container volume within your encoding container(s). This option is suitable for a single Docker host, but if you are using Docker Swarm or any other solutions where the container can run on any arbitrary host where there’s varying hardware type, use the ‘Aggressive’ solution below.
Here is a sample walk-through for setting this up:
- First create a data volume with:
- Then start up a new container so it can be configured:
- In another terminal session find out the name of the container and copy over the Encoder tarball:
- And for this sample walk-through our encoding script:
- And sample source for encoding:
- The result is that we now have the Encoder installed into a persistent volume which is mounted under the directory /encoder within the container.
- It is now safe to exit out of the container and all is setup ready for use.
- Each time the container is run (using item 2) with repeatable and consistent settings, running the script will start the encoding process
- Of course as this is an example, the files are basic and aimed at making it clear what is trying to be achieved. You will need to change the script and/or methods for your environment.
Sample files mentioned above:
hello.php
<?php echo "hello"; ?>
encode.sh
#!/bin/sh

echo "* Input dir..."
ls -la /encoder

echo "* Output dir..."
ls -la /tmp

echo "* Encode process"

cd /encoder/ioncube_encoder5_10.0

./ioncube_encoder.sh /encoder/hello.php -o /tmp/out.php

if  ; then
        echo "* Unlicensed. Get one..."
        ./ioncube_encoder.sh --activate
        echo "* Retry encode process"
        ./ioncube_encoder.sh /encoder/hello.php -o /tmp/out.php
fi

echo "* Output result"
ls -la /tmp
exit
Note that the above shell script makes a check for the state of the licensing as sometimes the Encoder may lose its licensing state. Please see further back for the specific situation.
Aggressive Licensing Solution
In some instances (where excessive licensing traffic/checking) can be tolerated, it is possible to license the Encoder before it is used and then release the license once the encoding process has completed – similar to the previous solution but with the added step of the after the encoding process. This can be performed using the the Encoder command line settings as found in the user guide via any CI/scripting process.
Here are a couple of examples of this manually performed (to demonstrate method) for both Centos and Debian:
Как установить ionCube loader
Установка на локальный сервер
В качестве примера локального сервера возьмем Денвер для Windows, установленный в каталог, назначенный на диск Z: Шаги установки:
- Скачиваем мастер установки ionCube loader, распаковываем архив и записываем файл loader-wizard.php в корневую папку какого нибудь вашего локального сайта, например Z:\home\test1.ru\www\
- Запускаем мастер набрав ссылку в браузере http://test1.ru/loader-wizard.php . Будет предложен выбор типа вашего сервера. Выбираем ‘Local install’ (локальный сервер) и жмем кнопку Next. Далее видим инструкцию мастера установки и следуем ей:
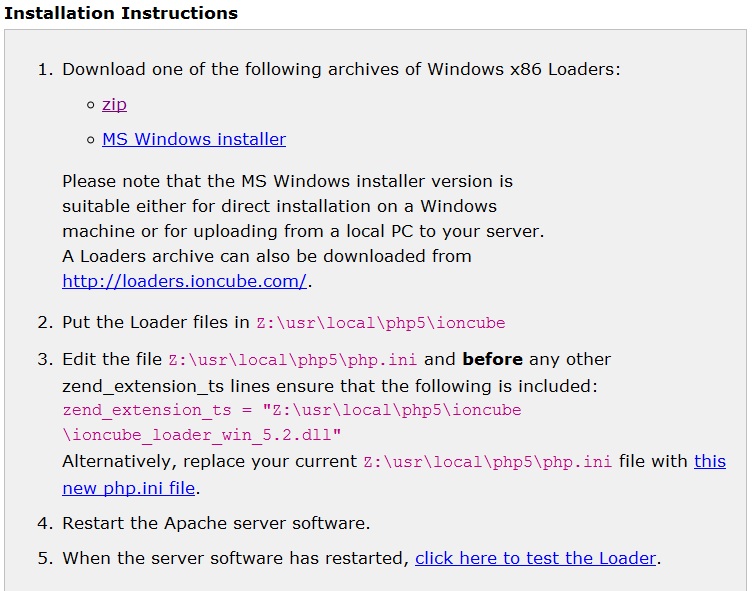
рис. 1
Итак, следуем инструкции шаг за шагом:
- На первом шаге нам предлагается скачать ionCube loader для Windows. Нажимаем на ссылку ‘zip’ и скачиваем архив.
- Распаковываем архив и записываем распакованные файлы в предлагаемый мастером каталог z:\usr\local\php5\ioncube
- Открываем для редактирования файл z:\usr\local\php5\php.ini и вставляем в начало файла после тега предлагаемую мастером строчку: zend_extension_ts = «Z:\usr\local\php5\ioncube\ioncube_loader_win_5.2.dll»
- Перезапускаем веб-сервер.
- После перезапуска сервера нажимаем на ссылку ‘click here to test the loader’ в окне браузера с инструкцией мастера по установке, чтобы проверить, установился ли ionCube loader. Если вы уже закрыли окно браузера с инструкцией, то запускаем мастер снова с помощью ссылки http://test1.ru/loader-wizard.php . Если мы видим следующее сообщение мастера (рис. 2 или рис. 3), то ionCube loader установлен правильно:
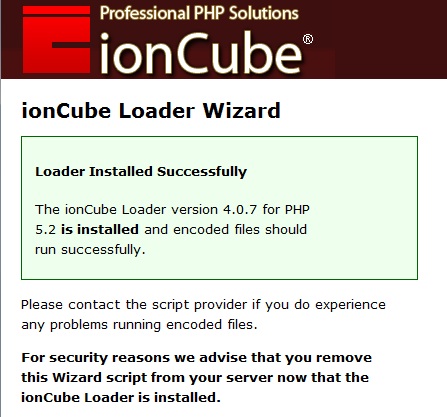
 рис. 3
После установки обязательно удалите файл мастера установки loader-wizard.php из корневой папки вашего сайта из соображений безопасности. Теперь можно устанавливать веб-приложения.
Установка на хостинге
Большинство хостинг провайдеров предустанавливают на свои серверы ionCube loader. Поэтому сначала узнайте у своего хостинг-провайдера, установлен ли уже на вашем сервере ionCube loader. Это можно узнать самостоятельно, запустив мастер установки loader-wizard.php, полученный на первом этапе установки на локальный сайт. Перепишите мастер в корневую директорию сайта и запустите в браузере с помощью URL www.мой-сат.ru/loader-wizard.php. Если вы увидите сообщение, подобное рис. 2, то ionCube loader уже установлен на вашем хостинге. Можно приступать к использованию веб-приложений. Так же возможно, что на хостинге установлена старая версия IONcube loader и в этом случае мастер порекомендует установить новую версию. Процесс обновления версии заключается в установке на ваш сайт новой версии ionCube loader, как будто он еще не установлен.
Если IONcube loader не установлен на вашем хостинге, то наилучшим выходом будет попросить хостера установить на ваш сервере IONcube loader. Так же на большинстве хостингов возможна самостоятельная установка, но необходимо проконсультироваться у службы поддержки хостинга как установить IONcube loader на свой сайт, так как в разных хостингах могут быть разные способы установки.
Encoder License Recovery
Normal containers are by nature volatile and should the situation arise where a licensed Encoder has not been released from within it’s container, recovery of the license will require support assistance and so incur delay.
If the correct exited container can be located committing it to an image and then creating a new container from that image with the original MAC address via the option, will allow a safe manual revocation of the license.
Additionally, if you happen to be using GitLab, there is a feature that allows you to reattach to the failed container and so release the license for your Encoder. Take a look at https://gitlab.com/gitlab-org/gitlab-runner/issues/3605
How to Install ionCube Loader in Debian and Ubuntu
by Ravi Saive | Published: May 2, 2018 | Last Updated: January 29, 2020
ionCube loader is a PHP extension (module) that enables PHP to load files protected and encoded using ionCube Encoder software, which is mostly used in commercial software applications to protect their source code and prevent it from being visible and detectable.
In this article, we will explain how to install and configure ionCube Loader with PHP in Debian and Ubuntu distributions.
Prerequisites:
A Ubuntu or Debian server running with a web server (Apache or Nginx) along with a PHP installed. If you don’t have a web server and PHP on your system, you can install them using apt package manager as shown.
Step 1: Install Apache or Nginx Web Server with PHP
1. If you already have a running web server Apache or Nginx with PHP installed on your system, you can jump to Step 2, otherwise use the following apt command to install them.
2. Once you’ve installed Apache or Nginx with PHP on your system, you can start the webserver and activate it to auto-start at system boot using following commands.
Step 2: Download IonCube Loader
3. Go to the inocube’s website and download the installation files, but before that, you need to check whether your Linux distribution is running on 64-bit or 32-bit architecture using the following command.
The above output clearly shows that the system is running on 64-bit architecture.
As per your Linux distribution architecture, download ioncube loader files to /tmp directory using following wget command.
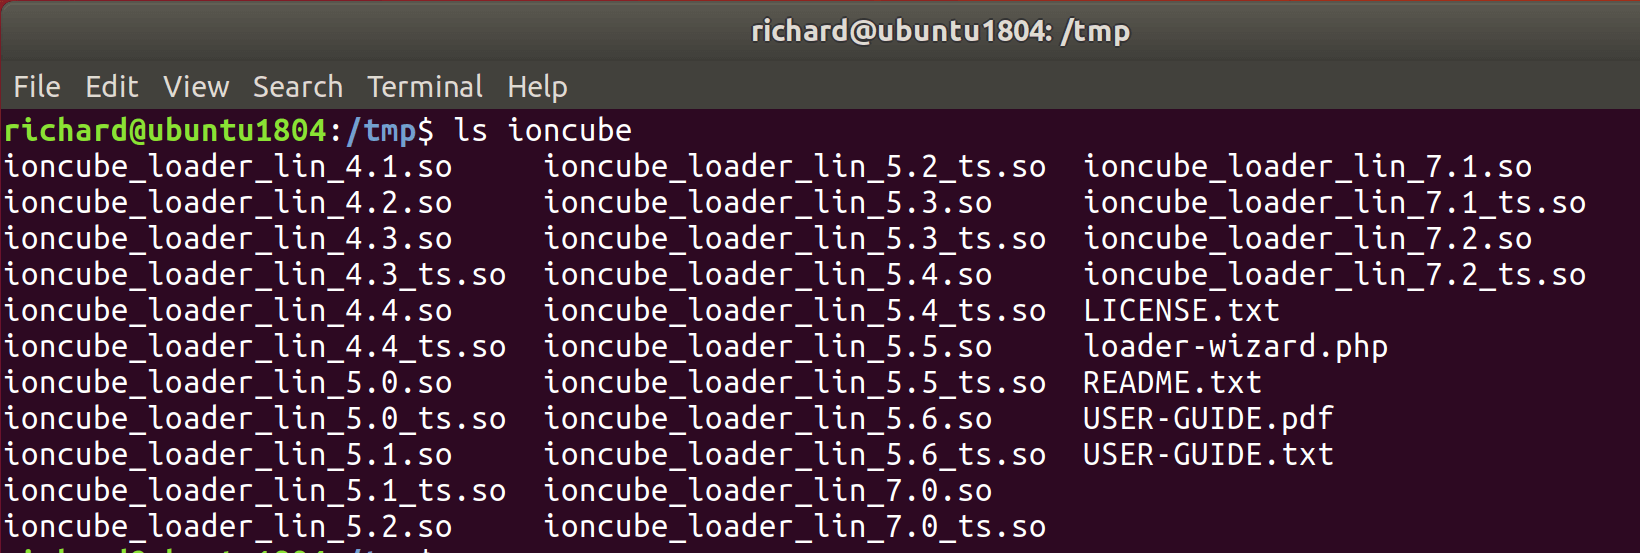
4. Then uncompress the downloaded file using the tar command and switch into the unzipped folder. Then run the ls command to list the various ioncube loader files for different PHP versions.
Step 3: Install ionCube Loader for PHP
5. In the above screenshot, you will see various ioncube loader files for different PHP versions, you need to select the right ioncube loader for your installed PHP version on your server. To know the currently installed PHP version on your server, run the command.
Check PHP Version in Ubuntu
The above screenshot clearly tells that the system is using PHP 7.0.25 version, in your case, it should be a different version.
6. Next, find the location of the extension directory for PHP version 7.0.25, it is where the ioncube loader file will be installed.
7. Next we need to copy ioncube loader for our PHP 7.0.25 version to the extension directory (/usr/lib/php/20151012).
Note: Make sure to replace the PHP version and extension directory in the above command according to your system configuration.
Step 4: Configure ionCube Loader for PHP
8. Now we need to configure ioncube loader to work with PHP, in the php.ini file. Debian and Ubuntu use different php.ini files for PHP CLI and PHP-FPM as shown.
Then add below line as the first line in the respective php.ini files.
Note: Make sure to replace the extension directory location and PHP version in the above command according to your system configuration.
9. Then save and exit the file. Now we need to restart the Apache or Nginx web server for the ioncube loaders to come into effect.
Step 5: Test ionCube Loader
10. Now it’s time to verify that the ionCube loader is properly installed and configured on your server by checking the PHP version one more time. You should be able to see a message indicating that PHP is installed and configured with the ioncube loader extension (status should be enabled), as shown in the output below.
That’s It! In order to secure PHP files, you need to have IonCube loader installed and configured with your installed PHP version, as shown above. We hope that everything worked fine without any issues, otherwise, use the feedback form below to send us your queries.
Choosing the right version
The first highlighted item describes the PHP version and server OS details e.g. PHP 5.5 in Ubuntu 3
Second item describes the system processor type e.g. x86-64.
This is needed to download appropriate loaders e.g. as in image Linux (x86-64) package.
You should enable the correct loader file with OS type and PHP version e.g.
zend_extension = /usr/local/ioncube/ioncube_loader_lin_5.5.so
The third highlighted item tells if PHP is threaded or not. In this example PHP is not threaded, if thread safety is enabled then your PHP configuration line should look like this:
zend_extension = /usr/local/ioncube/ioncube_loader_lin_5.5_ts.so
(note the “_ts” part)
Manual «ionCube» installation
You can do it yourself, if you have access to the PHP configuration file “php.ini”. Most hosting service allow you to either create a custom PHP configuration file inside any of your folders, or they provide a PHP configuration editor inside their control panels.
Depending on the PHP details that you checked above, your configuration line might look like this:
For linux and php 5.5, add a line like this:
zend_extension = /usr/local/ioncube/ioncube_loader_lin_5.5.so
For FreeBSD and php 5.6, add a line like this
zend_extension_ts = /usr/local/ioncube/ioncube_loader_fre_5.6_ts.so
For Windows and php 5.5, add a line like this
zend_extension_ts = c:\WINNT\ioncube_loader_win_5.5.dll
It is always best and easier to contact your hosting company tech support and ask them about the appropriate configuration line.
On the PHP details page, search for the “ioncube” word. If you can’t find anything similar, then it is not enabled.
Search the hosting FAQ, forum for any instruction to enable ionCube. The best solution would be to contact your hosting support. It is just matter of seconds for them to enable ionCube for you.
ionCube Encoder CI Edition
The CI Edition Encoder is the best solution for use within a CI environment, having changes to our licensing that better suit a container based system. The CI Edition comes with 2 license slots where licenses automatically become available for reuse every 24 hours, allowing for re-allocation of a previously licensed container is broken or has been destroyed before deactivation. This behaviour is only available with the CI Edition; our standard license agreement does not permit use of licenses in this way.
Using Docker On MacOS?
We welcome any comments, tips or experiences you have on the Mac that we can share with our users.
If you have any other tips and advice for Docker usage please let us know!
ionCube Docker Support
Как установить ioncube?
Решил я вчера установить на свой сервер панель вебмастера от site-control и сразу получил следующую ошибку: Site error: the ionCube PHP Loader needs to be installed. Было понятно, что у меня не установлен какой-то нужный для панели компонент, в частности ionCube PHP Loader. Как установить ioncube на хостинг?
Так как у меня на сервере стоит Debian, то в моем случае вопрос нужно поставить так: как установить ioncube на Debian? Все дело в том, что если у вас шаред хостинг, то данный компонент вы сами не поставите, так как для этого требуется доступ к системным файлам сервера. В этом случае вам нужно писать в тех. поддержку и просить установить ionCube PHP Loader.
Задачка оказалась не совсем простой, так как нормальная инструкция о том, как установить ioncube в debian отсутствовала в readme.txt, а то что показывал мне сам установщик было не полным. Я уже хотел писать в тех. поддержку хостинга и просить помощи, но потом подумал: я же сам веду сайт про линукс, чего позориться, разберусь как-нибудь сам. И разобрался.
Как установить ioncube loader на сервер?
Буду описывать сразу все шаги, без лишней воды, уже налил и так вначале (нужно же было ключевые слова куда-то впихнуть
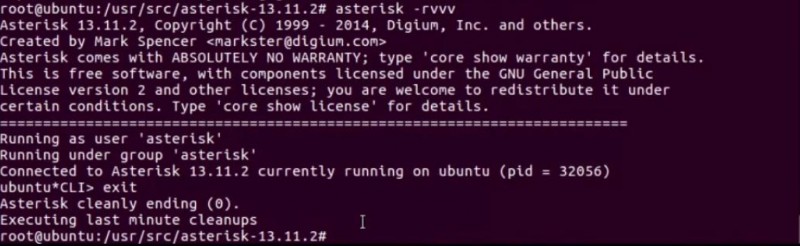
Идем на сайт ioncube и качаем нужный нам пакет, в моем случае это Linux (64 bits) stable

Я скачал zip пакет и распаковал его на жесткий диск. В итоге я увидел вот такие файлы внутри:

Но нас тут будут интересовать всего два файла: ioncube_loader_lin_5.4.so и libmcrypt.so.4. Второй загрузим на всякий случай, даже не знаю, есть ли в нем необходимость?
Я не стал выбирать самую последнюю версию ioncube_loader_lin, все новые версии обычно грешат глюками. Теперь нам нужно эти два файла загрузить на сервер в папку:
Следующий шаг — это сообщить серверу, что мы эти библиотеки загрузили и хотим их подключить. Для этого откроем этот файл:
В него, где-нибудь посередине, нужно вписать такую строку:
Вот, казалось бы и всё, а нет. Именно на этом шаге возникает проблема, так как официальные подсказки больше ничего не говорят. А на самом деле, чтобы все заработало нужно эту строку еще добавить сюда:
Может быть на других версиях Linux (Ubunt, например) этого делать и не нужно, но на Debian обязательно. Я вписал код в это место, хотя разницы особой нет:

Спасибо этому блогу, именно на нем нашел подсказку. Ну вот почти и все, осталось перезагрузить сервер apache:
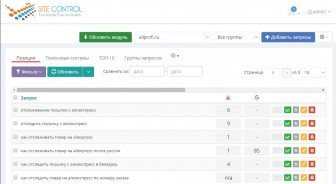
После этого панель вебмастера от site-control у меня сразу установилась. Я тут же начал пробовать снимать позиции, хоть в бесплатной версии тут урезанный функционал, но пользоваться все же можно.
Кстати, раз зашла речь об этой панели, то коротко расскажу, как ее установить?
Как установить site-control на хостинг?
Тут все очень просто: идем на сайт site-control и скачиваем установщик — это всего один маленький файл install.php. Загружаем его на хостинг (лучше создать поддомен для этих целей, как я http://seo.zmoe.ru/) и закинуть его в корневую папку.
Далее переходим по адресу http://ВАШ САЙТ/install.php и запустится установка. Там все как при установке того же wordpress: создаем перед этим на хостинге базу данных и потом прописываем ее данные. Все, если на сервере установлены все компоненты, то панель встанет без проблем, пользуемся и радуемся!
СОВЕТ ВЕБМАСТЕРУ: Умение зарабатывать в интернете — это только пол дела, вторая половина — это умение ВЫГОДНО обналичивать электронные деньги. Вот список офшорных банковских карт, на которые можно выводить средства и потом снимать с них хрустящие купюры:
1. Epayments — можно открыть счет в долларах, евро и рублях. Формально банка нет, юридический адрес в Лондоне, но можно получить реквизиты банка в Латвии.
2. AdvCash — Офшорный банк находится в Белизе, можно открыть счет в долларах, евро, фунтах и рублях.
3. Payeer — Штаб квартира этой платежной системы находится в Грузии, тут так же можно открыть счет в долларах, евро и рублях.
4. Capitalist — Можно создать счета в долларах, евро и рублях. Низкие тарифы на вывод. Компания зарегистрирована в юрисдикции Британских Виргинских Островов.
Во всех случаях можно заказать банковскую карту, которую пришлют вам по обычной почте. Активируете ее и идете снимать деньги банкомат! Тарифы смотрите на сайтах платежных систем.
Установка ioncube loaders ubuntu
If you’re developing or using any PHP applications that need to be secured, you may want to install ionCube Loader… ionCube Loader can be used to encode and secure PHP files…
It’s mostly used with commercial PHP applications to provide another layer of security in an unpredictable world of website security…. On Linux systems including Ubuntu, it’s installed on the webserver (Physical) and made available to PHP configuration…
This brief tutorial shows students and new users how to download and install ionCube Loader on Ubuntu 16.04 / 17.10 and 18.04 server with PHP 7.1 / 7.2 installed.
To install this PHP tool, follow the steps below:
Step 1: Download ionCube Loader
There are other ways to install ionCube Loader, however, downloading it and installing it manually is the safest way to go…
On 64-bit systems, use the link below:
cd /tmp && wget http://downloads3.ioncube.com/loader_downloads/ioncube_loaders_lin_x86-64.tar.gz
On 32-bit systems can use this link.
cd /tmp && wget http://downloads3.ioncube.com/loader_downloads/ioncube_loaders_lin_x86.tar.gz
After downloading version for your platform, run the commands below to extract the loader..
tar xfz ioncube_loaders_lin_*.gz
After extracting list all ionCube versions…
Step 2: Validate PHP Version Installed
Before you begin using a particular version of ionCube loader, you must validate the PHP version installed on the system… then use that particular loader for the specific PHP version…
To see which version of PHP installed, run the commands below… You should see the PHP version installed on your system…
Next, find the PHP extensions directory on the system by running the commands below
php -i | grep extension_dir
extension_dir => /usr/lib/php/20170718 => /usr/lib/php/20170718
You should see the directory PHP uses for its extensions…
Next, copy the ionCube loader into the PHP directory above, by running the commands below… do this for each loader for the particular PHP version…
When you’re done… open the default PHP config file and include the loader.
Step 3: Use ionCube Loader with PHP
Now that you’ve downloaded, extracted and copied ionCube loader to PHP directory, open PHP configuration file and include the loader…
PHP with Nginx
sudo nano /etc/php/7.2/fpm/php.ini
PHP with Apache2
sudo nano /etc/php/7.2/apache2/php.ini
PHP with CLI
sudo nano /etc/php/7.2/cli/php.ini
PHP with CGI
sudo nano /etc/php/7.2/cgi/php.ini
Then add a line in the file to include ionCube loader… it can be anywhere in the file below line… however, you’ll need to specify the exact location of the loader you copied above..
zend_extension = /usr/lib/php/ 20170718 /ioncube_loader_lin_7.2.so
Save the file and restart PHP and / or the webserver…
Now check PHP to see all modules installed. If you added it to the CLI config, you should see the output below when you run the php cli command.
Установка ioncube loader
IonCube — это набор утилит для работы в командной строке, которые дают возможность выполнять кодирование, обфускацию и лицензирование исходного кода, написанного на языке php. В своей статье «Установка ioncube loader» я расскажу как можно поставить его себе на ВПС под управлением Unix\Linux ОС.
Общая установка в автоматическом режиме для многих ОС
Перейдем в папку и скачаем php скрипт установщик:
Перенесем файл loader-wizard.php в домашню папку апача ( у меня это стандартный путь):
Открываем браузер и переходим:
Скачивание CentOS/Redhat/Fedora/Debian/Ubuntu/FreeBSD:
Чтобы скачать, выполните действия:
После скачивания, стоит распаковать данный архив:
Чтобы скачать, выполните действия::
После скачивания, стоит распаковать данный архив:
В файле содержится все поддерживаемые версии PHP, по этому, выбираем нужную версию и ее нужно скопировать.
Debian/Ubuntu.
Если Вы используете ОС, такую как Debian или Ubuntu и хотите установить ioncube loader на нее, то данная статья поможет в этом.
Покажу на примере PHP 5.4, но чтобы проверить версию php вы можете использовать:
Сейчас необходимо выбрать библиотеки под свою версию пхп и скопировать их:
После того как скопировали все файлы, нужно создать конфигурационный файл для PHP и прописать в него путь к скопированной библиотекам:
Т.к я использую не оригинальное названия файла, я создам на данный файл сим-линк:
После всех изменений стоит перезагрузить сервис PHP-FPM:
Если все сделали правильно, то появится модуль:
CentOS/Redhat/Fedora.
Если Вы используете ОС, такую как CentOS или RedHat или Fedora и хотите установить ioncube loader на нее, то данная статья поможет в этом.
Покажу на примере PHP 5.3, но чтобы проверить версию php вы можете использовать:
Сейчас необходимо выбрать библиотеки под свою версию пхп и скопировать их:
ВНИМАНИЕ! если не знаете куда нужно положить данные файлы, то стоит использовать ( скачать) loader-wizard. php я описывал в самом вверху
После того как скопировали все файлы, нужно создать конфигурационный файл для PHP и прописать в него путь к скопированной библиотекам:
Т.к я использую не оригинальное названия файла, я создам на данный файл сим-линк:
После всех изменений стоит перезагрузить сервис PHP-FPM:
Как установить ionCube и для чего нужен этот модуль
Сегодня поговорим о специальном модуле — ionCube, что это такое и для чего он нужен. Разберёмся, как установить ionCube loader на сервер. Лично мне он требуется для установки популярного среди пользователей joomla! и zoo приложения JBZoo, В этом посте я поясню как установить модуль ionCube на локальный сервер и на сервер вашего хостинга.
Итак, что такое ionCube?
Некоторые приложения требуют наличие этого модуля, в частности приложение, которое я часто использую в своей работе — JBZoo. Начиная с версии 2.0.0 для корректной работы JBZoo обязательна поддержка модуля ionCube Loader.
Большинство современных хостингов уже поддерживают модуль ionCube. В противном случае, вы всегда можете задать вопрос в техподдержку хостера и практически обычно его включают по первому запросу.
Как самостоятельно установить модуль ioncube на локальный сервер?
Часто новички задают вопрос, как установить ioncube loader на денвер. Для этого скачайте loader-wizard.php и запустите его на своем сайте. Следуйте советам мастера установки. Он поможет определить какой именно файл нужно скачать (ориентированный именно на вашу версию PHP) и что с ним делать дальше:
- Cкачать предложенный ZIP-архив.
- Распаковать в папку, указанную в пункте 2.
- Указать путь до этого файла в файле php.ini с помощью строки следующего типаzend_extension=»<ПОЛНЫЙ ПУТЬ ДО ФАЙЛА>/ioncube.dll»
- Перезапустить apache
Denwer хранит файл настроек обычно по этому пути — /usr/local/php5/php.iniOpen-Server — как на скриншоте:В остальных случаях смотрите phpinfo() :Внимание! Локальные сервера вроде Denwer и Open-Server зачастую имеют у себя в комплекте этот модуль. Поэтому перед установкой проверьте его присутствие
Если после перезагрузки сервер не запускается, то скорее всего
- вы скачали не ту версию ionCube
- не правильно отредактировали php.ini
Как самостоятельно установить модуль ioncube на хостинг?
Как я уже говорил, большинство хостингов уже содержат включённый модуль ioncube, либо подключают его при первому требованию. Вот, к примеру, как рекомендуют подключать модуль на хостинге logol.ru:
Выполните следующие действия:-скачайте библиотеку для архитектуры Linux (x86-64) в виде tar.gz или zip-архива с сайта http://www.ioncube.com/loaders.php-разархивируйте файлы библиотеки (в результате появится каталог ioncube)-загрузите каталог ioncube в домашний каталог ~/ на вашей хостинговой площадкев каталоге, где находится PHP-скрипт, для которого подключается ionCube,-создайте файл php.ini со следующей строкой:zend_extension=»/home/ВАШ_ЛОГИН_НА_CPANEL/ioncube/ioncube_loader_lin_5.2.so»Пример:zend_extension=»/home/cp123456/ioncube/ioncube_loader_lin_5.2.so»
Важно:Указанная выше строка должна быть самой первой из всех подключаемых zend_extension. А на хостинге sprinthost.ru подключить модуль ionecube можно вообще одним щелчком мыши:
А на хостинге sprinthost.ru подключить модуль ionecube можно вообще одним щелчком мыши: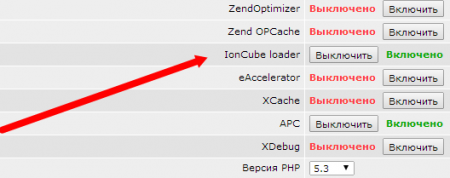
Рекомендуемые действия по окончании установки
Настраивать установленную систему WHMCS лучше всего в такой последовательности (если вы отказались от помошника по настройке):
- Общие настройки (Setup/Настройки > General Settings / Общее )
- Платежные шлюзы (Setup/Настройки > Payment Gateways / Платежные шлюзы )
- Продукты и услуги (Setup/Настройки > Products/Services / Продукты/услуги )
- Стоимость доменов (Setup/Настройки > Domain Pricing / Стоимость доменов )
- Отделы службы поддержки (Setup/Настройки > Support Departments / Отделы поддержки )
- Настройте модуль импорт тикетов (email piping) для осуществления поддержки через тикет-систему WHMCS
- Добавьте WHMCS Cron Job и настройте автоматические действия системы (Setup/Настройки > Automation Settings / Автоматизация )
- Сделайте несколько тестовых заказов с сайта для проверки работы системы.
WHMCS 7.5-7.7 поддерживает PHP 5.6, 7.0, 7.1, и 7.2